
This festive and eye-catching Christmas tree cake, with cinnamon cream cheese filling and delicious white chocolate frosting, is a stunning dessert you can make at home with minimal equipment and plenty of holiday spirit.
Why you should try this cake
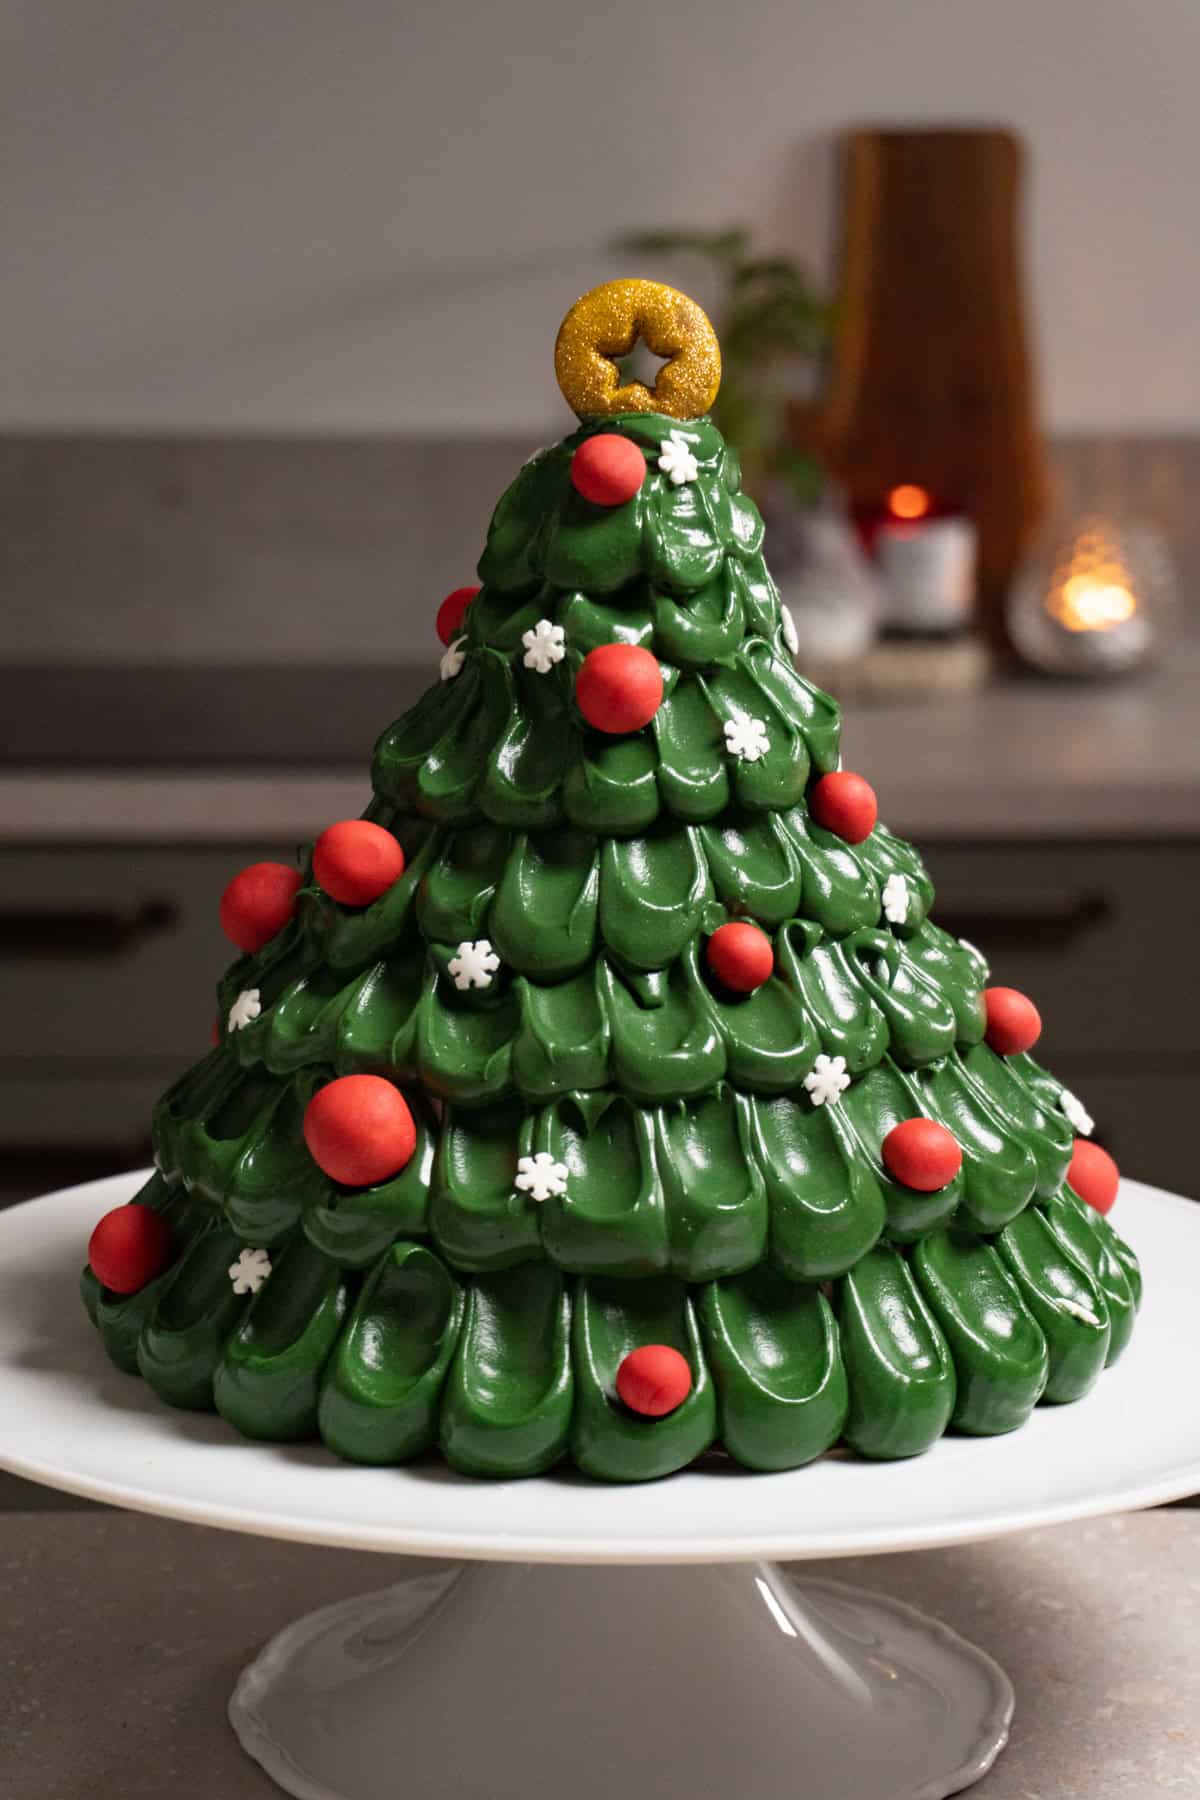
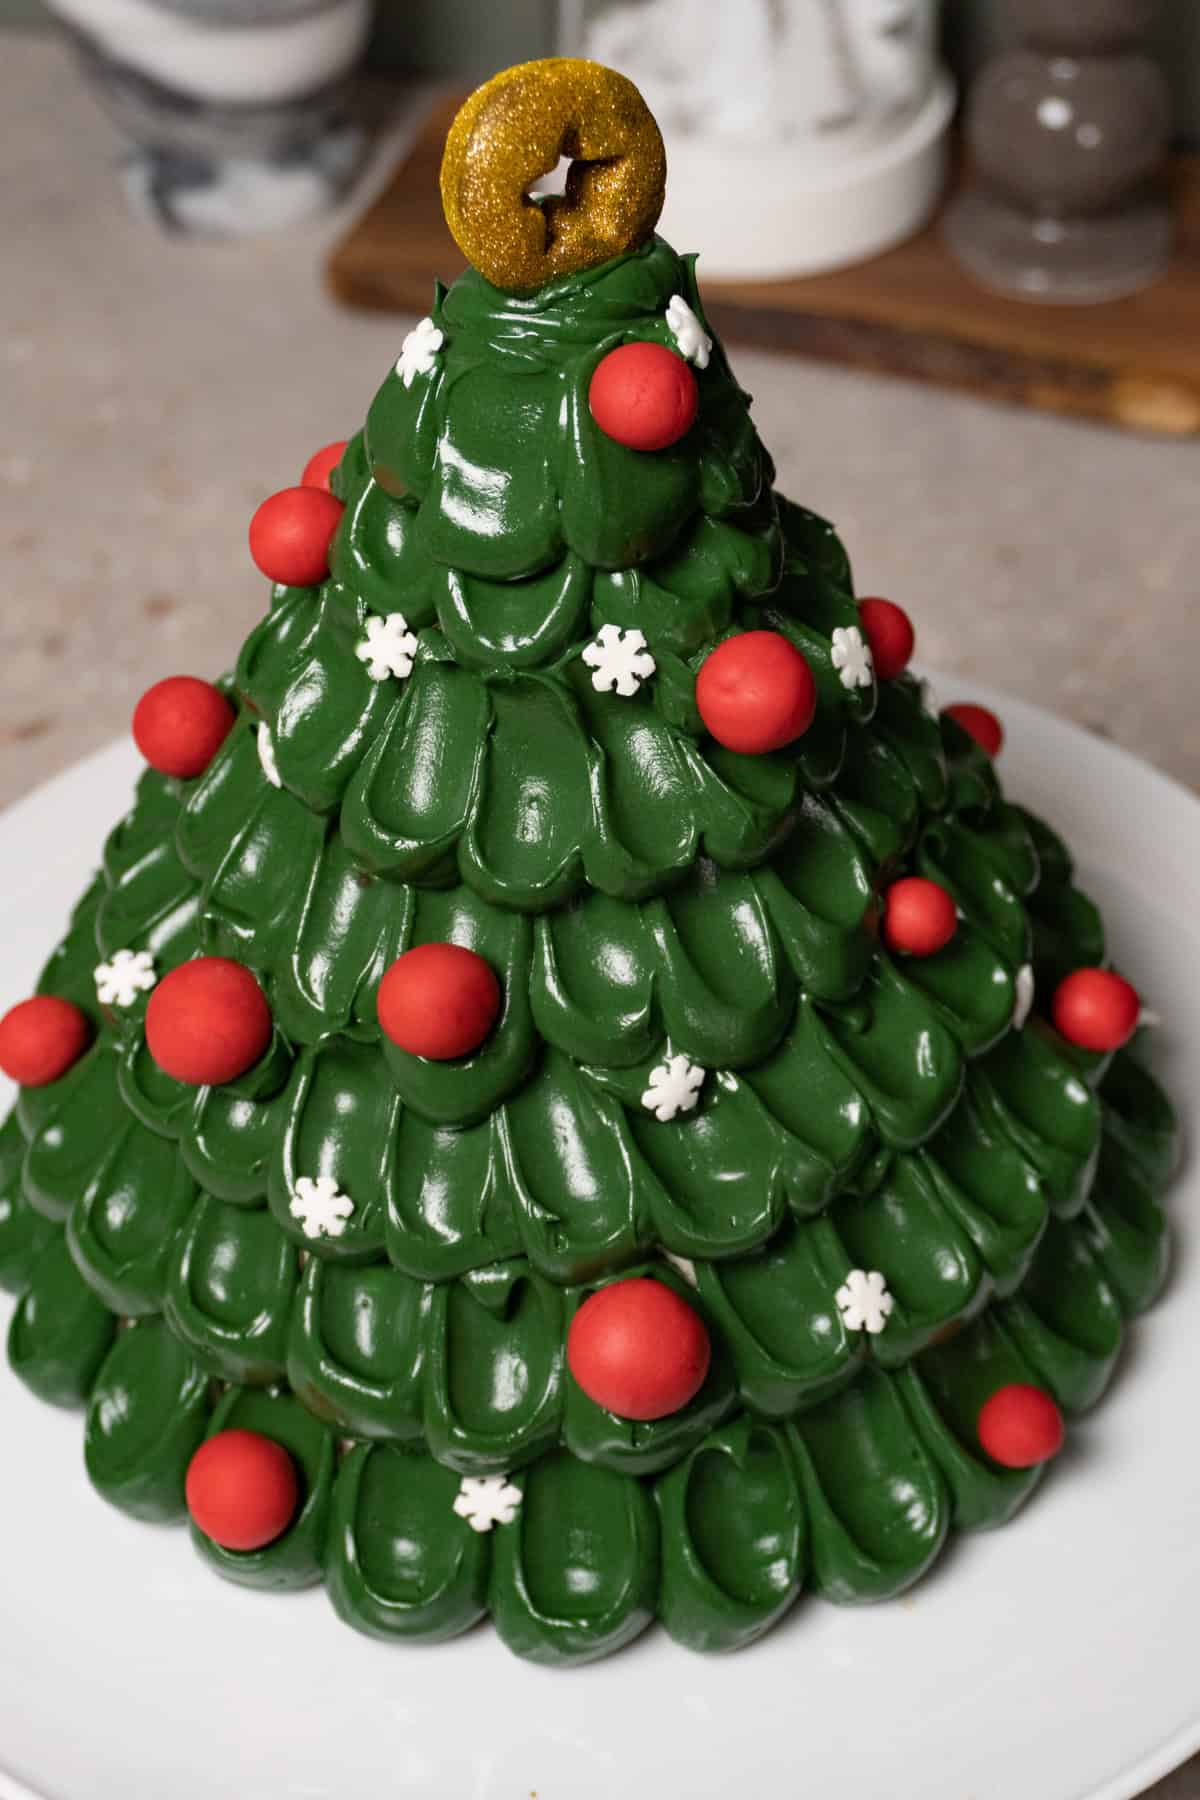
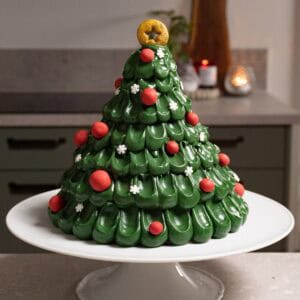
Show-stopping presentation. This Christmas tree cake is more than just a dessert, it's a centerpiece. With layered cakes stacked from largest to smallest, it creates the perfect holiday tree shape. Friends and family will be amazed before even taking a bite.
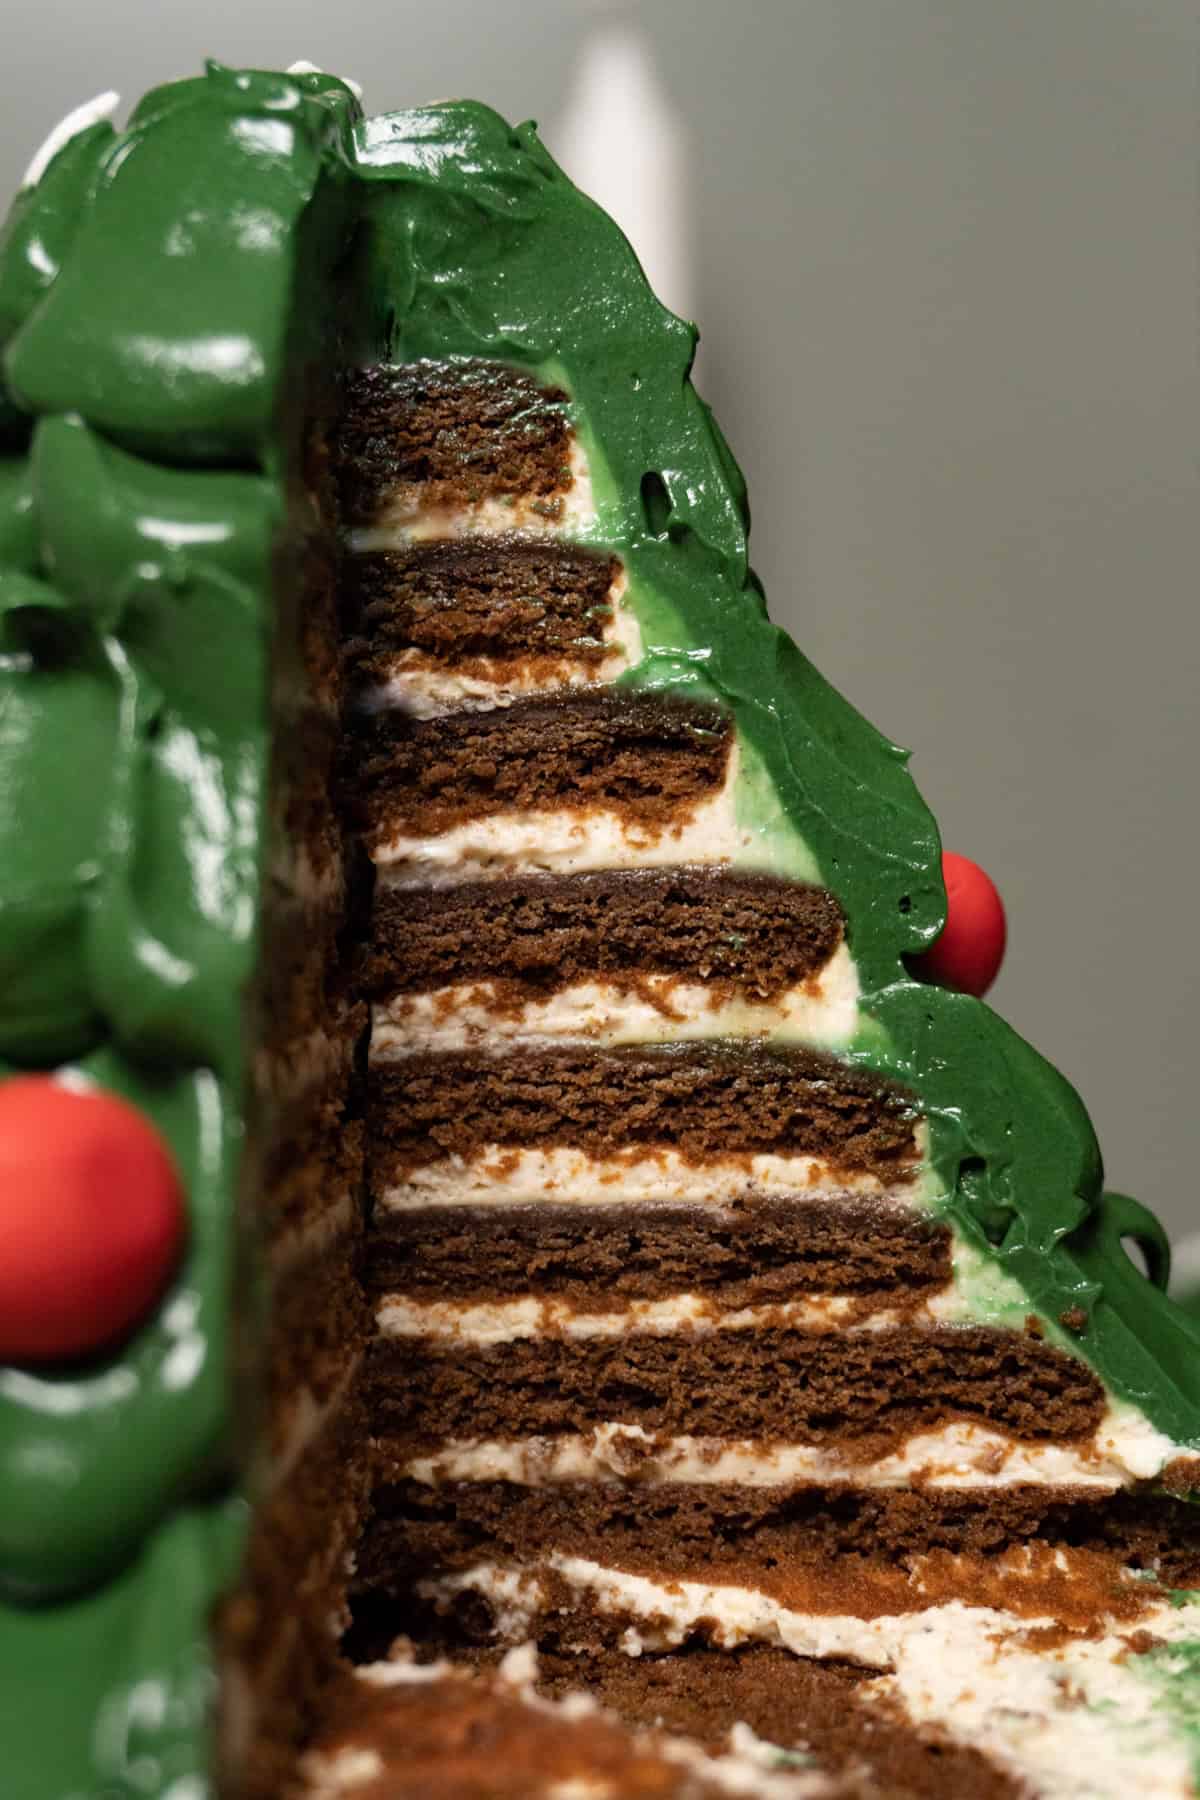
Soft honey chocolate layers. This cake, adapted from my Honey Cake, is made with honey, cocoa, and butter, giving it a tender texture and rich flavor.
Creamy, decadent filling. A spiced cream cheese filling adds a subtle tang that complements the sweet, chocolate-rich layers, while the green chocolate frosting brings both flavor and festive flair.
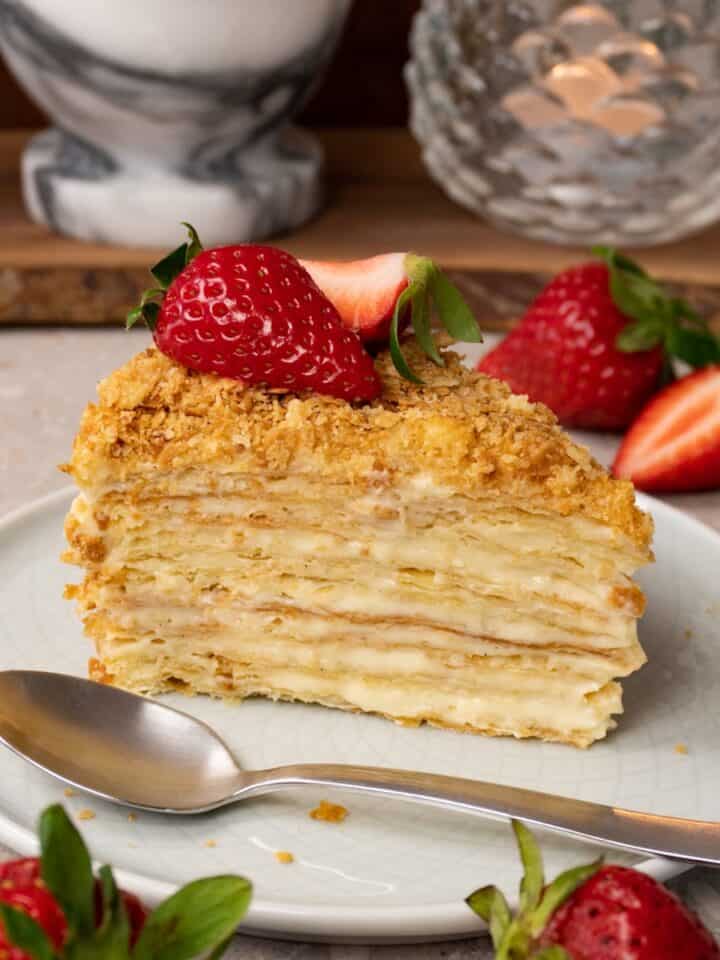
Looking for more delicious cake recipes? Check out this Chocolate cake with cream cheese frosting, this decadent Tiramisu cake or this fantastic-looking Napoleon cake.
Ingredients you will need
Butter - Use unsalted butter for the cake, filling, and frosting.
Sugar - Use white granulated sugar for the cake and powdered sugar for the filling.
Honey - Choose a honey whose flavor you enjoy because it will influence the taste of the cake.
Baking soda - Helps the cake layers rise.
Eggs - You can use eggs straight from the fridge; no need to bring them to room temperature.
Cocoa powder - You will need unsweetened Dutch-processed cocoa powder for a gentle chocolate flavor in the cake.
Flour - Use all-purpose flour to make this Christmas tree cake recipe.
Salt - Balances the sweetness of the honey and sugar.
Cream cheese - Use cold cream cheese, such as Philadelphia, for the filling and room-temperature cream cheese for the frosting.
Heavy cream - Whipped with cream cheese for a light, fluffy filling.
Ground cinnamon and vanilla extract - Add subtle warmth and festive flavor.
White chocolate - Melted into the frosting for richness, stability, and smooth texture. Use high-quality white chocolate with about 30 % cocoa solids.
Green food coloring - Use fat-soluble coloring for the frosting and chocolate to achieve a vibrant tree color. Water-soluble colors won't work well in this frosting because of its high fat content.
Red fondant - Perfect for creating festive baubles.
Snowflake sprinkles - Add a magical winter touch to the finished cake.
Cooking tips
Chill the dough before rolling. This prevents sticking and makes handling the thin cake layers much easier. Overnight chilling gives the best results.
Watch the baking time. The cake layers are thin and only take about 5 minutes in the oven. Overbaking will make them dry.
Don't overwhip the filling. Overwhipping can cause cream cheese mixtures to split and become unusable. Whip just until stiff peaks form.
Keep frosting at the right temperature. Make sure butter and cream cheese are at room temperature before adding melted chocolate.
Fixing Common Frosting Problems
Frosting too thin. If the frosting is too soft for piping, chill it in the freezer for 5 minutes, then remix on low. Repeat as needed until it's firm enough to pipe.
Frosting is grainy. This can happen if warm chocolate is added to a slightly cool butter and cream cheese mixture. Gently warm the frosting in 5-10 second intervals, stirring in between, then cool slightly as described in the "Frosting too thin" section before piping.
Frosting too stiff. Let it sit at room temperature for a few minutes, then remix gently until soft enough to pipe.
Step by step directions
Making the cake layers
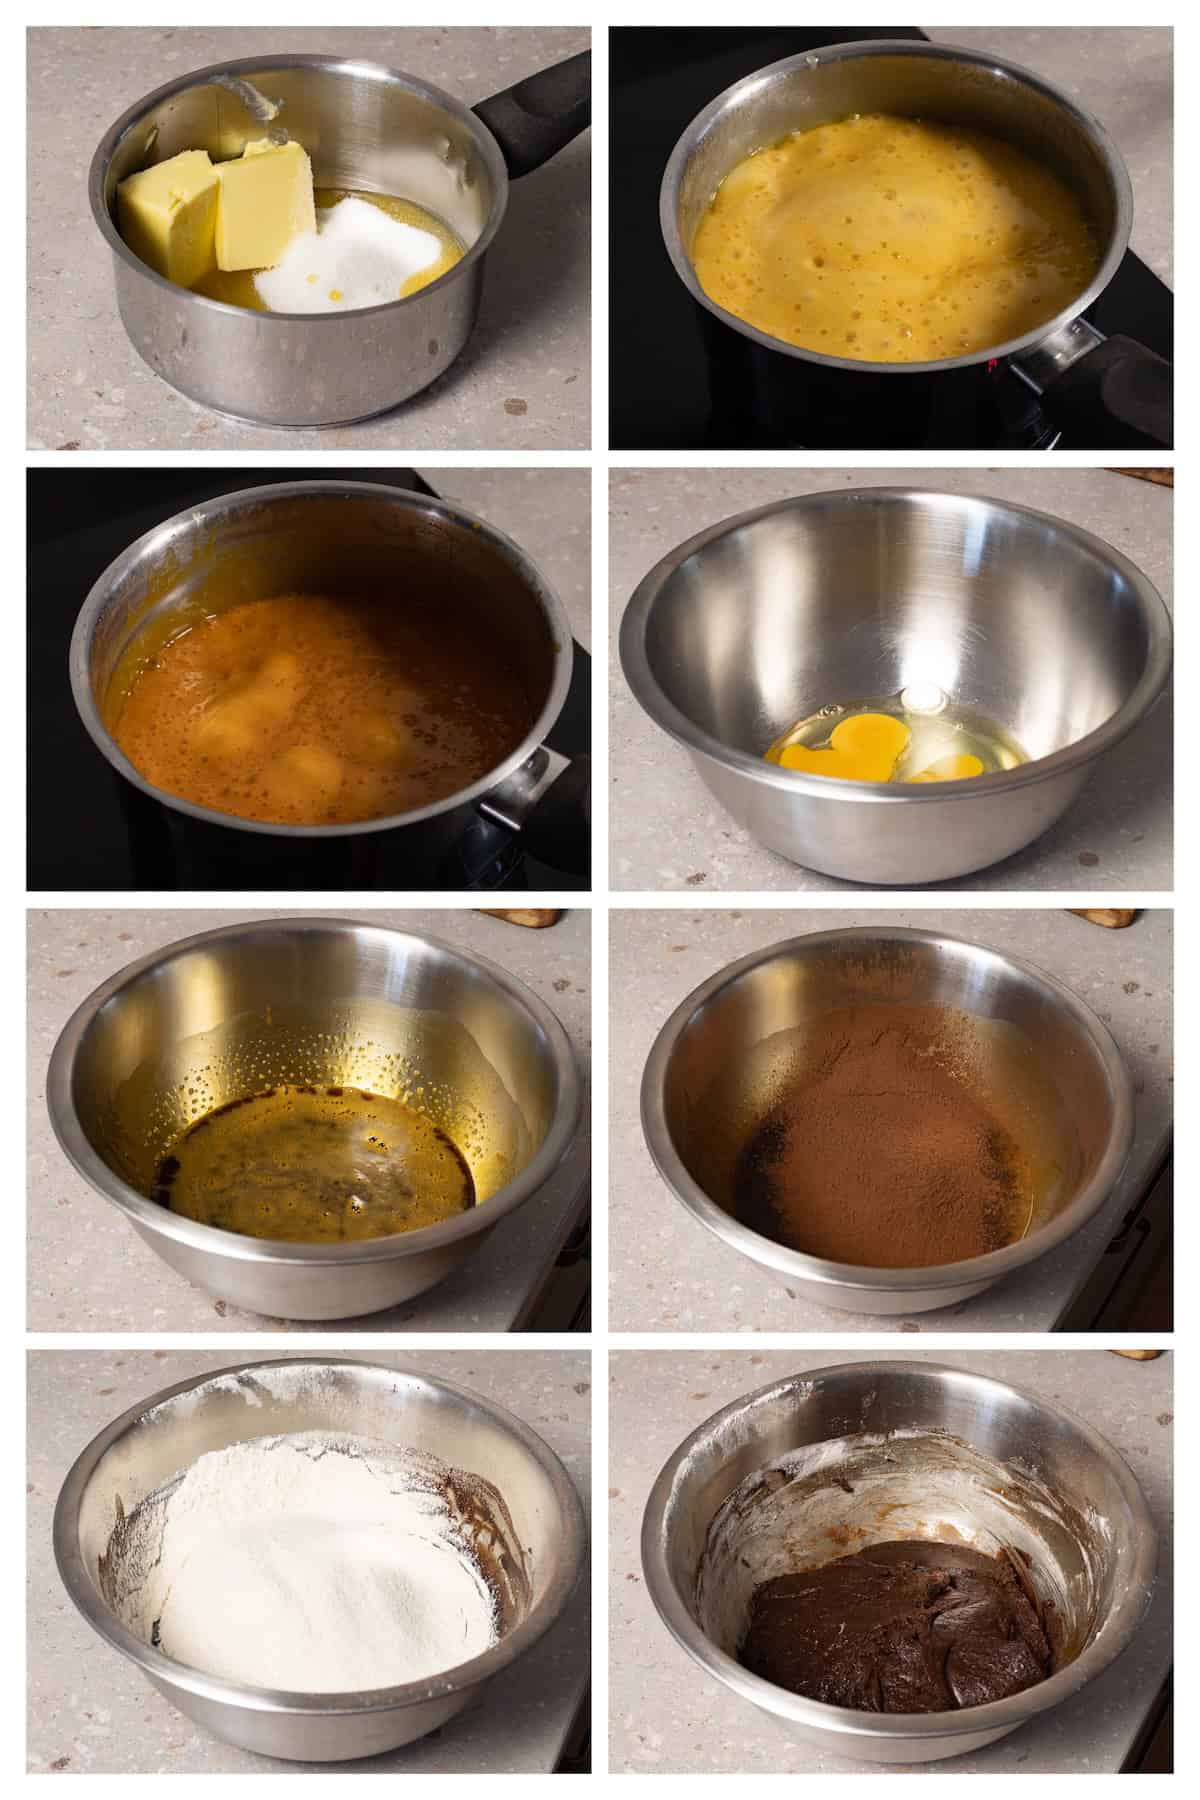
Start by combining the butter, sugar, and honey in a heavy-bottomed saucepan. Cook over medium heat until melted and bubbling. Reduce the heat, add the baking soda, and stir until the mixture foams and turns a light caramel color. Slowly pour the hot honey mixture into the eggs, whisking constantly so they don't curdle. Sift in the cocoa powder and mix until smooth, then fold in the flour and salt until you get a soft, slightly sticky dough. Wrap it in plastic and chill for at least 1 hour or overnight for best results.
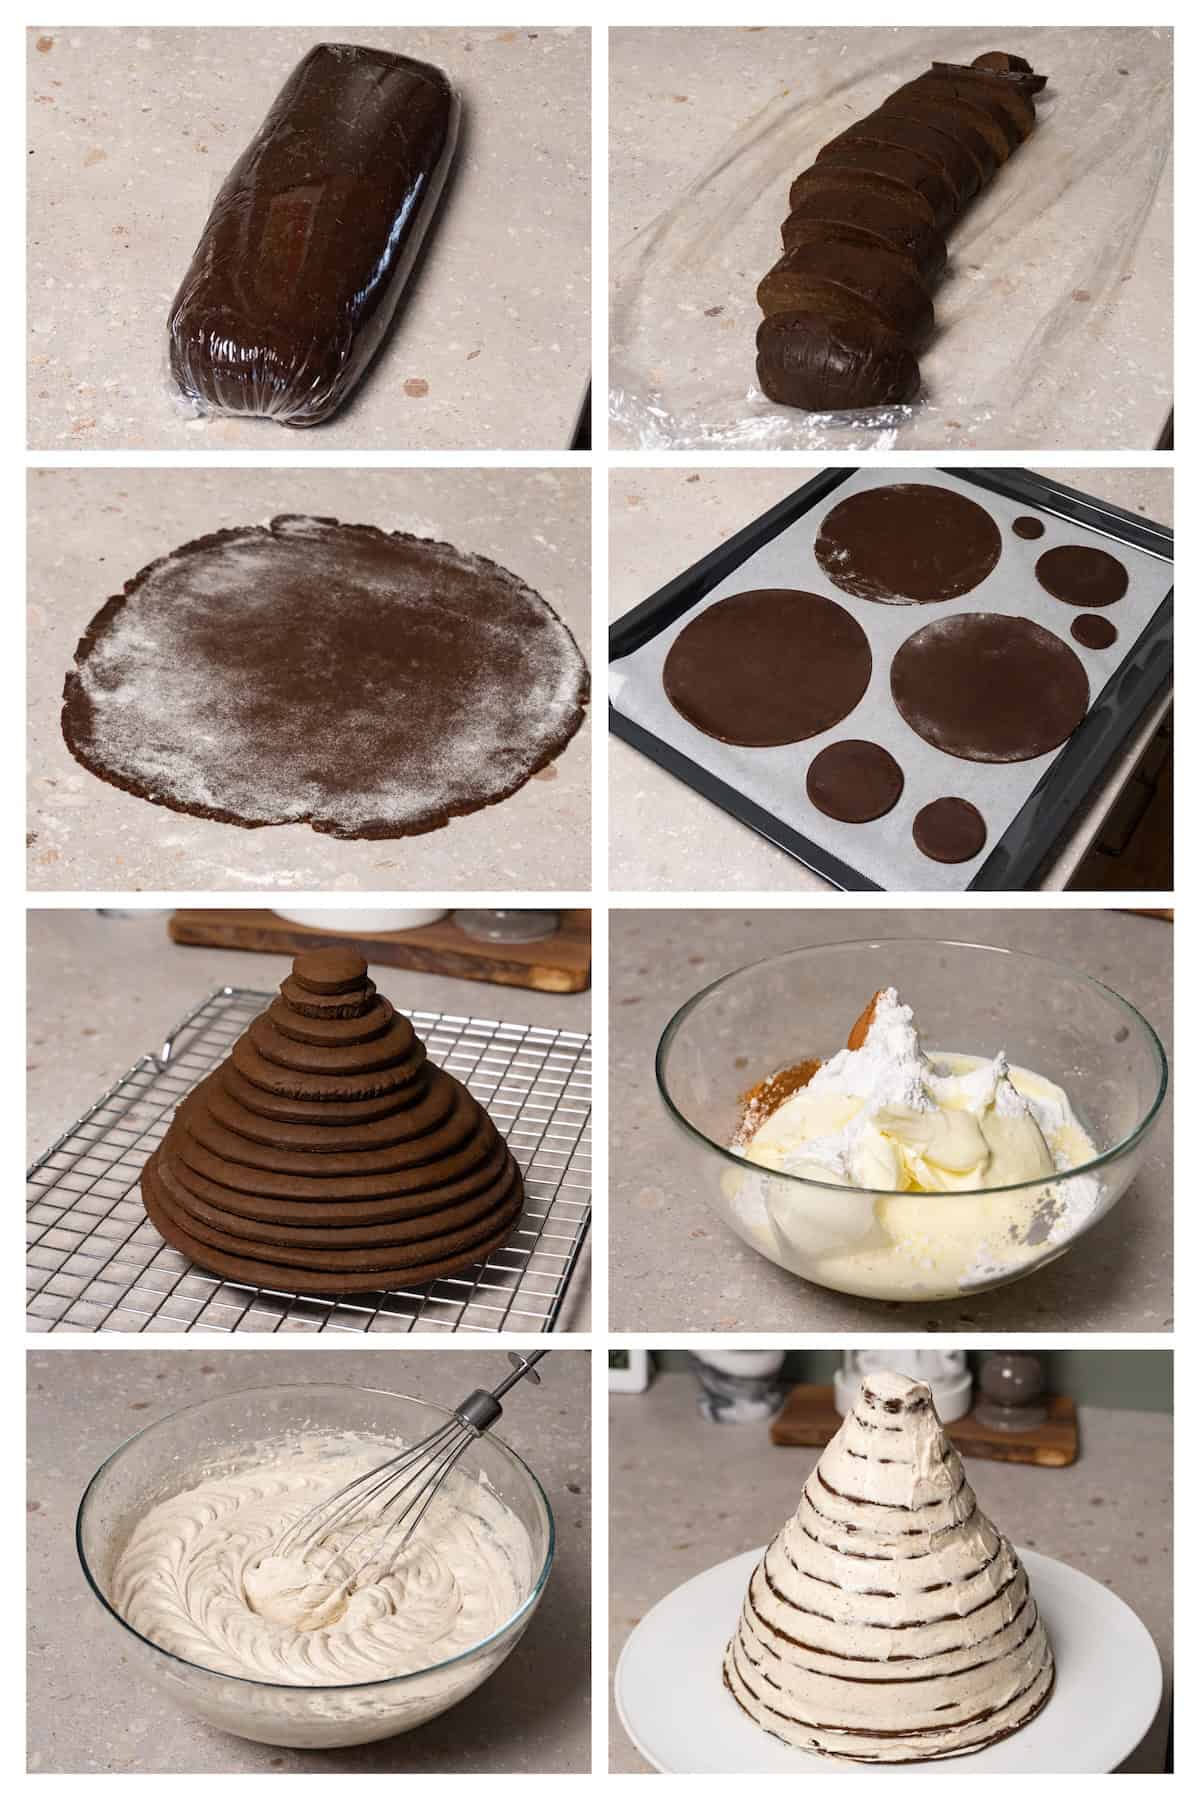
Roll the chilled dough on a lightly floured surface to 2-3 mm thickness. Cut circles in decreasing sizes for your tree layers. Place the circles on a parchment-lined baking sheet and bake for about 5 minutes. Transfer to a wire rack to cool completely.
Making the filling
Place the cream cheese, heavy cream, powdered sugar, cinnamon, and vanilla extract in a bowl. Whip until stiff peaks form. Spread about 5 mm of the filling between each cake layer, stacking from largest to smallest. Apply a thin crumb coat, cover with plastic wrap, and chill for several hours or overnight to help the cake layers set.
Frosting and decorating
Beat the butter with green food coloring until pale and fluffy. Add the cream cheese and mix just until combined. Melt the white chocolate, tint it with the same green coloring, and fold it into the butter mixture. Chill as needed until the frosting is pipeable.
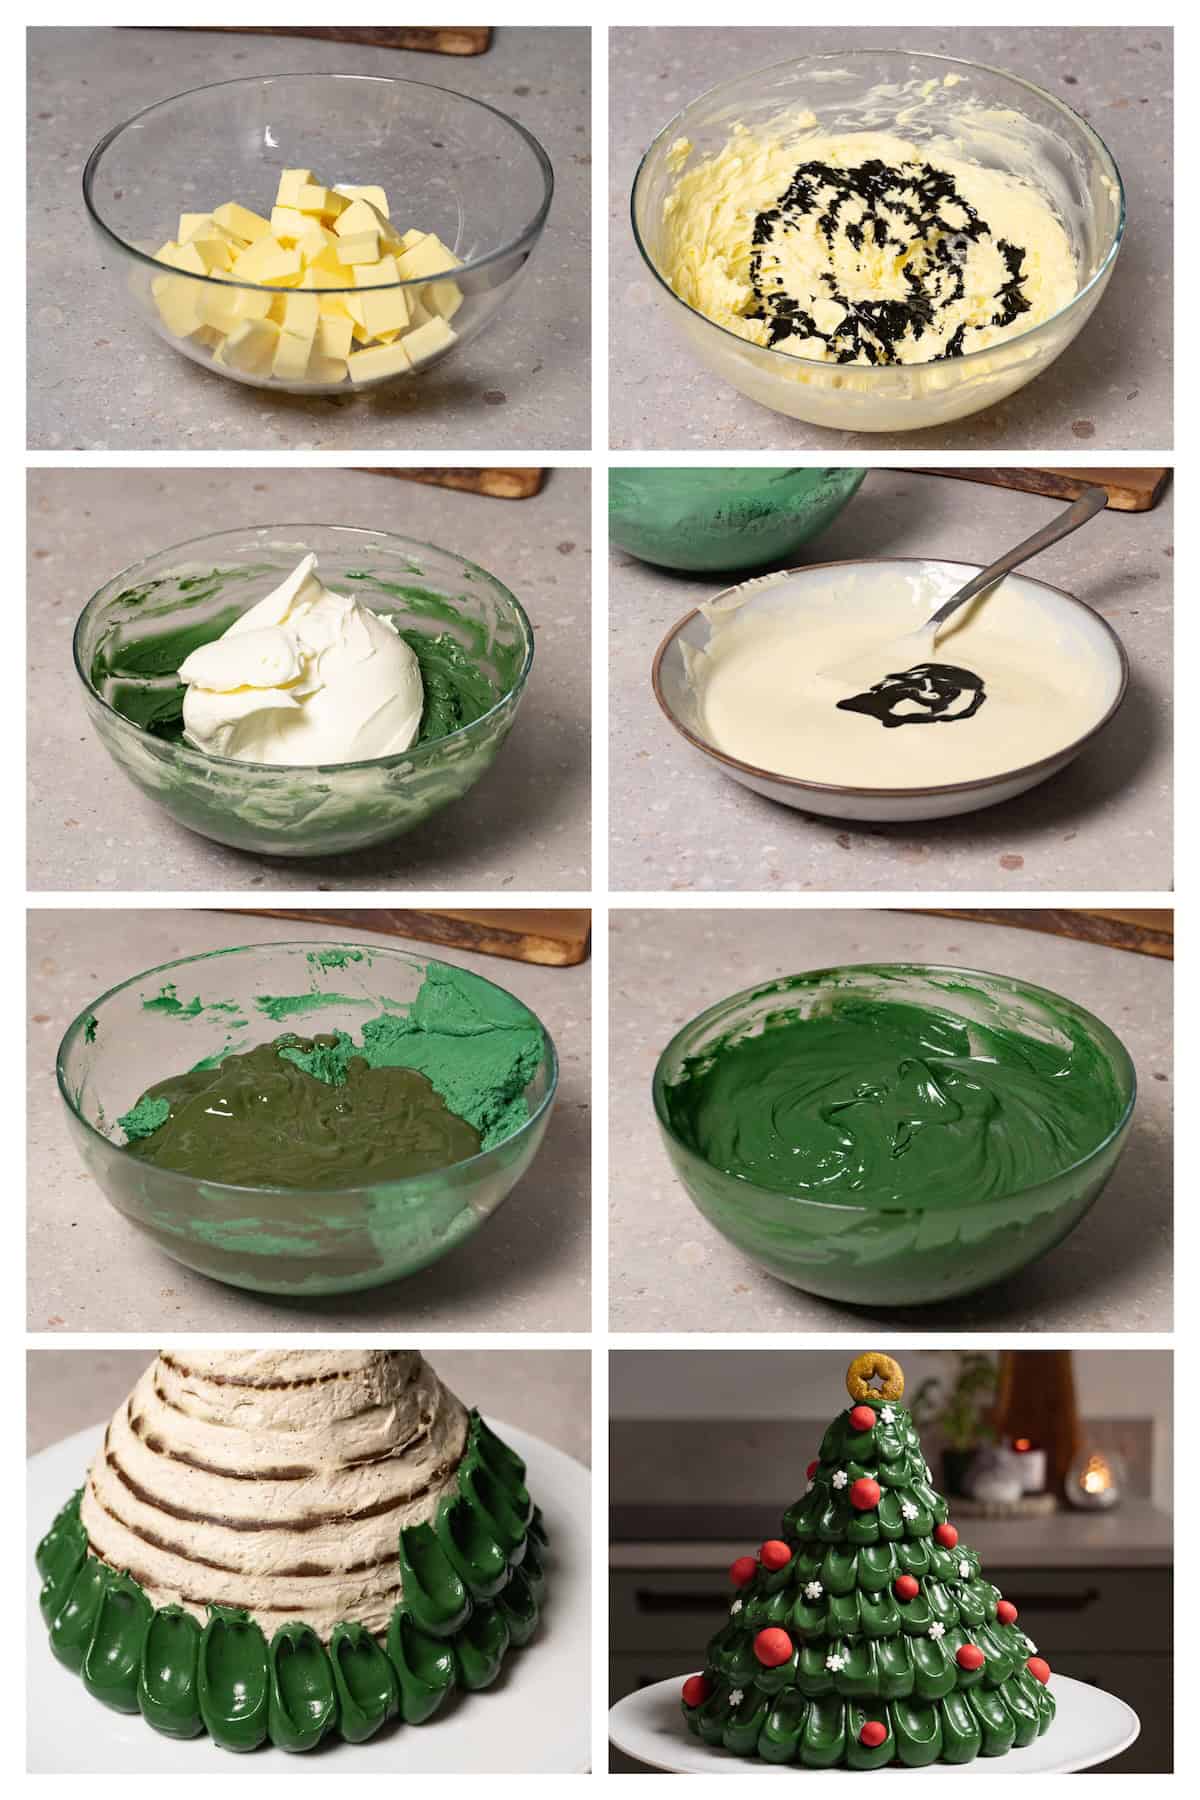
Pipe small dollops of frosting around the base of the cake and use a spoon to drag each one upward to create cascading branches. Repeat row by row until you reach the top, adding a few dollops at the tip. Finish by decorating with red fondant baubles and snowflake sprinkles for a festive look.
Looking for more Christmas desserts? I've got you covered! Try this Gingerbread cake, these Linzer cookies or make these adorable Reindeer cookies.
Possible variations
Decorate with extra frosting. Pipe additional swirls or dollops to make the tree look fuller and more festive. You can even dust your Christmas tree cake with edible glitter for sparkle.
Add edible ornaments. Use red fondant, chocolate buttons, or small candy pieces as baubles.
Flavor twists. You can add a pinch of nutmeg or ginger to the filling for a warm holiday flavor or sprinkle some crushed pecans or walnuts on top of each cream layer.
Alternative frosting colors. While classic green works best, you can try any color you like for a fun twist, and if you are not big fan of food coloring or think that this recipe use too much of it, leave it white and decorate with colorful sprinkles instead.
Storing and freezing
Storing the assembled cake. Keep the finished cake covered in the fridge for up to 4 days. The layers stay soft, and the frosting holds its shape well when chilled.
Freezing the assembled cake. This cake freezes surprisingly well. Wrap it tightly in plastic wrap, then place it in an airtight container and freeze for up to 2 months. Thaw it in the fridge overnight before serving so the frosting and layers return to their proper texture.
Make-ahead dough. The dough is perfect for preparing in advance. You can refrigerate it for up to 4 days, or freeze it for up to 2 months. Thaw frozen dough in the fridge overnight, then roll and bake as usual.
Recipe card
Christmas Tree Cake Recipe
Equipment
- Digital kitchen scale
- Rolling Pin
- Hand mixer
- Saucepan
- 3 Mixing bowls
- Piping bag
- Rubber spatula
- Whisk
Ingredients
Cake
- 120 g honey
- 105 g unsalted butter
- 70 g white sugar
- 8 g baking soda
- 2 large eggs
- 35 g unsweetened cocoa powder
- 320 g all-purpose flour
- 1 teaspoon salt
Filling
- 400 g cream cheese cold
- 100 g heavy cream cold
- 100 g powdered sugar
- 1 teaspoon ground cinnamon
- 1 teaspoon vanilla extract
Frosting
- 300 g unsalted butter at room temperature
- 300 g cream cheese at room temperature
- 300 g white chocolate melted
- Green food coloring must be fat soluble food coloring suitable for coloring chocolate
Decorations
- Red fondant
- Snowflake sprinkles
Instructions
Cake
- In a heavy-bottomed saucepan, combine the butter, honey, and sugar. Cook over medium heat, stirring until melted and bubbling. Reduce heat to low, add the baking soda, and stir well. The mixture will foam and lighten in color. Continue stirring until it reaches a light caramel hue.
- Slowly pour the hot honey mixture into the eggs, whisking constantly to prevent curdling. Sift in the cocoa powder and whisk until smooth. Then sift in the flour and salt, mixing until a soft, slightly sticky dough forms. Wrap in plastic and chill for 1 hour or overnight.
- Preheat the oven to 180C (355F). Divide the dough into 10-13 pieces. Roll each piece on a floured surface to 2-3 mm thickness. Cut circles for the tree layers with diameters of 18 cm (7 in), 17 cm (6.7 in), 16 cm (6.3 in), 15 cm (5.9 in), 14 cm (5.5 in), 13 cm (5.1 in), 11 cm (4.3 in), 9 cm (3.5 in), 8 cm (3.1 in), 7 cm (2.8 in), 5 cm (2 in), 4 cm (1.6 in), and 3 cm (1.2 in).
- Place several layers on a parchment-lined baking sheet (they can be close together as they don't spread) and bake one sheet at a time (I managed to bake on two sheets) for about 4-5 minutes, until puffed and no longer shiny. Layers will be flexible when hot and firm slightly as they cool. Transfer to a rack to cool completely.
Filling and Assembly
- Place all filling ingredients in a bowl and whip with a hand mixer to stiff peaks. Spread 5 mm (about ⅕ in) of cream between each layer, stacking from largest to smallest. Crumb coat, cover with plastic wrap, and chill for several hours or overnight.
Frosting and Decorating
- Using a hand mixer, beat the butter in a bowl until fluffy and pale yellow. Add green fat-soluble food coloring and mix until fully combined. Add the cream cheese and mix on medium speed just until incorporated and the color is uniform. Do not whip.
- Melt the chocolate in the microwave in short increments, stirring in between. When it is about 90% melted, remove it from the heat and stir until completely smooth. Add the same food coloring and mix thoroughly so that all of the chocolate is evenly colored.
- Add the chocolate to the butter and cream cheese mixture (ensure the butter mixture is at room temperature to avoid graininess) and mix until glossy. If too thin, chill in the freezer for 5 minutes, then remix. Repeat until the cream reaches a pipeable consistency. If the chocolate turns grainy when you mix in the chocolae, gently warm the cream in 5-10 second intervals, stirring in between, then cool as described to make it pipeable.
- Transfer the cream to a piping bag and cut off the end to create a 2 cm (¾-inch) opening. Pipe 5 cm (2-inch) balls around the base of the cake. Using a spoon, drag each ball upward starting from the middle to form a slide shape (see the video at the end of the recipe card for more info). Pipe the next row of balls above and turn them into slides again, continuing row by row to the top. Add a few cream blobs on top for the tree tip. If the cream becomes too thin while piping, chill briefly in the freezer, massage the piping bag in your hand, then continue piping.
- Decorate as desired. I made red fondant baubles and also used snowflake sprinkles.
Leave a comment