
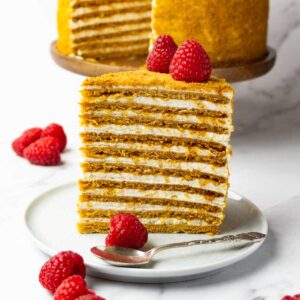
This delicious and moist honey cake recipe, with a tangy sour cream frosting and prominent honey flavor, is a cake that will take a very special place in your heart. It's a great dessert to make for any occasion, whether it's New Year's, a birthday, or even a wedding.

Jump to:
Why you should try this honey cake recipe
Irresistible flavor - Just like my Honey cookies, this cake offers a delightful combination of flavors. The cake itself is infused with a prominent honey flavor, giving it a natural sweetness and a rich aroma. The tangy sour cream frosting adds contrast and balances the sweetness of the cake.
Moist and tender texture - The use of honey and sour cream contributes to the cake's moisture, creating a soft and luscious texture that melts in your mouth.
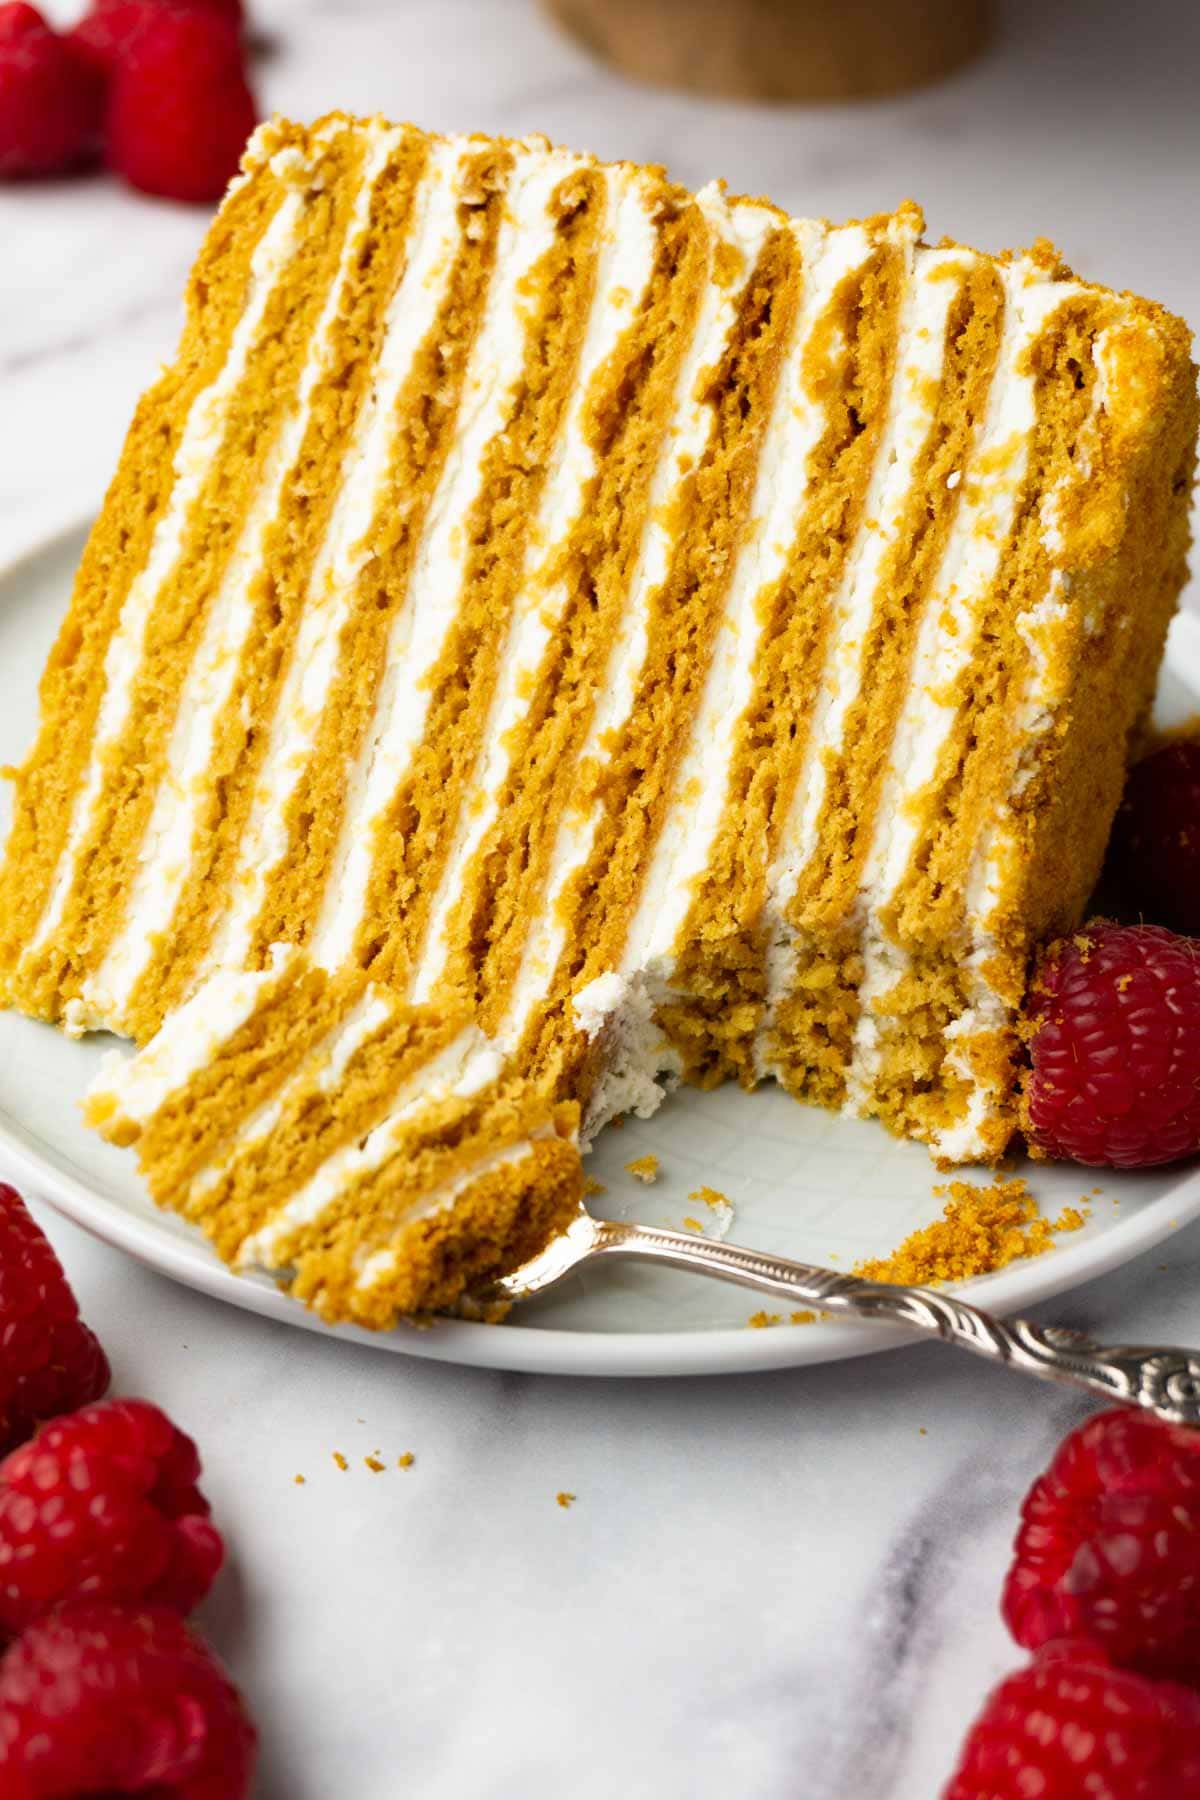
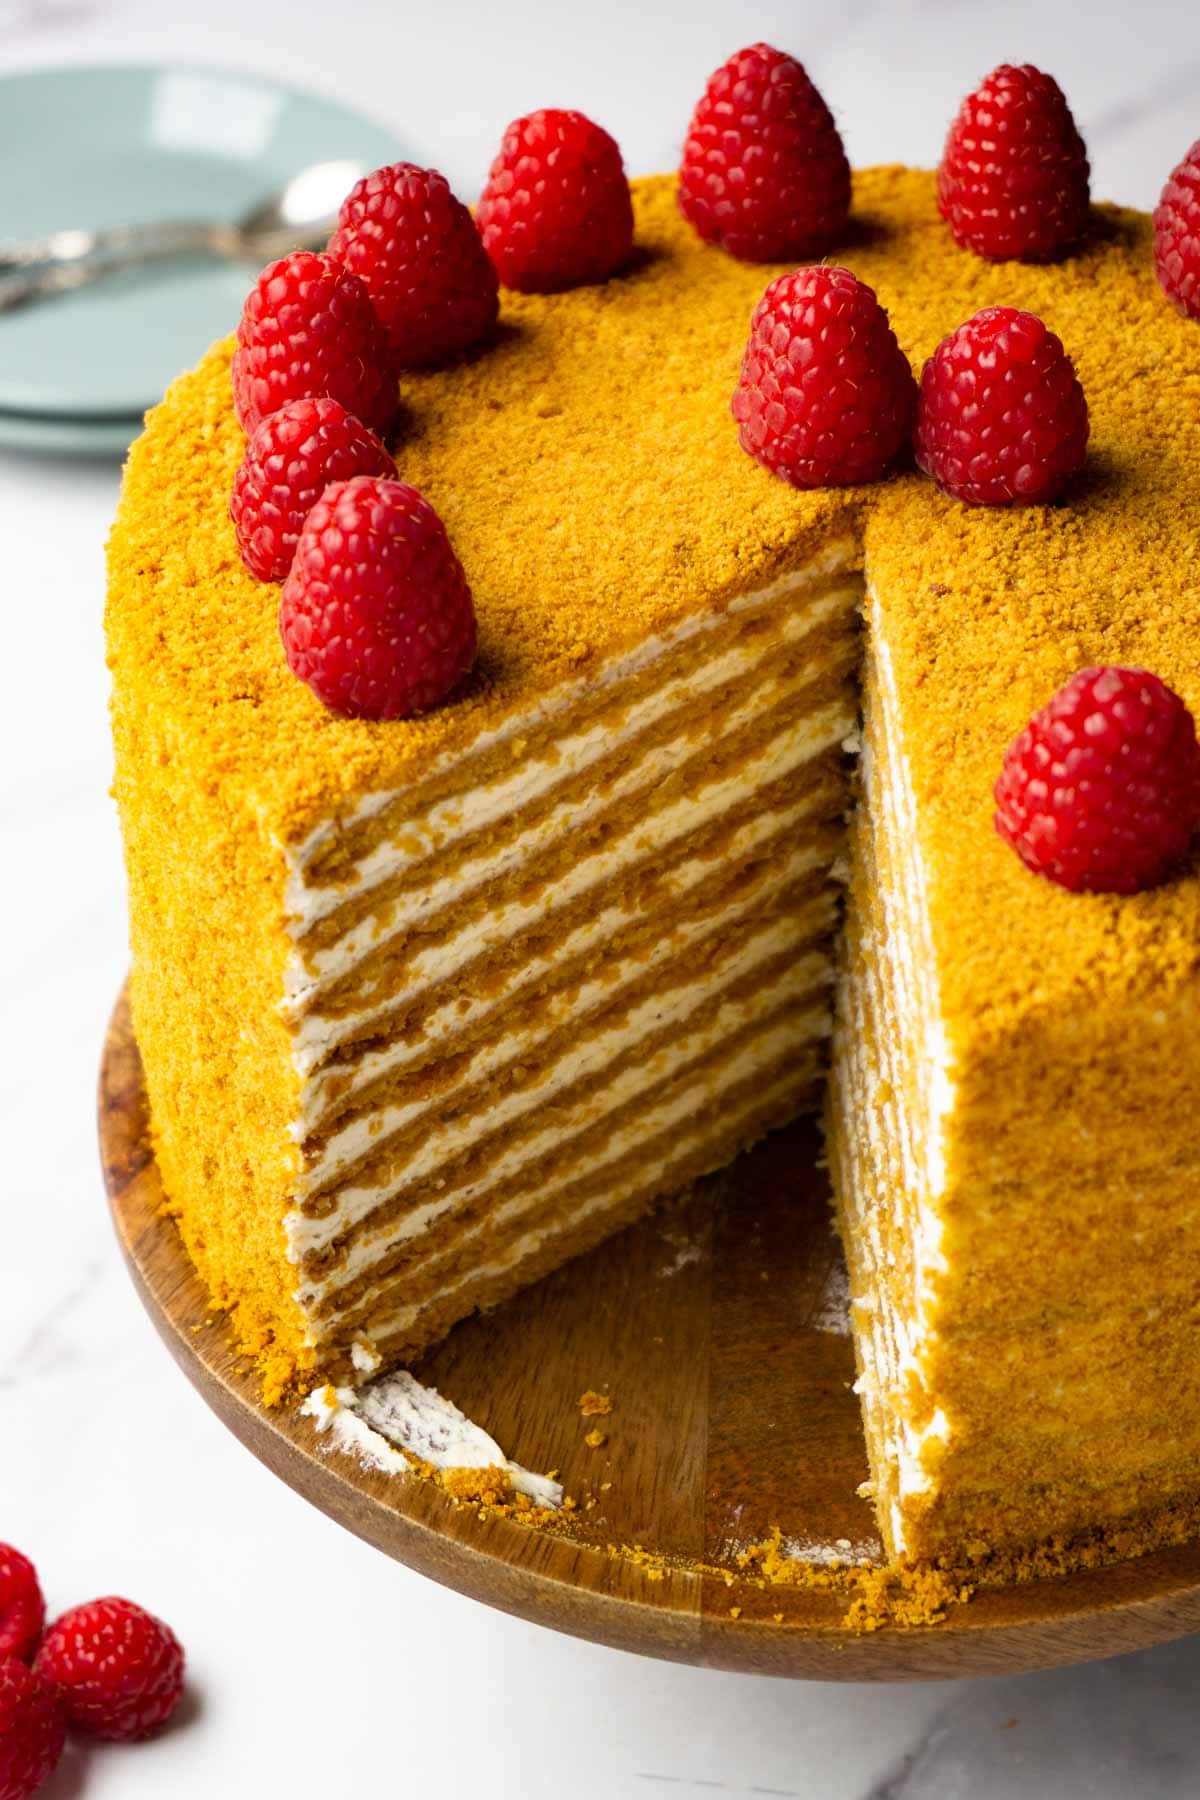
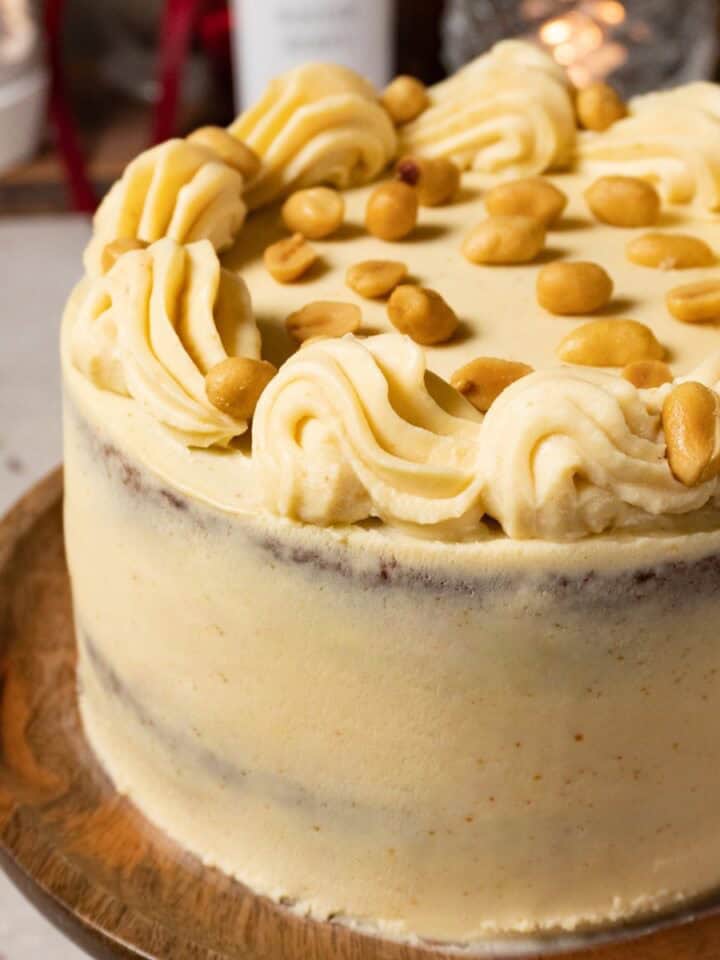
Impressive presentation - The honey cake's layering technique creates a visually stunning dessert that is sure to impress your guests. The thin, golden cake layers stacked with creamy frosting between each layer create a beautiful and elegant cake. Whether you're serving it at a party or sharing it with loved ones, this honey cake is a showstopper on any dessert table.
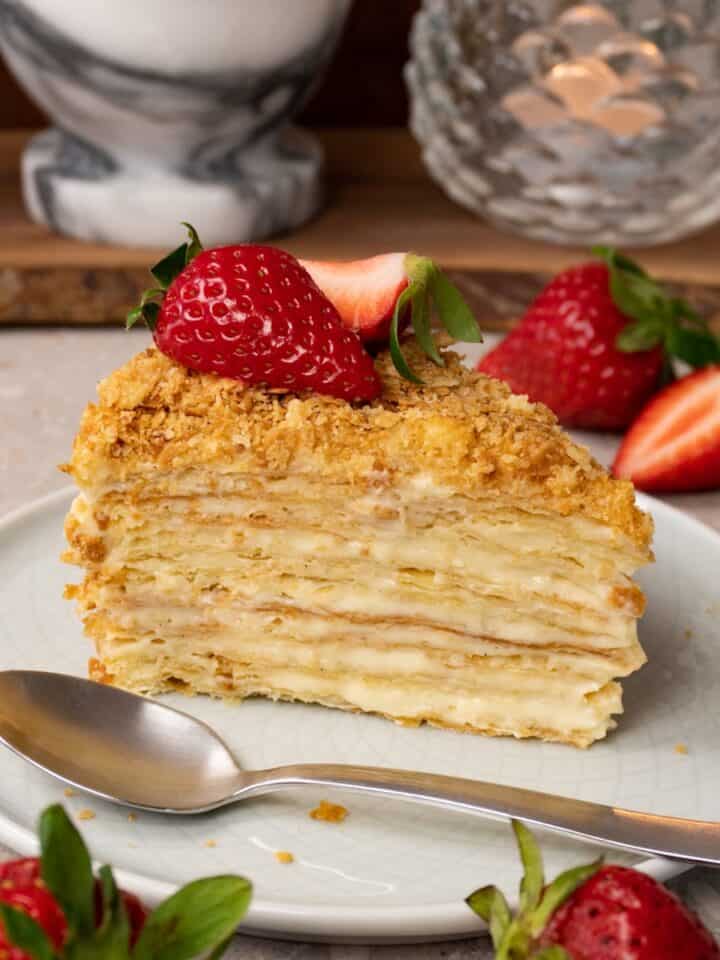
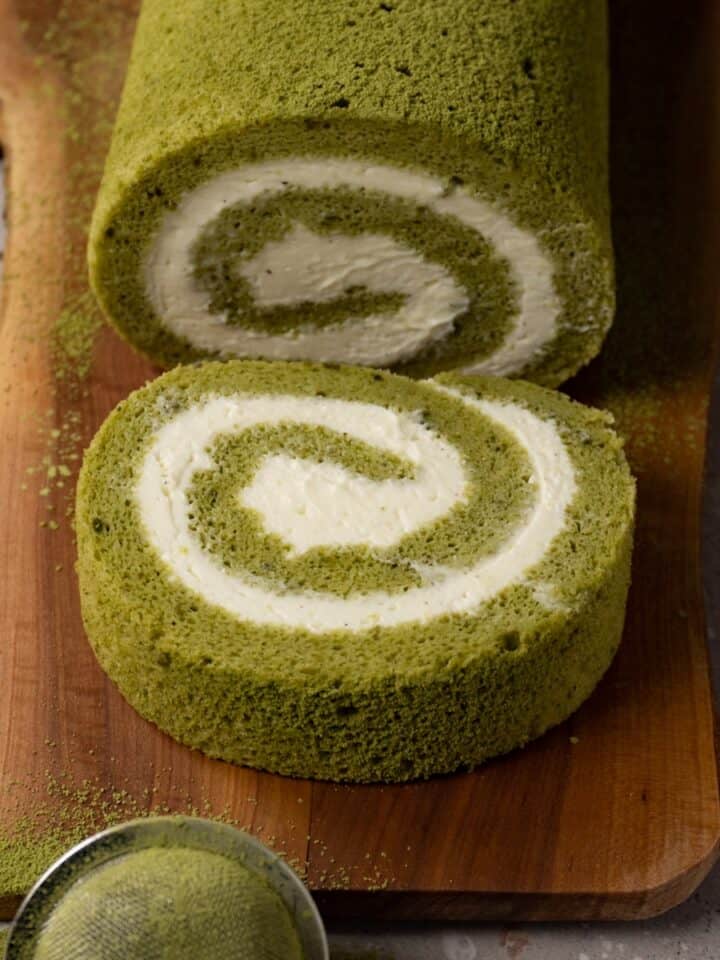
Looking for more delicious cake recipes? Then, you should try this decadent Tiramisu cake, this quiche and easy Castella cake, or this creamy and rich Matcha cake.
Ingredients and substitutes
Eggs - They should be at room temperature so they whip more easily, aerate properly, and trap enough air for a light batter.
Flour - You can use all-purpose flour for this cake recipe. Sift it to break any lumps before mixing with wet ingredients.
Salt - A very small but very important ingredient to improve flavor profile. Don't skip it!
Honey - Using good-quality honey here is a must. The flavor and aroma of the honey affect the taste of Medovik cake (the original name for Russian honey cake). It's very important that you like the taste of the honey you're going to use. If you don't know what type of honey to buy, wildflower honey or clover honey will work great in this recipe.
Butter - No need to bring the butter (unsalted) to room temperature as we're going to melt it in a saucepan with other ingredients.
Sugar - We will need granulated sugar for the dough and powdered sugar for the cream.
Baking soda - Make sure that the baking soda you use is fresh. To check, place ½ teaspoon of soda in a tablespoon and pour any acidic liquid (such as white vinegar) on top. If you get a strong fizzing reaction right away, your soda is good enough to use in this recipe. For those who are worried that 10g of baking soda will make your cake with honey taste bad, no worries: honey is very acidic and it will react with all the soda you put in. Honey's acidity is the reason you can't use baking powder instead, as it's just too weak and won't react strongly enough with honey. This means it therefore won't produce enough carbon dioxide to make the texture of the cake layers porous.
Sour cream - Traditionally, you should use smetana (it's a sour cream from Central and Eastern Europe which is very similar to creme fraiche, which usually has 28-42% milkfat content per 100g). However, just regular full-fat sour cream with the addition of heavy cream to increase the fat percentage should whip up with no problems. Just make sure that it's very cold!
Heavy whipping cream - As I mentioned previously, adding cold heavy cream will help our sour cream to whip up.
Cooking tips
Preparation is key. This is a very simple honey cake recipe if you prepare everything in advance. Weigh all ingredients so they're ready to go and prepare 10 pieces of parchment paper with all the tools you need before you start cooking.
Weigh all the ingredients using a digital kitchen scale. This recipe likes precision. Don't measure ingredients with cups, especially flour. If you add too much flour, the cake layers might turn out too hard and less fluffy.
Don't burn your honey. After you add the baking soda, the honey mixture will bubble and caramelize extremely fast. At this point, you have to use low heat and whisk (or mix with a rubber spatula) the mixture non-stop. When you see it reaches a caramel color, stop and remove the saucepan from the heat.
Roll the dough very thin (1-2mm). Roll the dough very thin, about 1-2 millimeters. I like to work with two pieces of plastic wrap instead of rolling straight on parchment or floured surface. I set the dough between the two pieces of plastic wrap, roll it out until it's thin, then peel off the top layer of plastic. Holding the dough by the bottom layer, I flip it onto a piece of parchment, peel the plastic away, and go from there. Sometimes I bake it first and cut out the cake layer afterward, and sometimes I cut the round shape before baking, depending on what feels easier in the moment. This way, my rolling pin doesn't stick to the dough and I don't need to use extra flour, which gives me very fluffy and soft cake layers.
You can reuse parchment paper. As I mentioned previously, you'll typically need 10 pieces of parchment paper - but you can use 5 instead. This just means that you're going to reuse each piece. I don't recommend reusing it more than once, as the baking paper becomes too fragile after two times in the oven.
You can use a silicone mat or Teflon mat. If you use a silicon mat, dust its surface with some flour or the dough will stick to it and you'll have problems rolling it out properly. A Teflon mat is nonstick, so you'll work on it the same way as on parchment paper. However, if you have only one silicon or only one Teflon mat, your cooking time will be around 30 minutes longer, as you won't be able to roll out the next cake layer while the first one is baking.
Do not overbake! Each cake layer takes around 4 minutes to bake. Of course, the baking time will vary depending on your oven (30 seconds to 1 minute more or less baking time), so you need to keep an eye on the first 2 layers to determine how many minutes you need to bake them. Once evenly golden, you can remove your cake layer and let it cool down for a minute, then remove it from the parchment paper onto a cooling rack. The layers should be soft and slightly bendable after cooling down completely.
Step by step directions
Preparing the honey dough
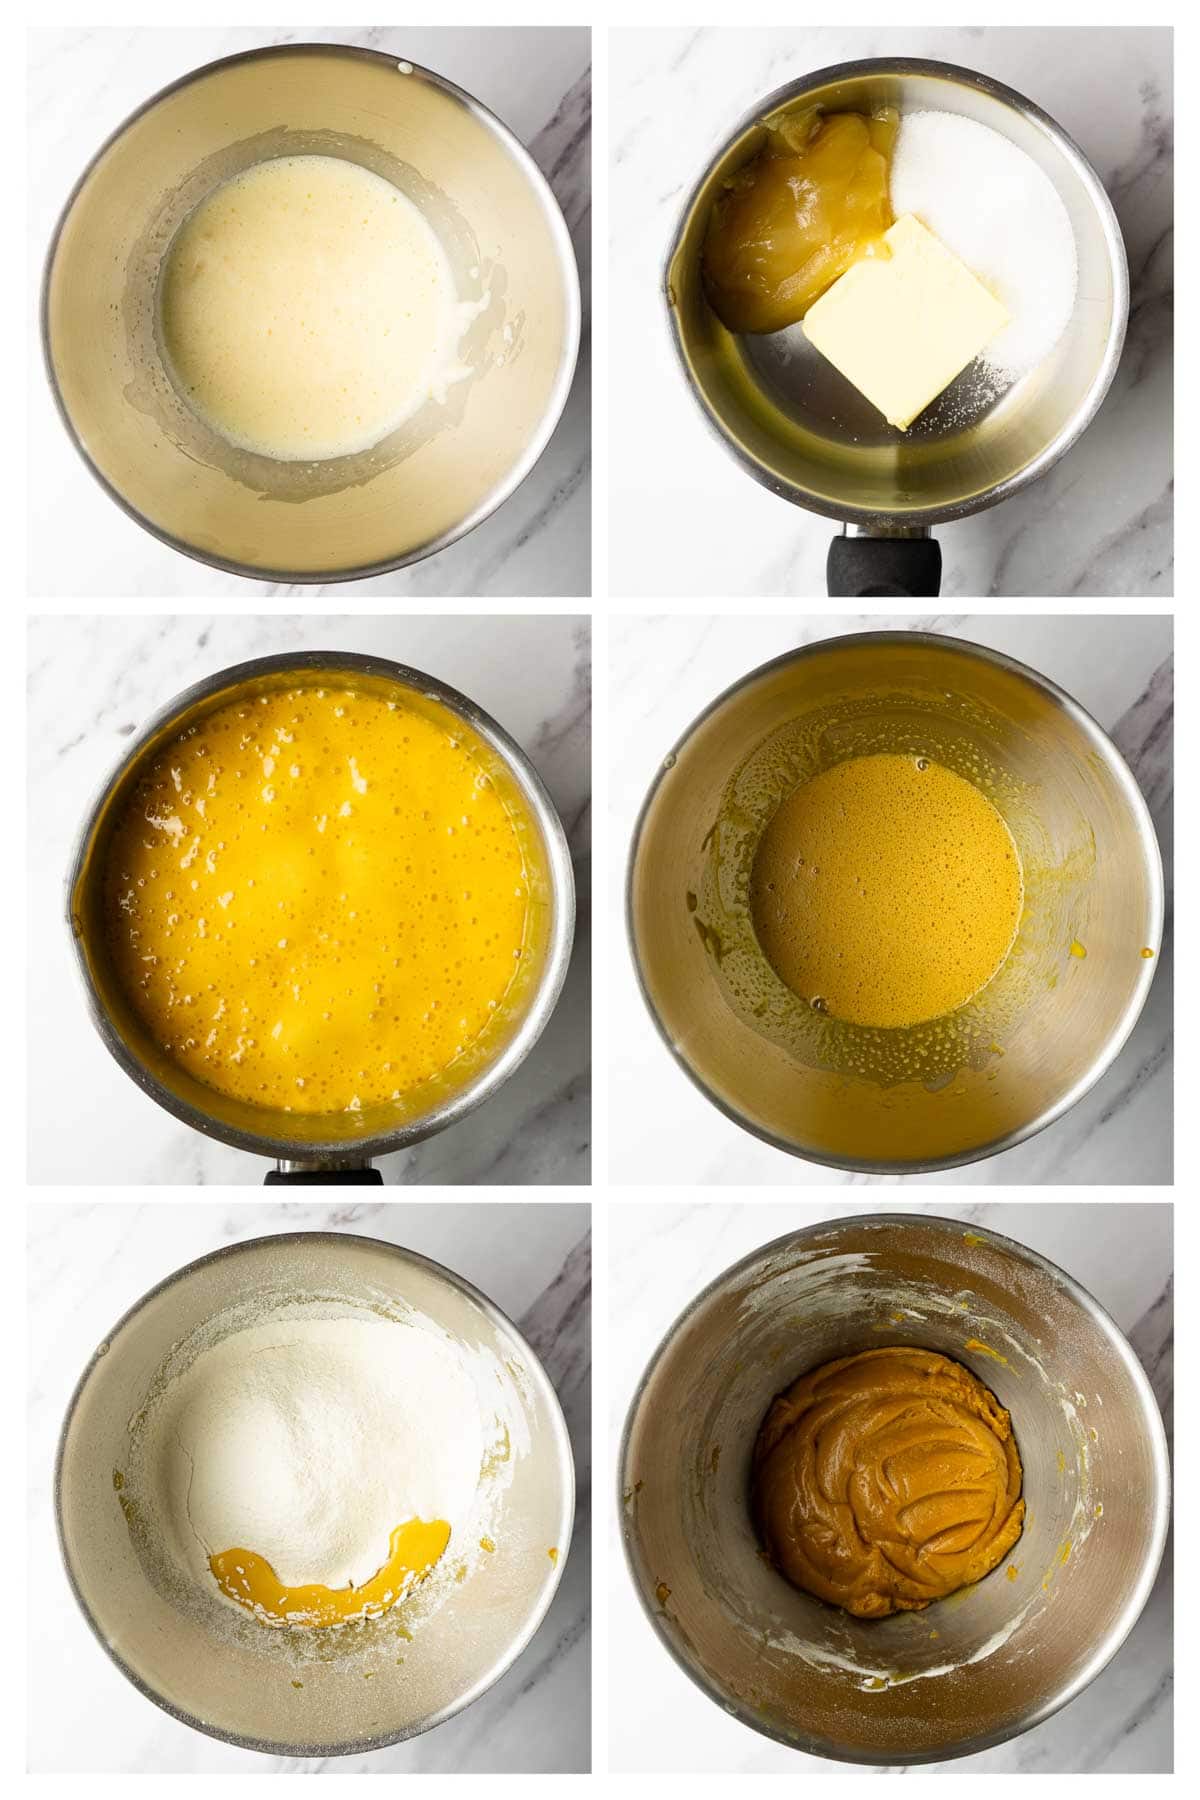
- Whip the eggs in a large mixing bowl with a hand mixer for one minute or until pale. Set aside.
- Heat the butter, honey, and sugar in a heavy-bottomed saucepan over medium heat until melted and the first bubbles appear.
- Lower the heat to low and add baking soda. Whisk to combine. The mixture will bubble and expand a lot but then subside. Cook over low heat, stirring continuously to prevent the honey from burning, until the mixture turns a light amber color.
- Slowly pour the honey mixture into the eggs, whisking vigorously.
- Sift in the flour with the salt and mix until no dry ingredients are left. The dough should be sticky, don't add more flour! Wrap the dough in plastic wrap and place it in the fridge for 1 hour, or overnight.
Rolling out the dough and baking the cake layers
- Preheat the oven to 180C (355F). Prepare the baking sheet and 10 pieces of parchment paper (one for each cake layer).
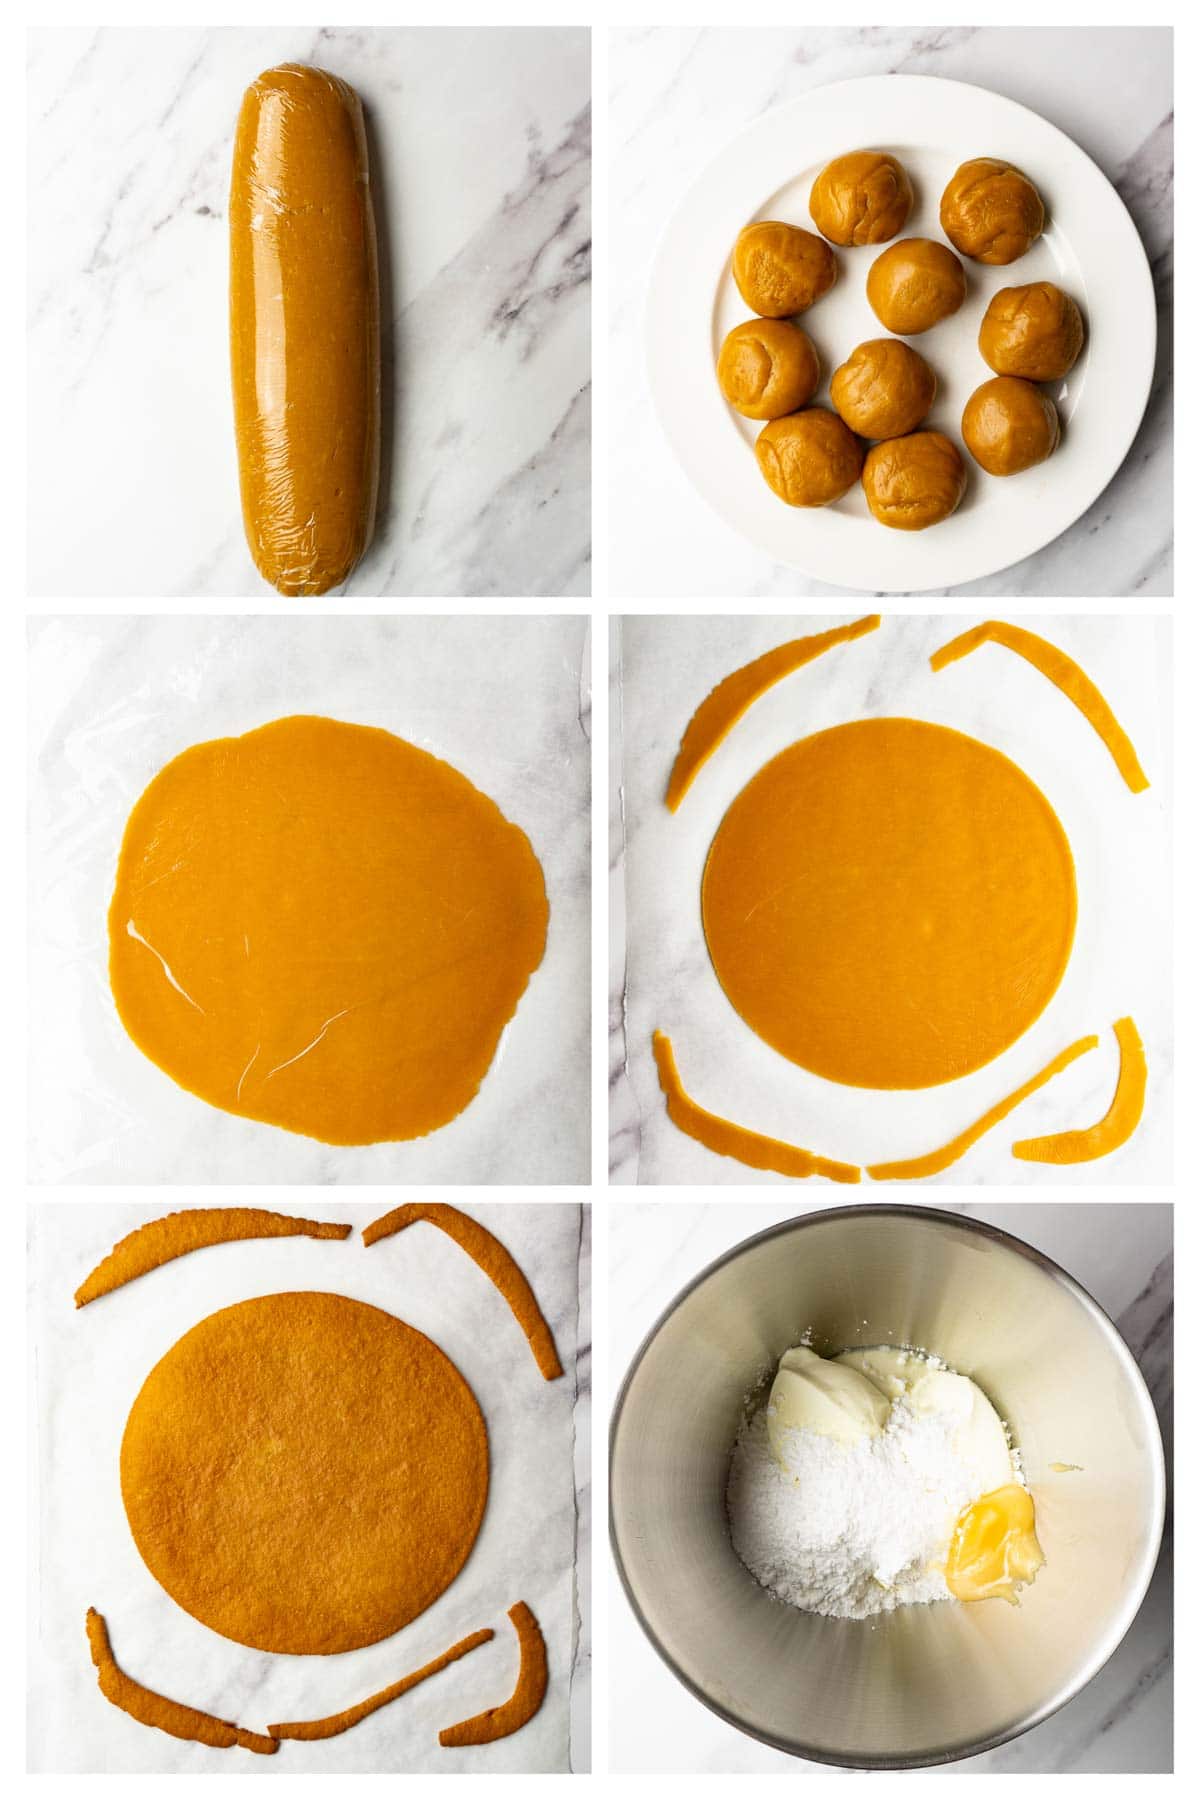
- Split the dough into 10 even parts (around 85g each). Take one piece and place it on a piece of plastic wrap, cover it with another piece of plastic wrap, and roll the dough (it should be 1-2mm thick) so you can cut out a 7-inch (17cm) disc and have some left overs. Then, peel off the top layer of plastic. Holding the dough by the bottom layer, flip it onto a piece of parchment, peel the plastic away.
- Cut out a 7-inch disc and spread the leftover dough about an inch away from it. The scraps will be used to decorate the cake. You can also cut the disc after baking if you prefer cleaner edges.
- Bake each layer for around 4 minutes or until just golden. While one cake layer is baking, you can roll out and cut out the next layer.
- Remove from the oven and let cool down for a minute on the baking sheet. Then, transfer onto a cooling rack. Place the leftovers onto a separate plate. Don't stack baked cake layers on top of each other if they're still warm.
Making the sour cream filling
- Place all ingredients in the bowl of a stand mixer fitted with a whisk attachment (or use a bowl and a hand mixer).
- Whip to medium peaks (3-4 minutes on medium-high), scraping the sides and the bottom of the bowl couple of times in between.
How to assemble the honey cake
- Spread one teaspoon of the cream on the surface that you're going to use to assemble your cake, so it slides less.
- Place the first cake layer on top. Then, add around ⅔ cup (80g) of the cream and spread it evenly. Cover with the second cake layer and repeat the process until no cake layers are left.
- Crumb coat the cake with the rest of the cream and cover the cake with plastic wrap. Refrigerate for 2 hours.
- Pulse cake leftovers in a food processor until a fine crumb is reached.
- When the cake is chilled, dust it evenly with the crumbs and decorate the top with fresh berries. The cake is best served the next day.

Flavor variations
- Fresh berries - Try to choose sweet and sour berries, such as raspberries or red currants, to place on top of the cake - or even spread between cake layers. The sourness will complement the sweetness of this very best honey cake.
- Caramel - Caramel fits well with honey, so you can make homemade Salted caramel and spread it very thinly between every second cake layer.
- Berry sauce - As with fresh berries, choose sweet and sour berries for the sauce. You can make this Raspberry coulis (thicken it with cornstarch to make it thicker and more stable) and spread it thinly between every second cake layer.
- Nuts - You can add some crushed walnuts between layers. They're not going to stay crunchy because this cake is very moist, but the nutty flavor will shine through.

Decoration variations
The easiest and most traditional way to decorate this cake is to dust it with crumbs made of the leftovers you'll have after baking all layers. This coating will add even more honey flavor to the cake. However, you don't have to do this if you want to achieve another look for occasions like birthdays or weddings.
You can use your favorite buttercream for the final frosting layer, ganache frosting, or cream cheese frosting with butter if you want to use different decoration techniques to make this cake suitable for any occasion.
FAQ
Store it in a plastic cake container (or you can place it on a large plate and cover the cake with plastic wrap) in the fridge for up to 4 days.
You can't freeze the assembled honey cake, but you can freeze the cake dough for up to 2 months. Wrap it in plastic wrap and then in a piece of foil and freeze. Thaw in the fridge overnight before rolling it out and baking.
More cake recipes
Recipe card
Honey cake
Equipment
- Digital kitchen scale
- Rubber spatula
- Stand mixer
- Parchment paper
Ingredients
For the cake layers
- 2 large eggs at room temperature
- 120 g unsalted butter
- 80 g granulated sugar
- 140 g honey
- 10 g baking soda
- 420 g all-purpose flour
- ½ teaspoon salt
For the cream
- 600 g full-fat sour cream such as from Daisy (cold)
- 160 ml heavy whipping cream cold
- 100 g powdered sugar
- 3 tablespoon honey
- Fresh raspberries for decoration
Instructions
For the cake layers
- Whip the eggs in a large mixing bowl with a hand mixer for one minute or until pale. Set aside.
- In a heavy-bottomed medium saucepan, add the butter, honey, and sugar. Heat over medium heat until the butter has melted and the mixture starts simmering.
- Lower the heat to low and add baking soda. Whisk to combine. The mixture will bubble and expand a lot but will then subside. Cook over low heat, stirring continuously to prevent the honey burning, until the mixture turns a light amber color.
- Remove from the heat and slowly pour the honey mixture into the eggs, whisking vigorously. Then, sift in the flour with salt and mix until no dry ingredients are left. The dough should be sticky, don't add more flour! Wrap the dough in plastic wrap and place it in the fridge for 1 hour.
- Preheat the oven to 180C (355F). Prepare a baking sheet and 10 pieces of parchment paper (one for each cake layer).
- Split the dough into 10 even parts (around 85g each). Take one piece and place it on a piece of plastic wrap, cover it with another piece of plastic wrap, and roll the dough (it should be 1-2mm thick) so you can cut out a 7-inch (17cm) disc and have some left overs. Then, peel off the top layer of plastic. Holding the dough by the bottom layer, flip it onto a piece of parchment, peel the plastic away.
- Cut out a 7-inch disc and spread the leftover dough about an inch away from it. The scraps will be used to decorate the cake. You can also cut the disc after baking if you prefer cleaner edges.
- Bake each layer for around 4 minutes or just until golden. Remove from the oven and let it cool down for a minute on the baking sheet. Then, transfer it onto a cooling rack. Place the leftovers onto a separate plate. Don't stack baked cake layers on top of each other if they're still warm.
For the cream
- Place all ingredients in the bowl of a stand mixer fitted with a whisk attachment (or use a bowl and a hand mixer).
- Whip to stiff peaks (3-4 minutes on medium-high), scraping the sides and the bottom of the bowl couple of times in between.
Assembling the cake
- Spread one teaspoon of the cream on the surface/plate that you're going to use to assemble your cake.
- Place the first cake layer on top. Then, add around ⅔ cup (80g) of the cream and spread it evenly. Cover with the second cake layer and repeat the process until no cake layers are left.
- Crumb coat the cake with the rest of the cream and cover the cake with plastic wrap. Refrigerate for 2 hours.
- Meanwhile, place the cake layers leftovers in a food processor and pulse until a fine crumb is reached.
- When the cake is chilled, dust it evenly with the crumbs and decorate the top with fresh berries.
- The cake is best served the next day.
Martha says
This is the best cake I’ve ever tried!
Ann says
A video would help to show the steps for those cake. It really looks very complicated but the result is impressive with all of the layers.
Anna says
Thank you for your comment, Ann! I will make a video in the future. As for now, you can find detailed step-by-step photo instructions in the post.
Sarah says
Yum!! I would recommend for novice dough rollers to make 1.5x-2x dough. I made it exactly as is and found I really needed closer to 100g to get the best layer thickness! I rolled too thin first go around and made another batch of dough doubling the recipe and found it a bit easier to get thickness right!!
Anna says
Thank you for sharing your experience with my recipe! I'm glad to hear that you liked it 🙂 The total weight of the dough should be around 885g which is enough for 10 7-inch thin layers (I agree that it can be challenging to roll them 1-2mm thick, but this is how I like to make this cake). To make thicker cake layer, you don't need to double amount of the dough. You just need to make 8-9 layers instead of 10. Then, you'll have more dough (97-110g per layer) to work with.
Little Kid says
I like honey bees 🐝 and honey 🍯! This looks awesome.
neha says
hellooo is the cake tooo sweet or overly sweet ?? why did u whip the eggs to pale and fluffy?? very less recipes do tht? any specific reason?? also wanted to ask u mixing the whipping cream with the creme fraiche wont curdle or seize the cream ?? how is the sweetness of the total product?? this looks incredible!! just wanted to know all these things please clear my doubts?how does it taste like? also how hot should the mixture be while pouring into the eggs mixture? and is the dough sticky? dusting with a little flour will ruin the softness?? please replyyy!! plssss clear my doubtss pls! also which honey did u use? please reply!!!!!
Anna says
You can find all the answers to your questions by reading this blog post.
Neha says
hey!!! I'm the same person who had commented a lot about the recipe, asking you a lot of questions lol!!! i made the cake yesterday!! and turned out awesome , wish i could send you a picture of it, turned out really great!!! its really a labor of love!! the recipe is great , works very well( i had to use little bit more of frosting !! and also added little less icing sugar to the frosting and it was balanced overall !!! awesome work!! will surely try other recipes from u too!! Ur great!! HAPPY NEW YEAR!!
Anna says
I’m glad you liked the recipe. Happy New Year!
Tammy says
Flawless recipe, truly! I've made medovik before using a couple of different recipes but this is my new go-to. I got 795 g of dough and still had enough for 10 thin layers and a crumb coat. For any NZ/AUS people here - I made this with Tatua sour cream and just the Woolworths brand liquid honey and it worked perfectly. Thank you Anna for this recipe, it tastes like home to me. I'm trying your Karpatka next.
Tammy says
Adding a rating
Anna says
It really means the world to me that people enjoy my Honey Cake recipe. It tastes like home to me as well, and I’m so happy that you feel the same way about this cake. I’ve also finished working on my improved Napoleon cake recipe, and I’ll update the post in a month or so with fresh photos and a new recipe card. I’m sure you’ll love this cake too. Karpatka is an amazing cake as well!