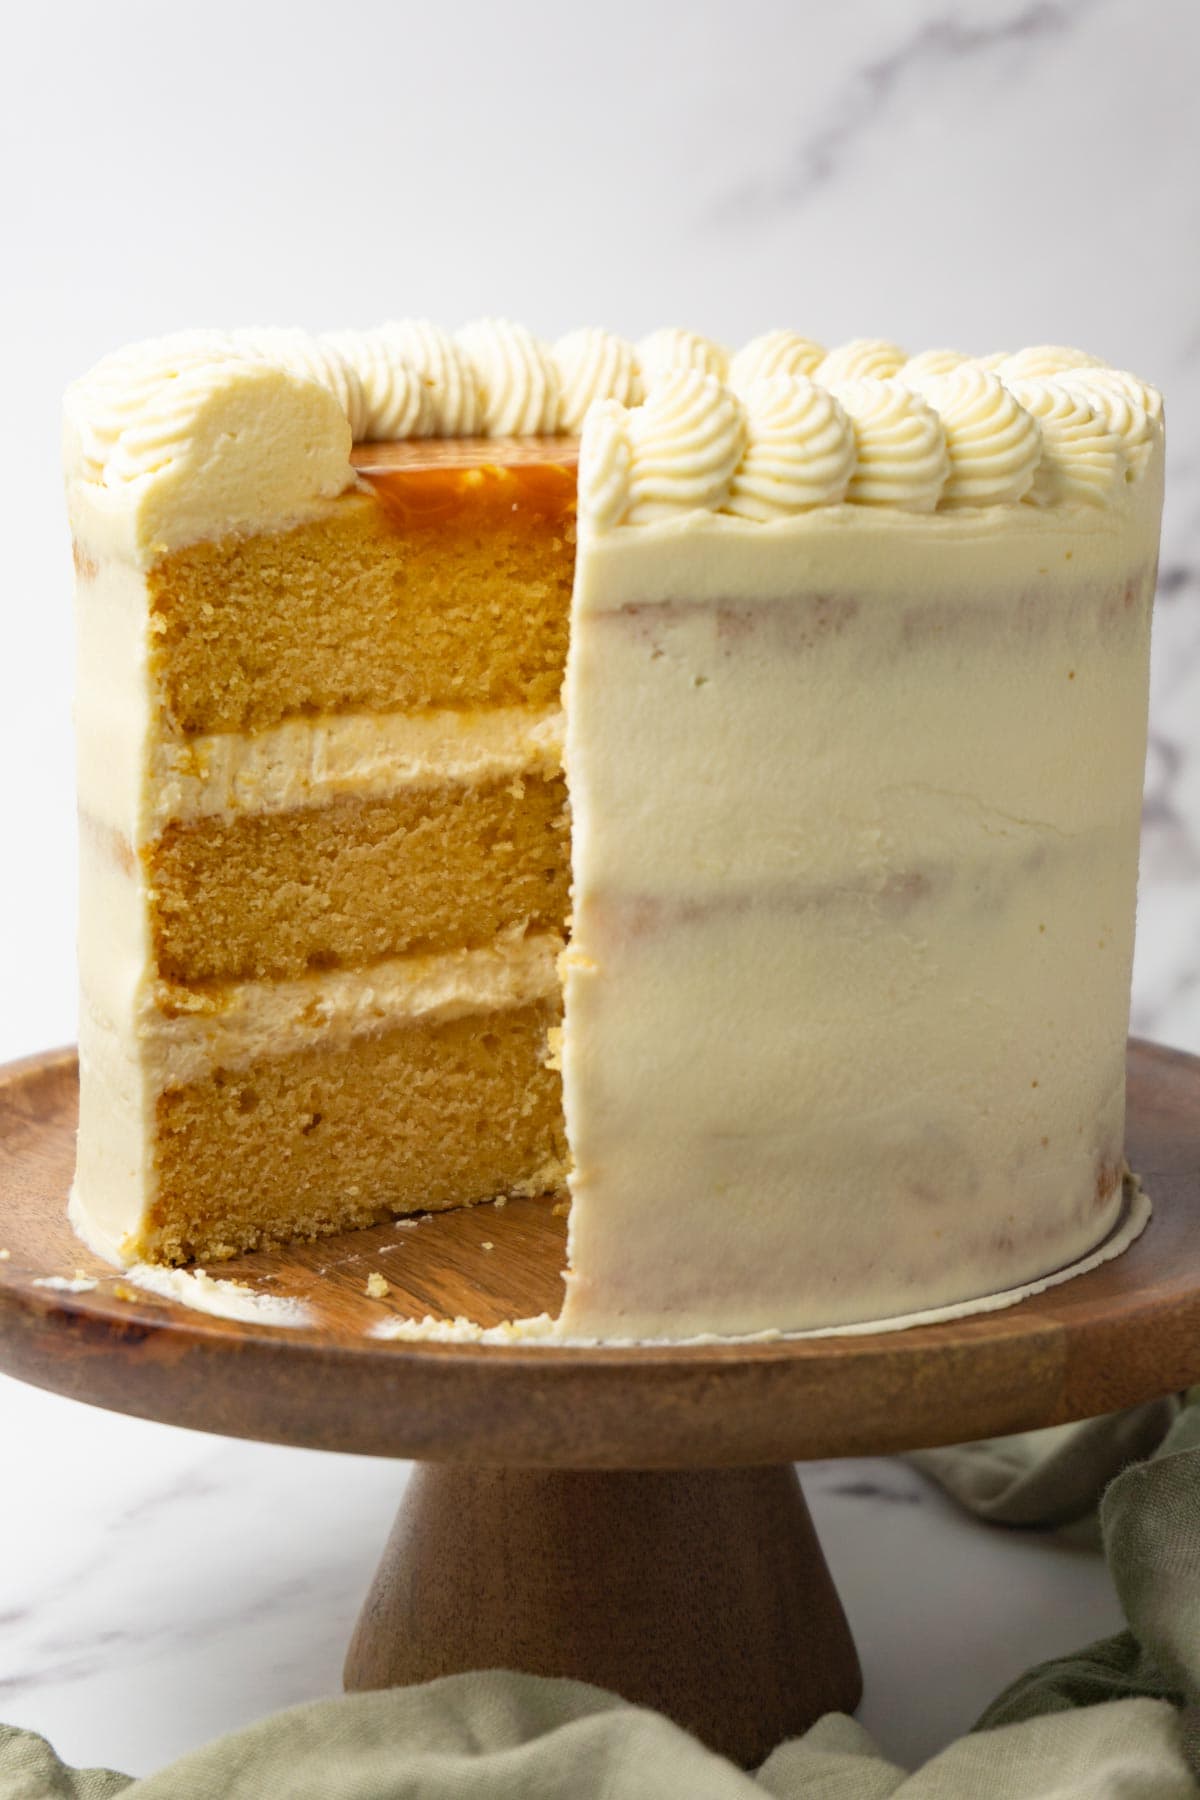
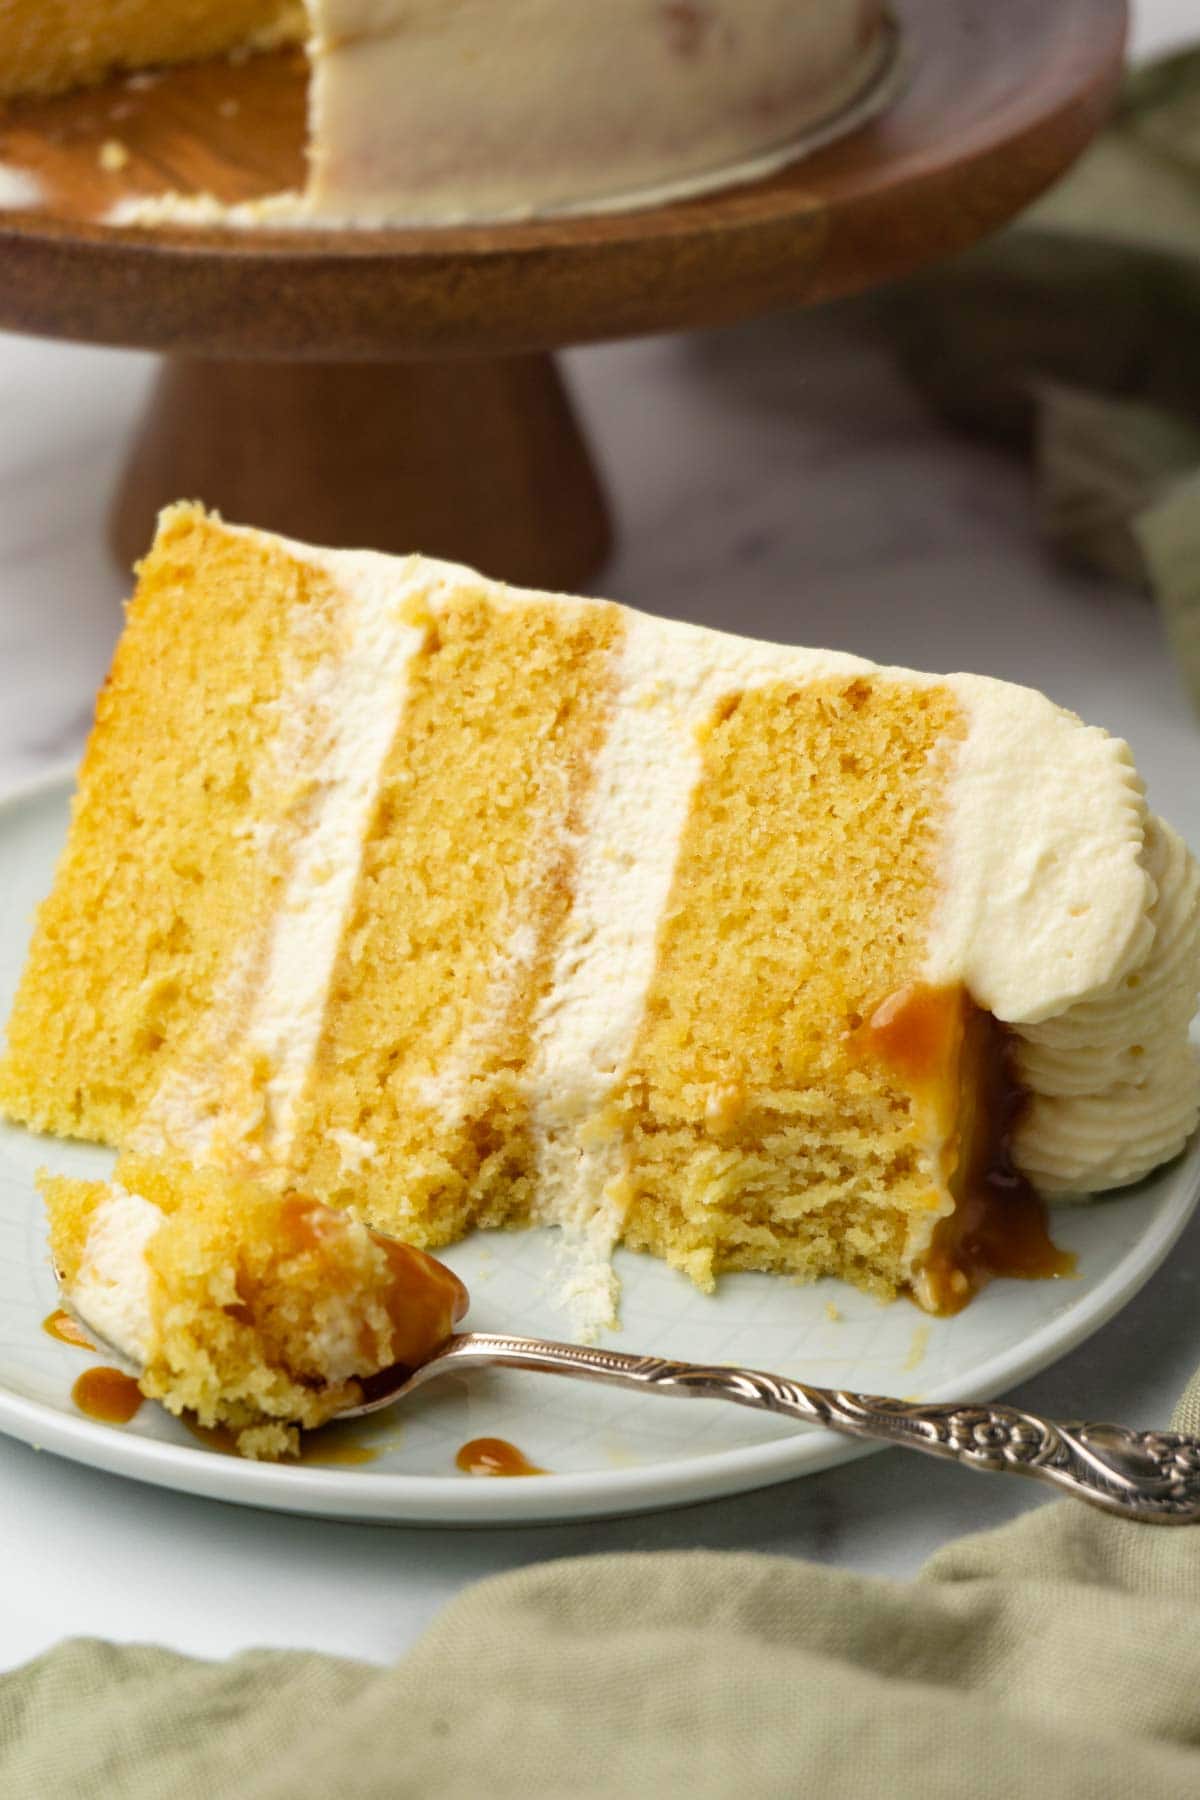
This caramel cake recipe is super easy to make. Three layers of soft and moist cake are stacked on top of each other with caramel frosting made with mascarpone cheese in between. If you're in love with everything caramel, you'll love this indulgent salted caramel cake.
Jump to:
Ingredients and substitutes
To learn more about Salted caramel, follow the link. I have a whole post prepared for you.
For the cake
Flour and corn starch - You can replace these with 220g of cake flour for a finer crumb.
Eggs - If you store eggs in the fridge, you can place them in warm water for 3-5 minutes to bring them to room temperature quickly.
Butter - Use unsalted butter at room temperature so it beats well with the sugar.
Sugar - Use white granulated sugar or caster sugar.
Salt - A generous pinch of salt for flavor balance.
Baking powder - To lighten the texture of the cake, we need to add baking powder.
Milk - Use whole milk at room temperature.
Salted caramel - Should be at room temperature.
For the frosting
Mascarpone cheese - Use cold mascarpone cheese or the same amount of cream cheese. Philadelphia cream cheese makes a more stable frosting.
Heavy whipping cream - Should be cold, right from the fridge.
Salted caramel - It has to be at room temperature or it won't combine with the rest of the ingredients.
Powdered sugar - Don’t add more powdered sugar as it will make the frosting too thin.
Cooking tips
Measure all the ingredients using a digital kitchen scale, not cups. For the best results, it's better to measure ingredients correctly.
Make the caramel sauce in advance. It takes time for the caramel to cool down, so it's best if you make it the day or even days before.
Make the cake layers in advance. To save you time, you can also bake the cake one day before and store it wrapped in plastic wrap in the fridge overnight.
Bake your cake low and slow. There are many tricks you can use to bake a perfectly flat cake without dark, caramelized sides. Many use cake strips that you can buy online, but I prefer to lower the temperature in the oven. This way, the sides of your cake will bake slower, meaning they won't set before the center of your cake. Thus, the cake will rise evenly and it won't dome in the middle.
Use store-bought caramel. If you're not sure that you can handle making caramel, or you just want to save some time, you can use any store-bought caramel.
Apply the crumb coat first. It will help to stick all the crumbs to the cake, so they won't be in your final frosting layer.
Let the cake sit at room temperature for 20-30 minutes before serving. This is enough time to display the cake in front of your guests, blow out the candles, sing a birthday song, and let the cake layers soften after being in the fridge for a while.
What you need to know about mascarpone frosting
Mascarpone frosting is not stable! It's extremely delicious, not overly sweet, and it takes in the caramel flavor very well, but it's not a stable frosting. Since flavor, for me, is the most important part of any dessert, I went with what I felt best fits this particular cake. If you want, however, a cake that can withstand hot weather (it's not recommended to leave cakes in a hot room for more than 30 minutes, regardless of the frosting you use), you should apply a different frosting on top of the crumb coat just to help this cake withstand heat better. Swiss meringue buttercream or white chocolate ganache would be perfect choices!
You can also replace mascarpone with cream cheese. The flavor will be different, but your cake will be more stable and perfectly sweetened. Also, cream cheese frosting won't harden, which means it’s so much easier to cut into the cake.
Step by step directions
For the salted caramel
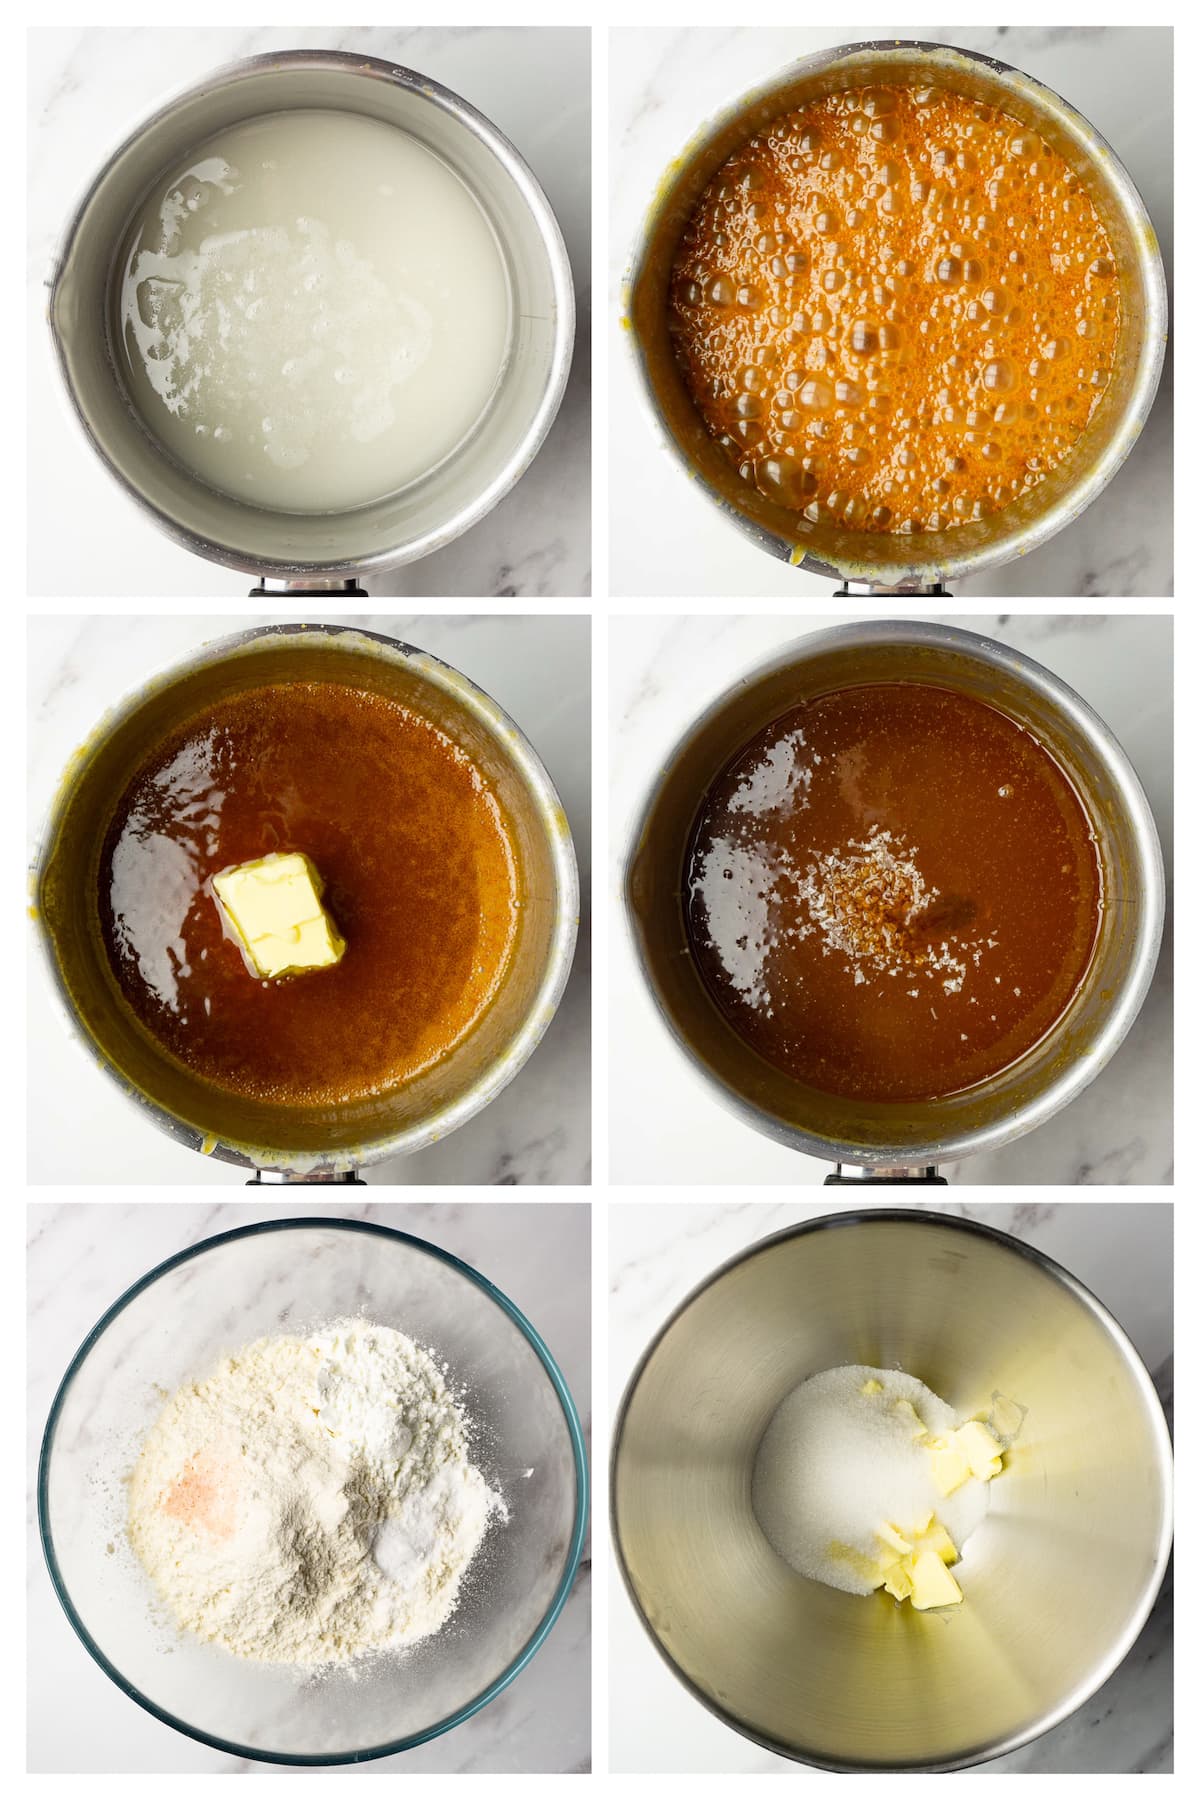
1. Add the sugar, water, and lemon juice into a heavy-bottomed saucepan, mix until it resembles wet sand, and place it on your stovetop over medium heat. Let the sugar melt and caramelize to a deep amber color.
2. Meanwhile, pour the heavy cream into a microwave-safe bowl and heat it until it’s hot, but not boiling.
3. When the sugar syrup has caramelized, pour in the hot heavy cream. Whisk vigorously until fully incorporated. Remove from the heat and add the butter. Whisk until completely incorporated.
4. Add the salt and vanilla extract and whisk.
5. Let it cool down to room temperature before using.
For the cake layers
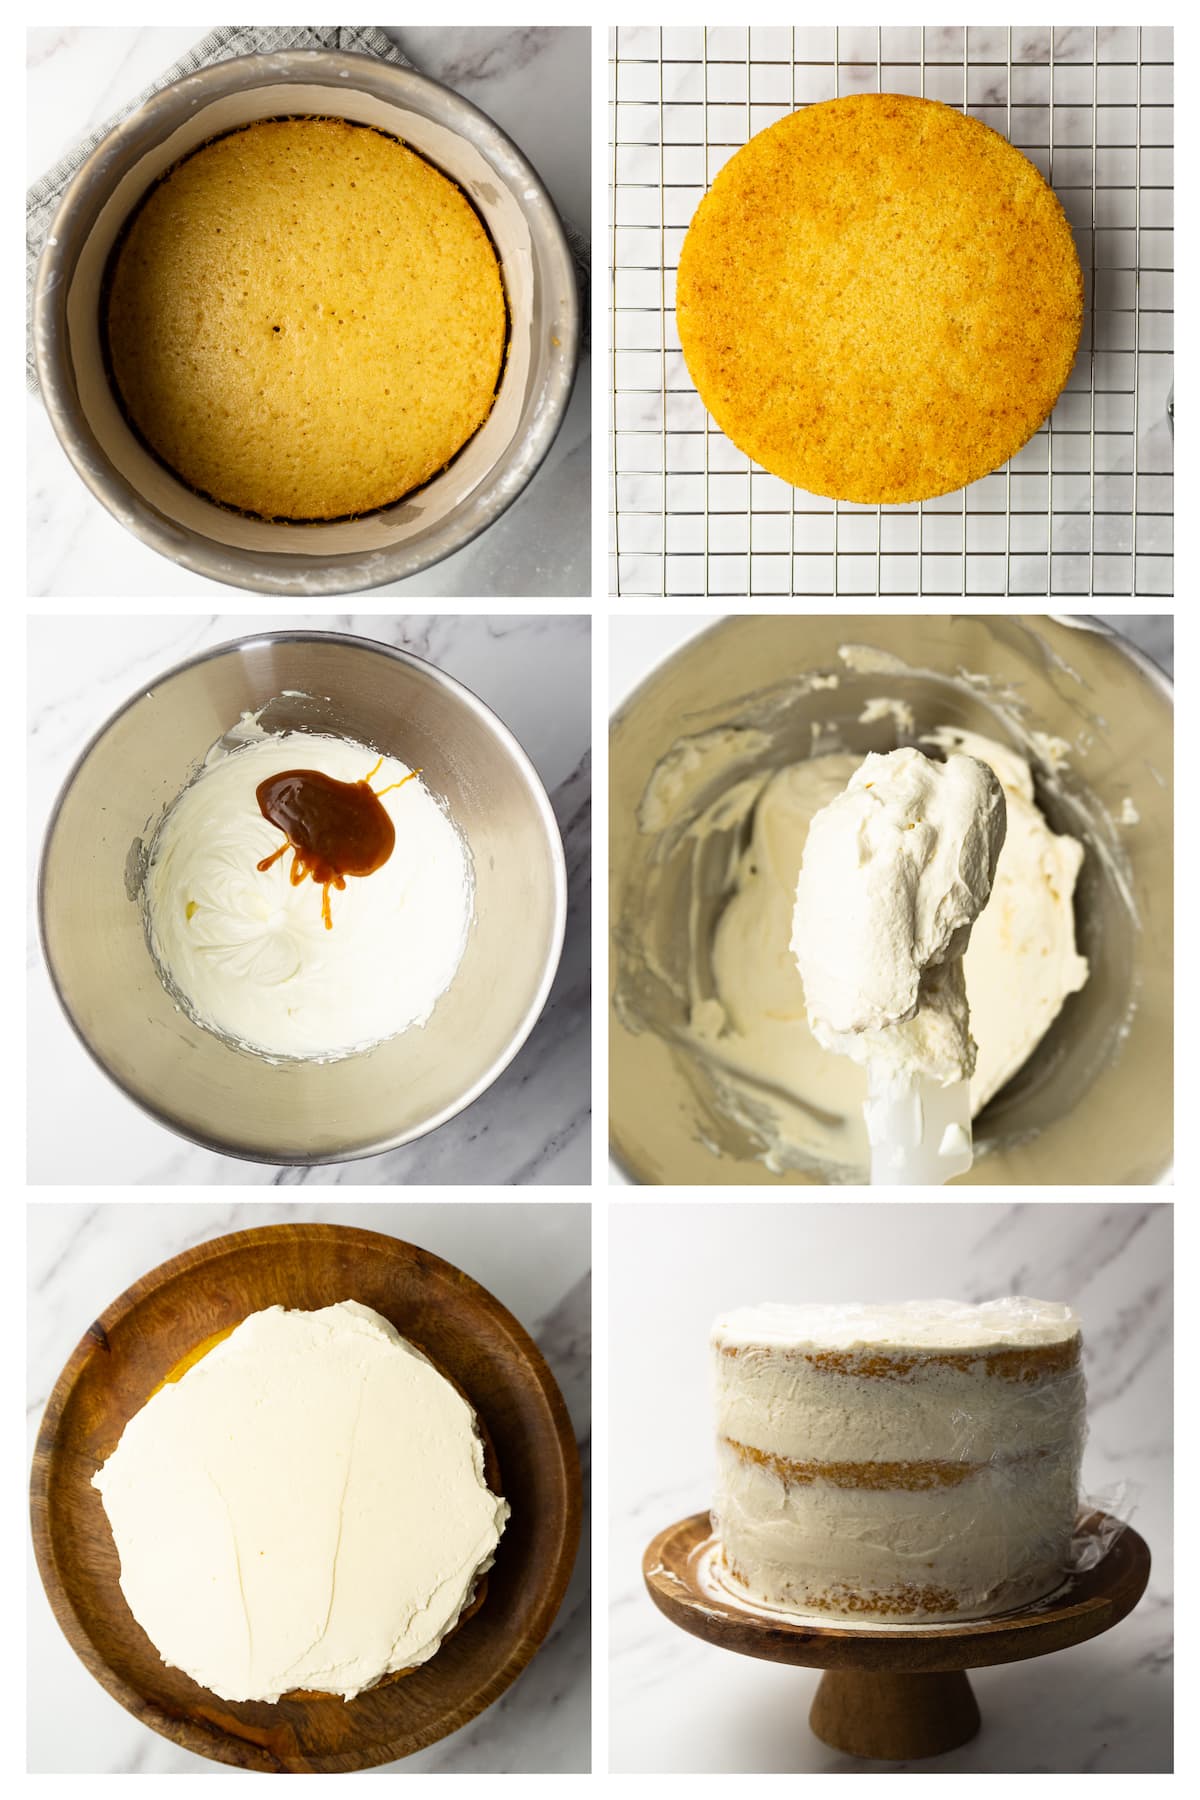
1. Preheat the oven to 160C (320F) and line the bottom and the sides of three 6-inch cake pans (15cm) with parchment paper.
2. In a bowl, combine the flour, corn starch, baking powder, and salt. Set aside.
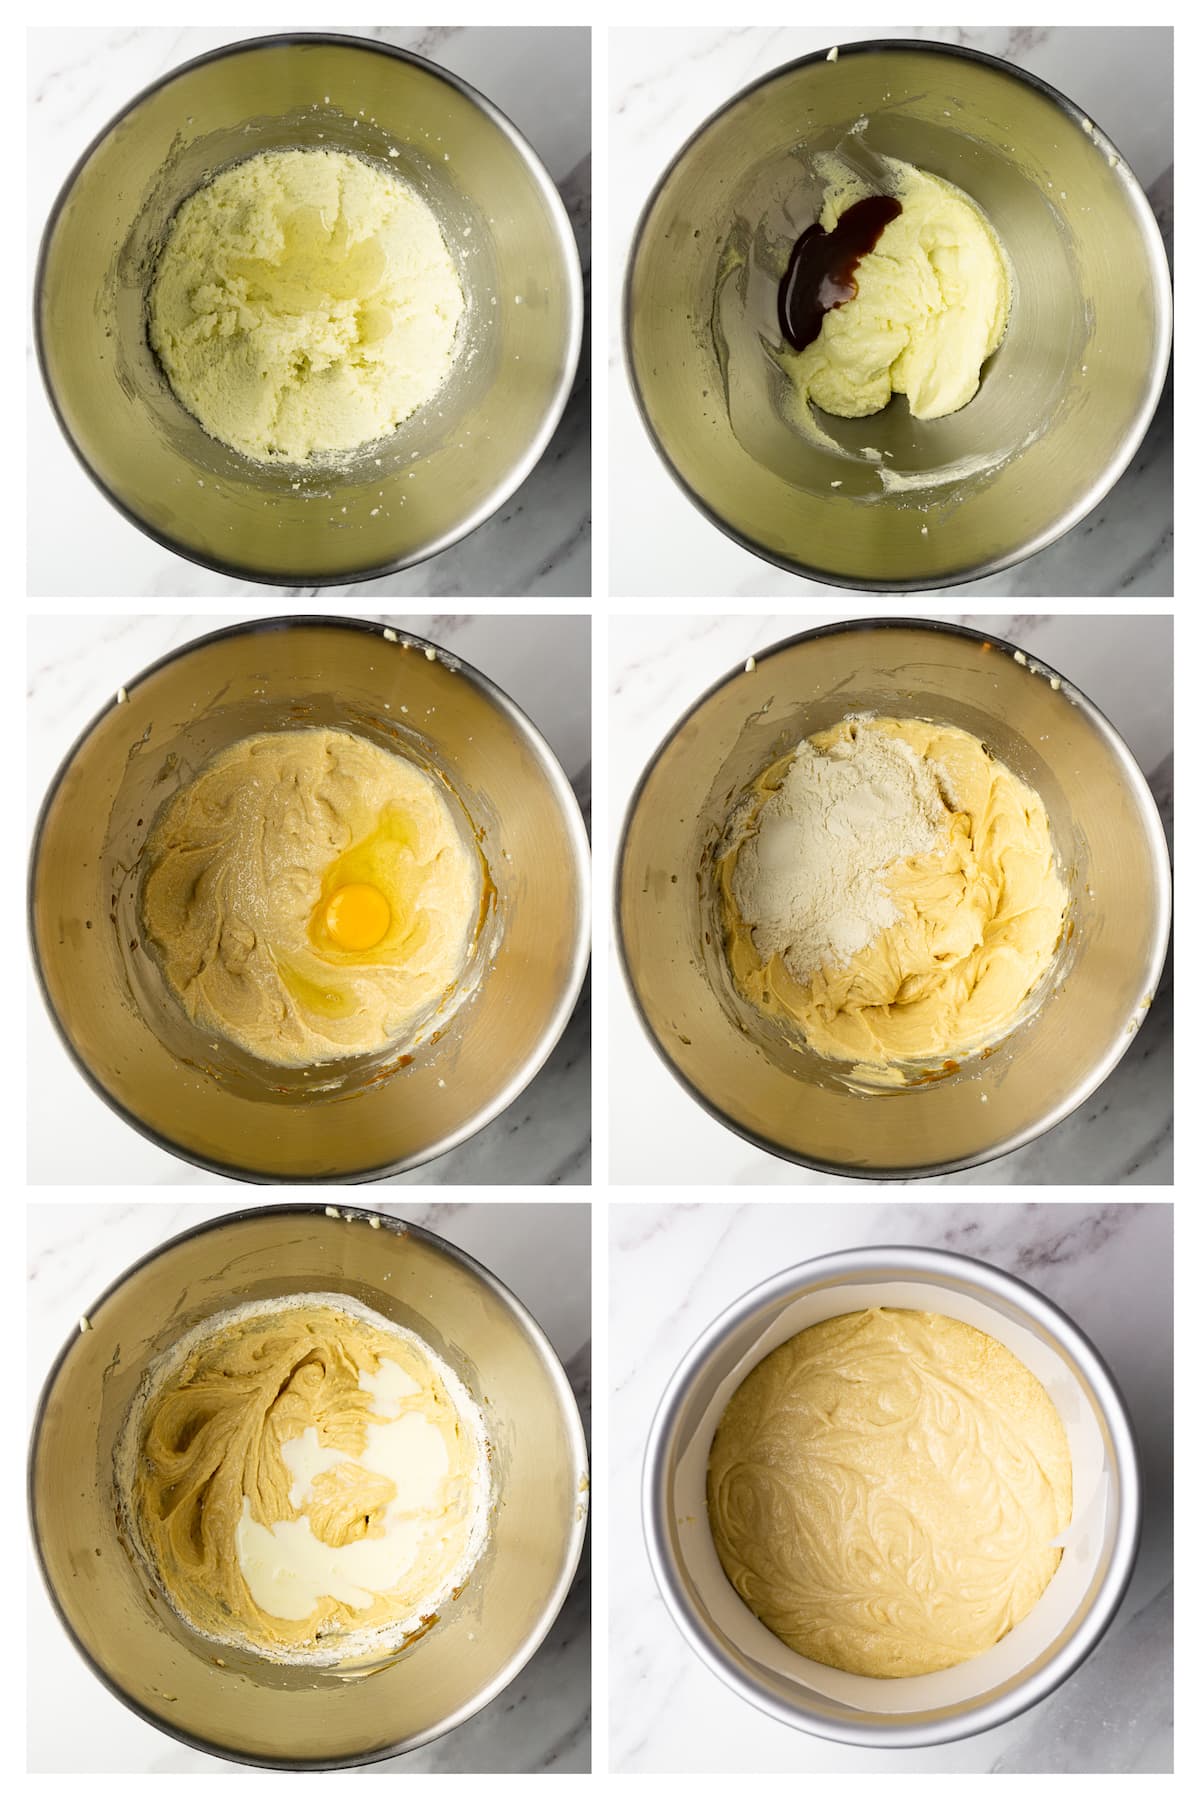
3. In a stand mixer fitted with a paddle attachment, add the butter and sugar. Beat on medium-high until pale and fluffy. Then add the oil and beat until fully incorporated. Scrape the bottom and the sides of the bowl and beat 10 extra seconds.
4. Add the caramel and beat until you reach a homogenous consistency. Add one egg at a time and beat until fully incorporated and fluffy.
5. Add the dry ingredients in three parts alternating with the milk, starting and ending with the dry ingredients while beating on low until a homogenous and silky consistency is reached. The pattern should look like this – dry/milk/dry/milk/dry.
6. Divide the batter evenly between the pans (around 300g per pan) and bake for around 30 minutes or until a toothpick inserted in the center comes out clean.
7. Remove from the oven and let cool down in the pans until safe to handle. Then, place the cakes onto a cooling rack to cool down completely.
For the frosting
1. Place the powdered sugar and heavy cream into the bowl of a stand mixer fitted with a whisk attachment. Whip on medium for 30 seconds, then on medium-high to medium peaks.
2. Place the mascarpone cheese into a small bowl and stir with a spoon to soften the mixture . Then, add the cheese in three parts to the whipped cream and whip on medium until fully incorporated and it forms stiff peaks. It will take 1-2 minutes. Check the texture every 20-30 seconds to avoid overwhipping.
3. Add the salted caramel and whip for 10 seconds or just until fully incorporated.
Assembling the cake
1. Place the first layer on a plate and add cream on top. Spread evenly and place the second layer on top. Repeat the process.
2. Apply a crumb coat and wrap the cake in plastic wrap. Place into the fridge for 2 hours to set. The rest of the cream should be stored in the fridge during this time, covered with plastic wrap that touches the cream completely.
3. When time is up, remove the cake from the fridge and apply an extra layer of cream. I went with the semi-naked look.
4. Decorate as desired.
Flavor variations
In my opinion, this cake is perfect in terms of flavors. It tastes like pure caramel and it's difficult to think of variations.
However, you can use another, more stable frosting which also will give the cake another flavor. You can use Swiss meringue buttercream or Cream cheese frosting, as they are more stable and not overly sweet like American buttercream.
Thinking of other options, you can sprinkle crushed walnuts or pecans in between the cake layers for crunch and flavor, or decorate the top of your cake with fresh strawberries (which is the only berry that fits caramel).
Also, thin banana slices would be amazing in between the cake layers. YUM!
Decoration variations
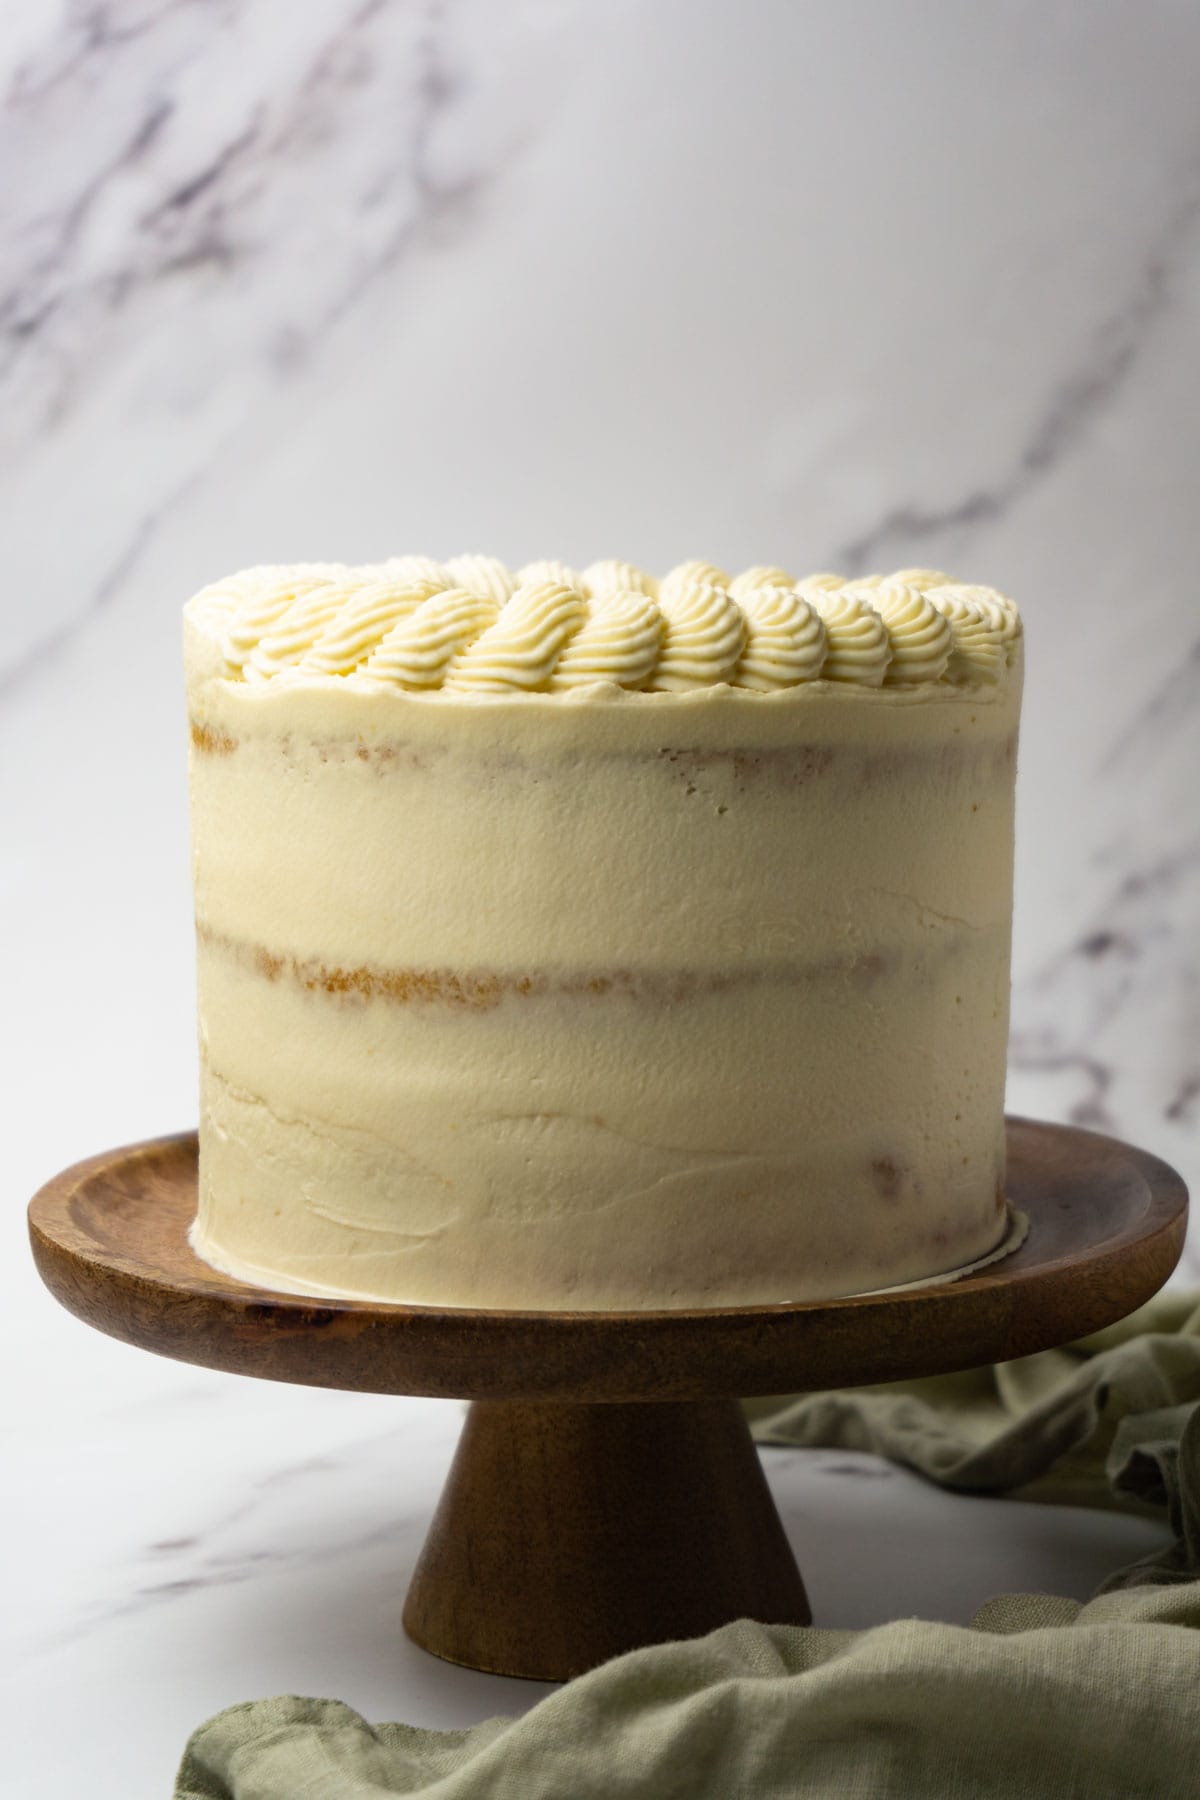
First of all, I didn't cover my cake with a thick layer of frosting, which gave it a semi-naked and stylish look. If you like to completely cover your cake with frosting, you can do so.
Then, I decorated my cake by piping out a beautiful border on the top of the cake using a piping bag and a Wilton 4B nozzle. For the last touch, I poured the caramel leftovers right into the center and gently leaned the cake in all directions to let the caramel fill all gaps inside the border.
You can, of course, decorate the cake the way you want. Adding some color to your frosting can make your homemade caramel cake more festive, or you can decorate it with colorful sprinkles.
Instead of pouring the caramel only in the center of your cake, you can make caramel drips. Just make sure that you chill your cake very well in the fridge before applying the caramel on top of the cake. I suggest you frost your cake and leave it in the fridge for at least 2 hours, then transfer it to the freezer for 15 minutes.
Meanwhile, prepare your caramel leftovers. If it's too thick, heat it in a microwave for 10 seconds or until it’s just pourable but not too warm and thin. It should be barely warm or it will melt the frosting. Try to apply one drip before applying a large amount. This way, if your caramel is too warm, you'll see it and it will be easy to fix.
FAQ
Store assembled cake in the cake box or wrapped with plastic wrap on a serving plate in the fridge for 3-4 days.
Once you assemble the cake, it's not possible to freeze it. However, you can bake your cake layers and freeze them for up to 2 months. Wrap each cake layer in plastic wrap and then in a piece of foil to prevent frostbite. Before using, remove the foil and leave it to thaw in the fridge overnight.
Yes, you can! Store it in an air-tight container in the fridge for up to 2 weeks or in the freezer for up to 3 months. Thaw in the fridge overnight before using it. If it splits, gently reheat and whisk to emulsify again.
More cake recipes
Recipe card
Caramel cake
Equipment
- Digital kitchen scale
- 3 6" (15cm) cake pan
- Stand mixer or hand mixer and a large mixing bowl
- Parchment paper
- Rubber spatula
Ingredients
For the caramel
- 200 g granulated sugar
- 50 ml water
- ½ teaspoon lemon juice
- 150 ml heavy cream
- 50 g unsalted butter cubed and cold
- 1 teaspoon vanilla extract optional
- ½ teaspoon sea salt flakes
For the cake layers
- 200 g all-purpose flour
- 20 g corn starch
- 2 teaspoon baking powder
- 1 teaspoon salt
- 100 g unsalted butter at room temperature
- 15 g oil
- 150 g white granulated sugar
- 2 large eggs at room temperature
- 180 ml whole milk at room temperature
- 100 g salted caramel at room temperature
For the frosting
- 500 g mascarpone cheese cold
- 60 g powdered sugar
- 100 ml heavy whipping cream cold
- 50 g salted caramel at room temperature
Instructions
For the caramel
- Add the sugar, water, and lemon juice into a heavy-bottomed saucepan, mix until it resembles wet sand, and place it on your stovetop. Let the sugar melt and caramelize to a deep amber color over medium-high heat.
- Meanwhile, pour the heavy cream into a microwave-safe bowl and heat it until it’s hot, but not boiling.
- When the sugar syrup has caramelized, pour in the hot heavy cream (do it in 2-3 batches to prevent the mixture bubbling too much). Whisk vigorously until fully incorporated. Remove from the heat and add the butter. Whisk vigorously until completely incorporated.
- Add the salt and vanilla extract and whisk.
- Use right away or pour into a clean, dry mason jar and store for future use.
For the cake layers
- Preheat the oven to 160C (320F) and line the bottom and the sides of three 6” (15cm) round cake pans with parchment paper.
- In a bowl, combine the flour, corn starch, baking powder, and salt. Set aside.
- In a stand mixer fitted with a paddle attachment (or you can use a large mixing bowl and a hand mixer), add the butter and sugar. Beat on medium-high until pale and fluffy. Then, add the oil and beat until fully incorporated. Scrape the bottom and the sides of the bowl and beat 10 extra seconds.
- Add the caramel and beat until you reach a homogenous consistency. Add one egg at a time and beat until fully incorporated and fluffy. Scrape the bottom and the sides of the bowl.
- Add the dry ingredients in three parts alternating with the milk, starting and ending with the dry ingredients, while beating on low until a homogenous and silky consistency is reached. The pattern should look like this – dry/milk/dry/milk/dry.
- Divide the batter evenly between the pans (around 300g per pan) and bake for around 30 minutes or until a toothpick inserted in the center comes out clean.
- Remove from the oven and let cool down in the pans until safe to handle. Then, place the cakes onto a cooling rack to cool down completely.
- If you want to assemble the cake the next day, wrap each cake layer in plastic wrap and refrigerate overnight.
For the frosting
- Place the powdered sugar and heavy cream into the bowl of a stand mixer fitted with a whisk attachment (or use a mixing bowl and a hand mixer). Whip on medium for 30 seconds, then on medium-high to medium peaks.
- Place the mascarpone cheese into a small bowl and stir with a spoon to soften the mixture. Then, add the cheese to the whipped cream in three parts and whip on medium until fully incorporated and forms stiff peaks. It will take 1-2 minutes. Check the texture every 20-30 seconds to avoid overwhipping.
- Add the salted caramel and whip for 10 seconds or just until fully incorporated.
Assembling the cake
- Place the first layer on a plate and add cream on top. Spread evenly and place the second layer on top. Repeat the process.
- Apply a crumb coat and wrap the cake in plastic wrap. Place into the fridge for 2 hours to set. The rest of the cream should be stored in the fridge during this time, covered with plastic wrap that touches the cream completely.
- When the time is up, remove the cake from the fridge and apply an extra layer of cream. I went with the semi-naked look.
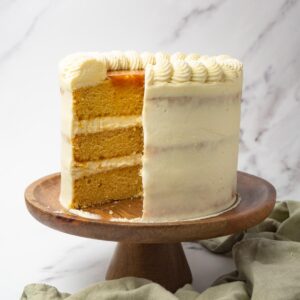
- Decorate as desired. I created a beautiful border on the top of the cake using the Wilton 4B nozzle and then flooded the center with the rest of the caramel (should be pourable but not too warm, or your cream border will melt).

Susan
I don't have 6" cake pans. Can you give the measurements for 9" pans?
Anna
Hi Susan! You need to multiply each ingredient by 2,4 to get new measurements. NOTE that this doesn't apply to the frosting and salt caramel ingredients, only to the cake batter.
Let's take flour as an example. It says that you need 200g of all-purpose flour for a 6" cake. So you should multiply 200 by 2,4 (200 x 2,4 = 480g of flour you'll need to bake a 9" cake). You'll also need to adjust the baking time.
I hope it will help!
Ashley
Hello!
I have made the caramel according to the recipe and it tastes a bit strong. not burned, but just strong if that makes sense... will this effect the cake and frosting? just wondering what you think?
Thanks!
Anna
Hi Ashley! Thank you for your comment! It's a standard caramel recipe, and if you didn't burn it, it has a smooth texture and deep amber color, and it doesn't taste bitter - you've done it right. You can add it to the cake batter and frosting.
As for the flavor intensity, some people like it when the caramel is a bit bitter, so they burn it on purpose. Some people like it when it's undercooked, with a lighter color and runnier consistency. If you are worried that your cake will have a "strong" caramel flavor which is just a standard caramel flavor for me, you can make the caramel again and add heavy cream a bit earlier to the sugar syrup (when it's lighter in color). Another option is to buy caramel that you like and bake with it.