
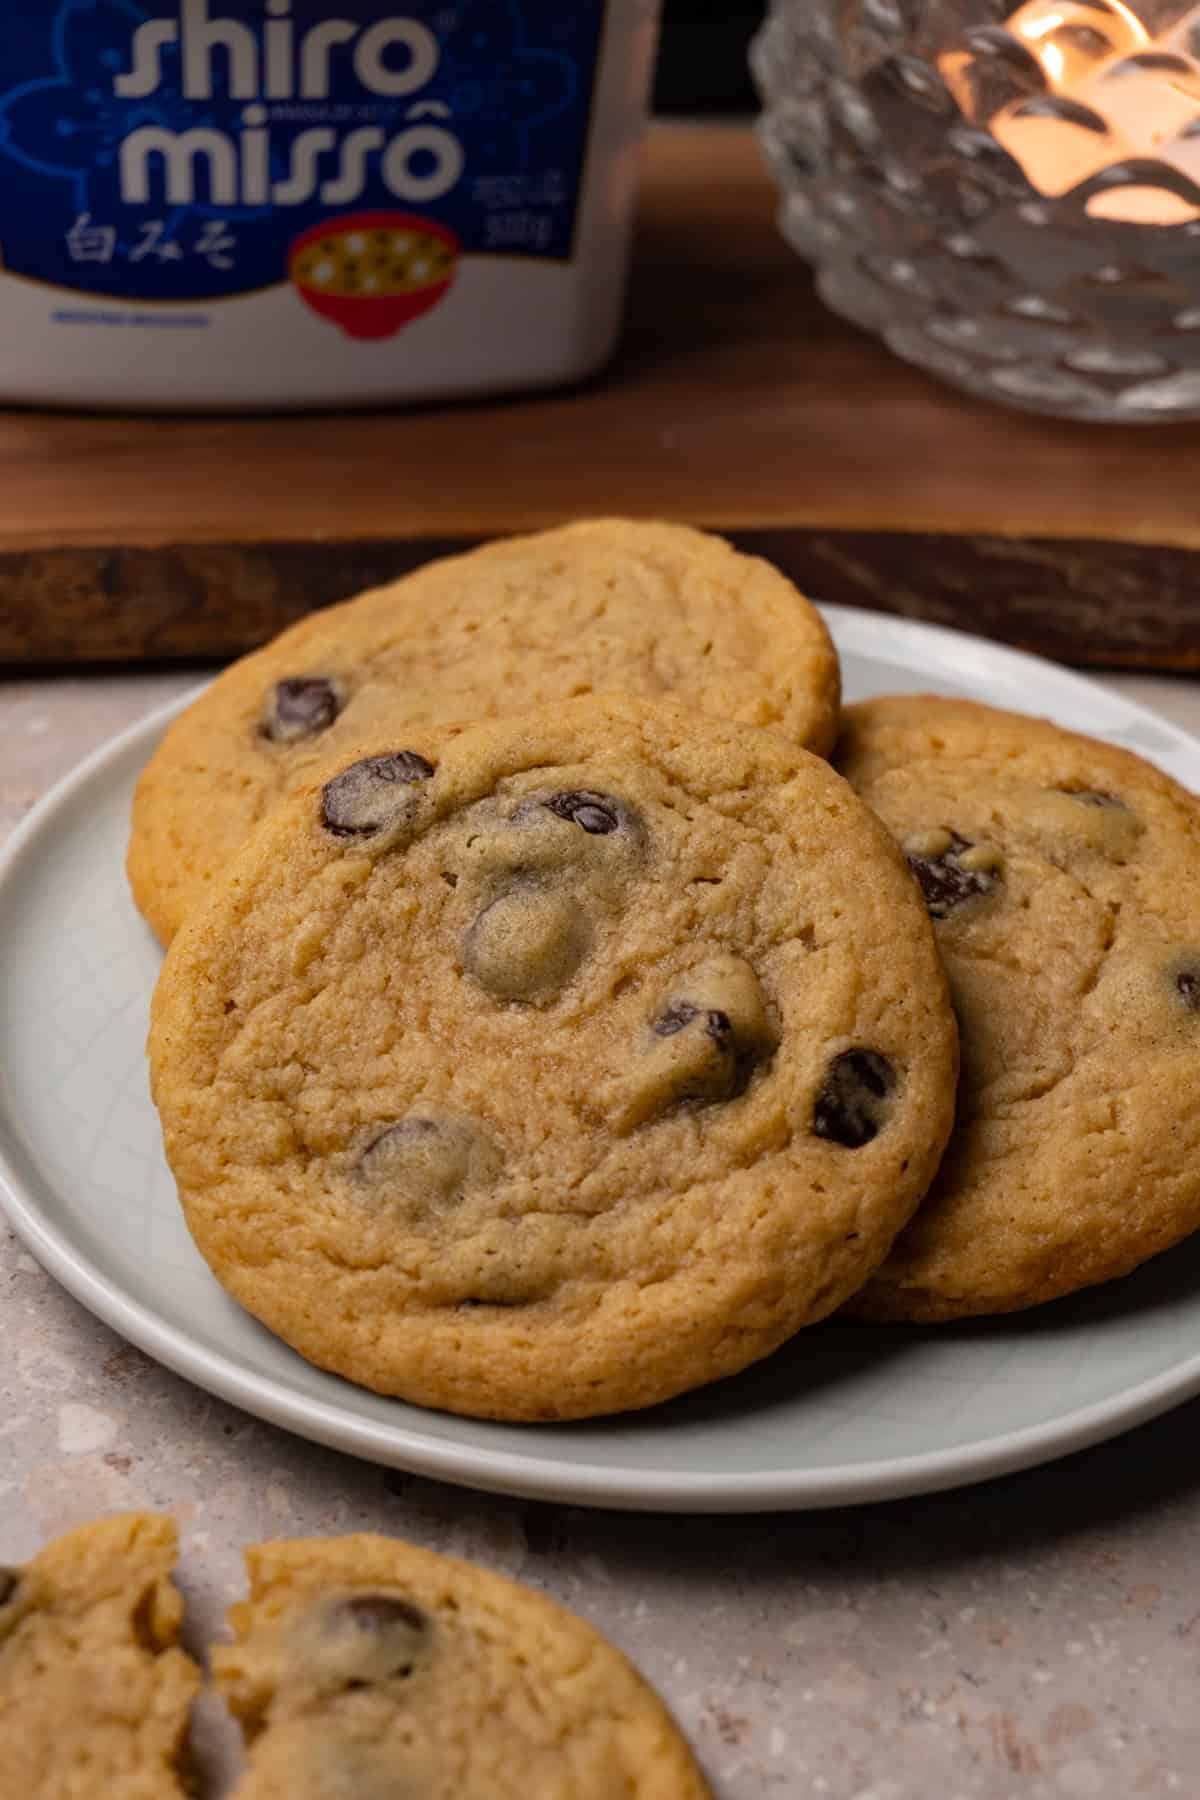
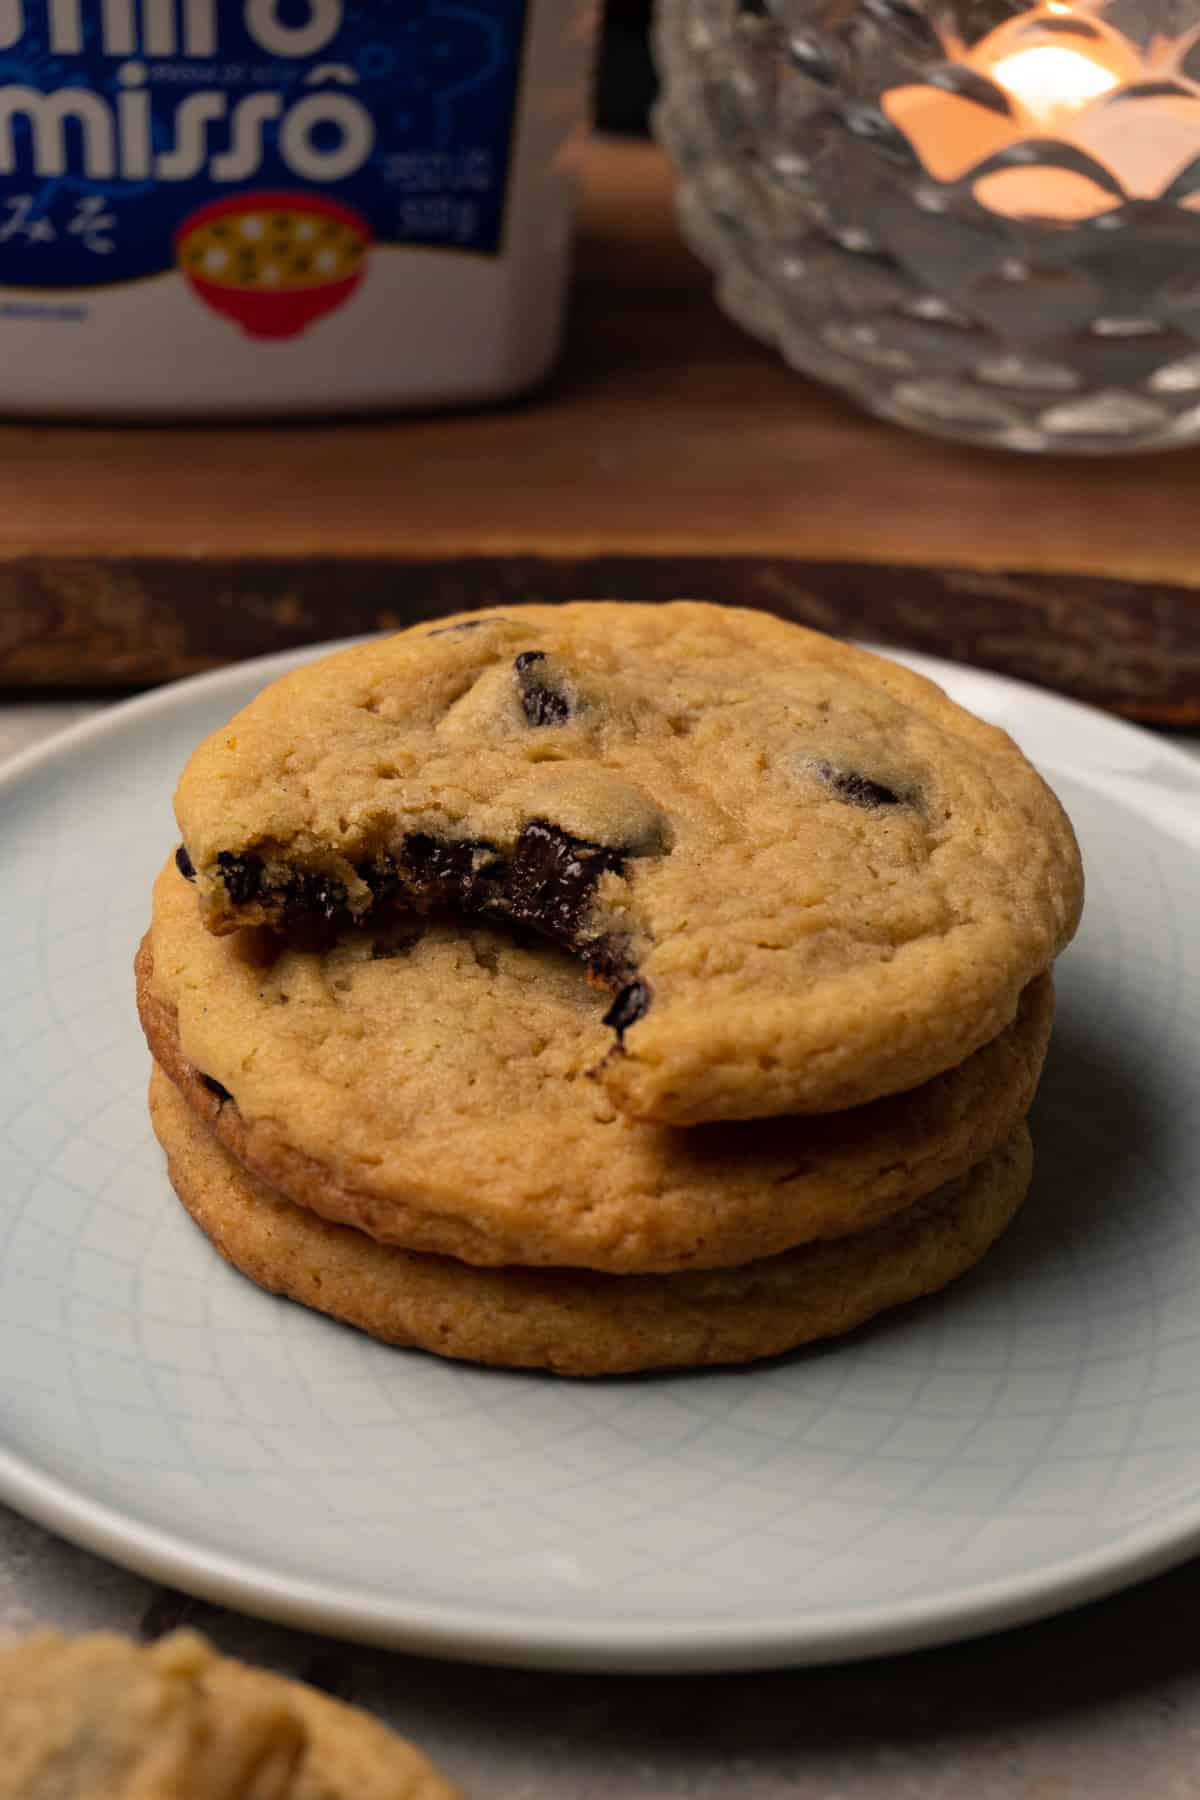
These miso cookies are chewy, packed with chocolate, and honestly one of the best things to come out of my oven. If you haven't baked with miso before, this is a great place to start.
What Do Miso Cookies Taste Like?
I know it sounds weird, but hear me out. You can't actually taste the miso - what it does is add a little hit of umami that stops the cookies from being just sweet. The chocolate tastes richer, the brown sugar comes through more, and the whole thing just tastes really, really good. People will ask you what's in them.
Ingredients You Will Need
Bread flour: Using bread flour instead of all-purpose gives these cookies a slightly chewier texture thanks to the higher protein content. It's what helps them hold their shape while staying soft and tender in the center.
Baking soda and baking powder: The combination of both leavening agents gives the cookies a good rise and a slightly crispy edge while keeping the centers soft and chewy.
Unsalted butter: Bring it to room temperature before using.
White granulated sugar and light brown sugar: The combination of both sugars is important. White sugar helps the cookies spread and gives the edges crispness, while brown sugar adds moisture, chewiness, and a deeper, more caramel-like sweetness that works beautifully with the miso.
Vanilla extract: Rounds out the flavor and adds warmth that complements the miso and chocolate.
White miso paste: The star ingredient. White miso is the mildest variety. It adds depth and a subtle saltiness without being overpowering. Don't substitute with red or brown miso, which are much stronger and will dominate the flavor of the cookie.
Egg: Binds the dough together and adds richness.
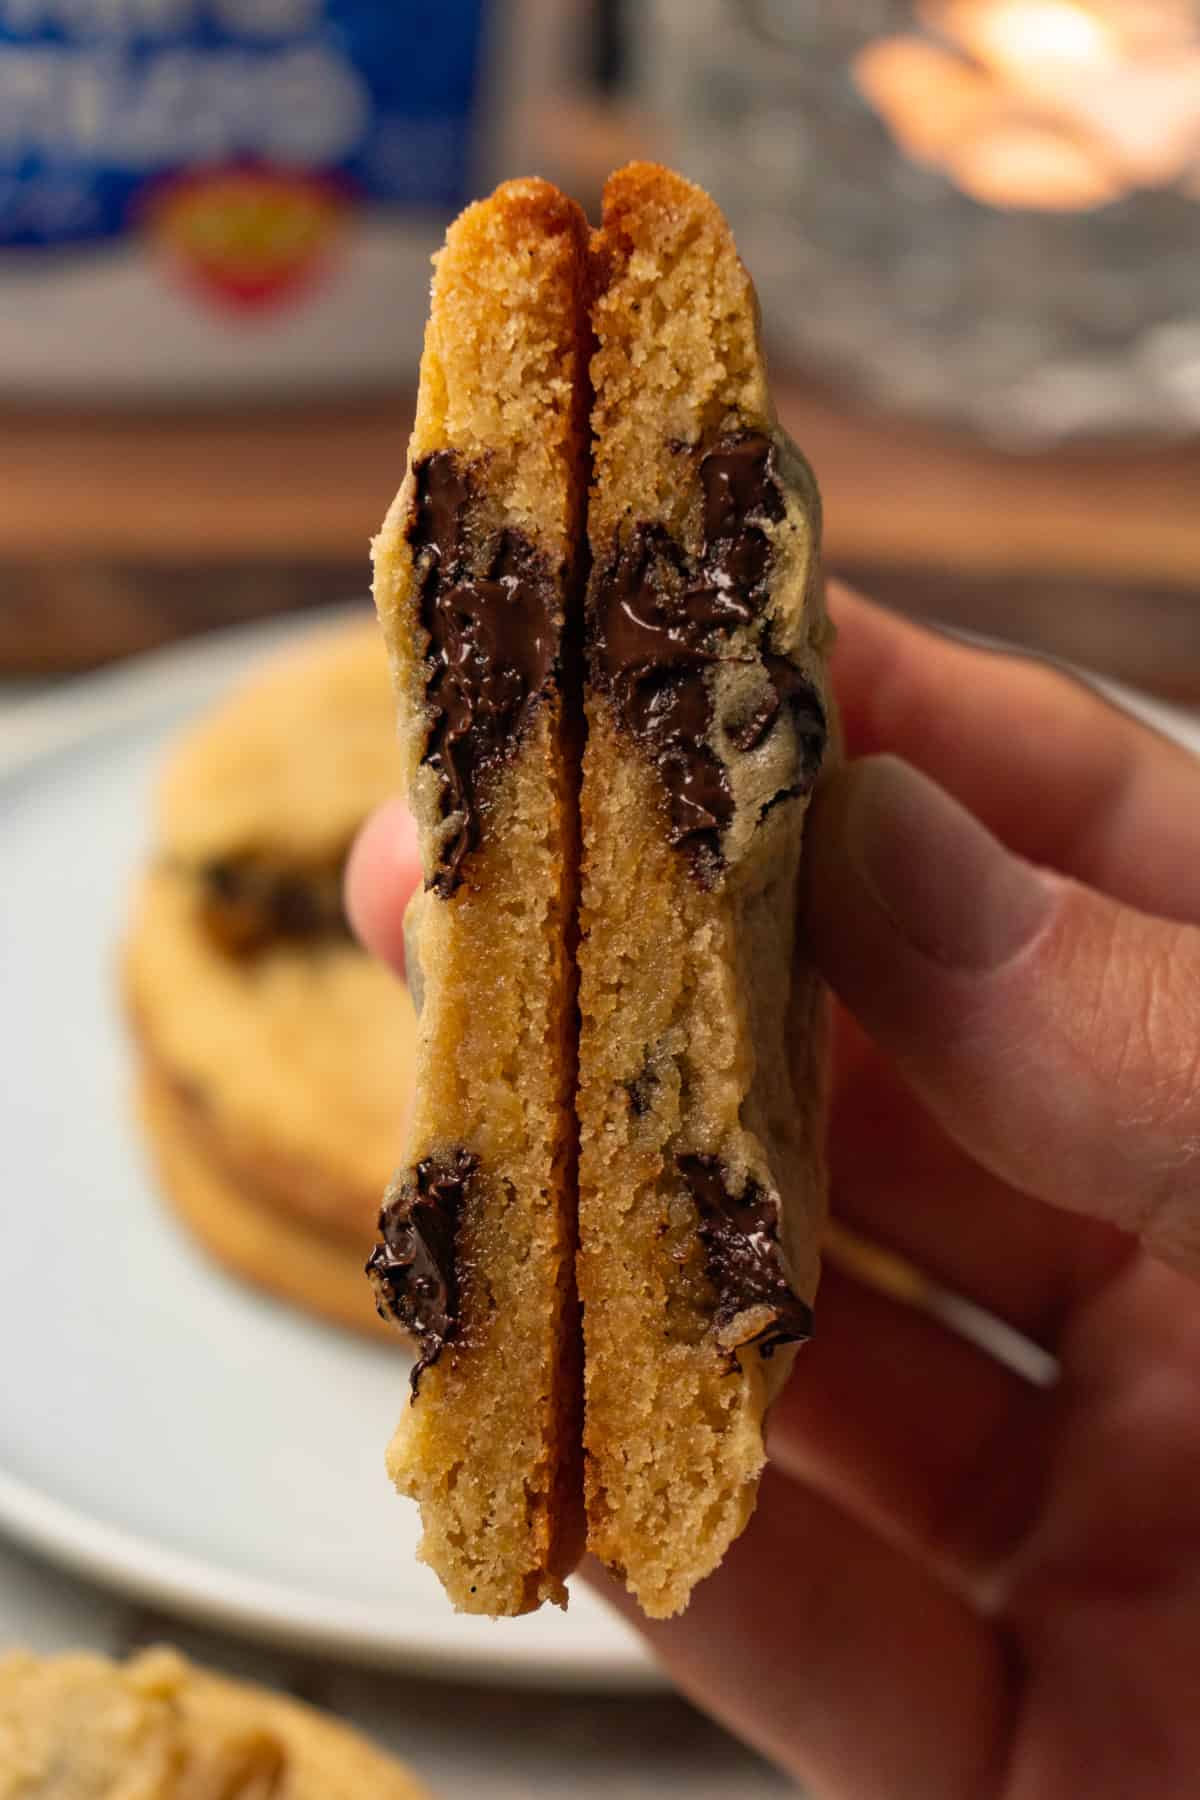
Semi-sweet chocolate chips: Semi-sweet is the perfect choice here. Milk chocolate would be too sweet alongside the miso, and dark chocolate too bitter. The slight bitterness of semi-sweet chocolate is the ideal counterpoint to the savory, caramel notes of the miso and brown sugar.
Cooking Tips
Don't overmix once the flour goes in. Mix on low and stop as soon as the dry ingredients are just incorporated. Overmixing develops too much gluten, which makes the cookies tough rather than tender and chewy.
Use bread flour for the best texture. All-purpose flour will work in a pinch, but bread flour gives you that distinctly chewy, slightly dense texture that makes these cookies so satisfying. It's worth picking up a bag if you don't already have it.
Use a cookie scoop for even results. Portioning the dough into even balls ensures all the cookies bake at the same rate. A 3 tablespoon scoop is ideal for this recipe and gives you a generous, bakery-style cookie.
Don't overbake. This is the most important tip for chewy cookies. Pull them out of the oven when the edges are set and lightly golden but the centers still look slightly underdone - they will continue to cook on the hot baking sheet as they cool. Overbaked miso cookies lose their chewiness quickly.
Let them cool on the baking sheet. Resist the urge to move them immediately. Five minutes on the baking sheet allows them to firm up enough to transfer without breaking, and the residual heat finishes cooking the centers perfectly.
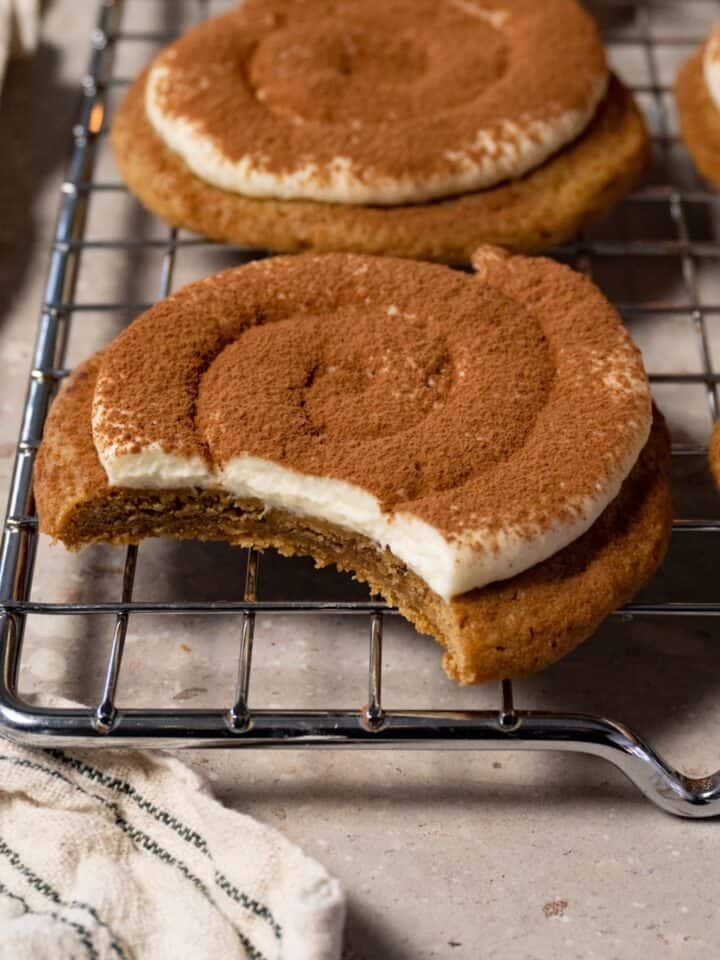
Are you looking for more delicious cookie recipes? Look no further! Check out these Chewy Peanut Butter Cookies, these Molasses Cookies with brown butter icing, or these Tiramisu cookies with cream topping.
How to Make Miso Cookies
Mix the dry ingredients: Whisk together the flour, baking soda, and baking powder in a bowl and set aside.
Make the dough: Beat the butter, both sugars, and vanilla extract together until a paste-like consistency. Add the miso paste and beat until incorporated, then add the egg and beat until well combined.
Combine: Add the dry ingredients and mix on low until just combined. Fold in the chocolate chips.
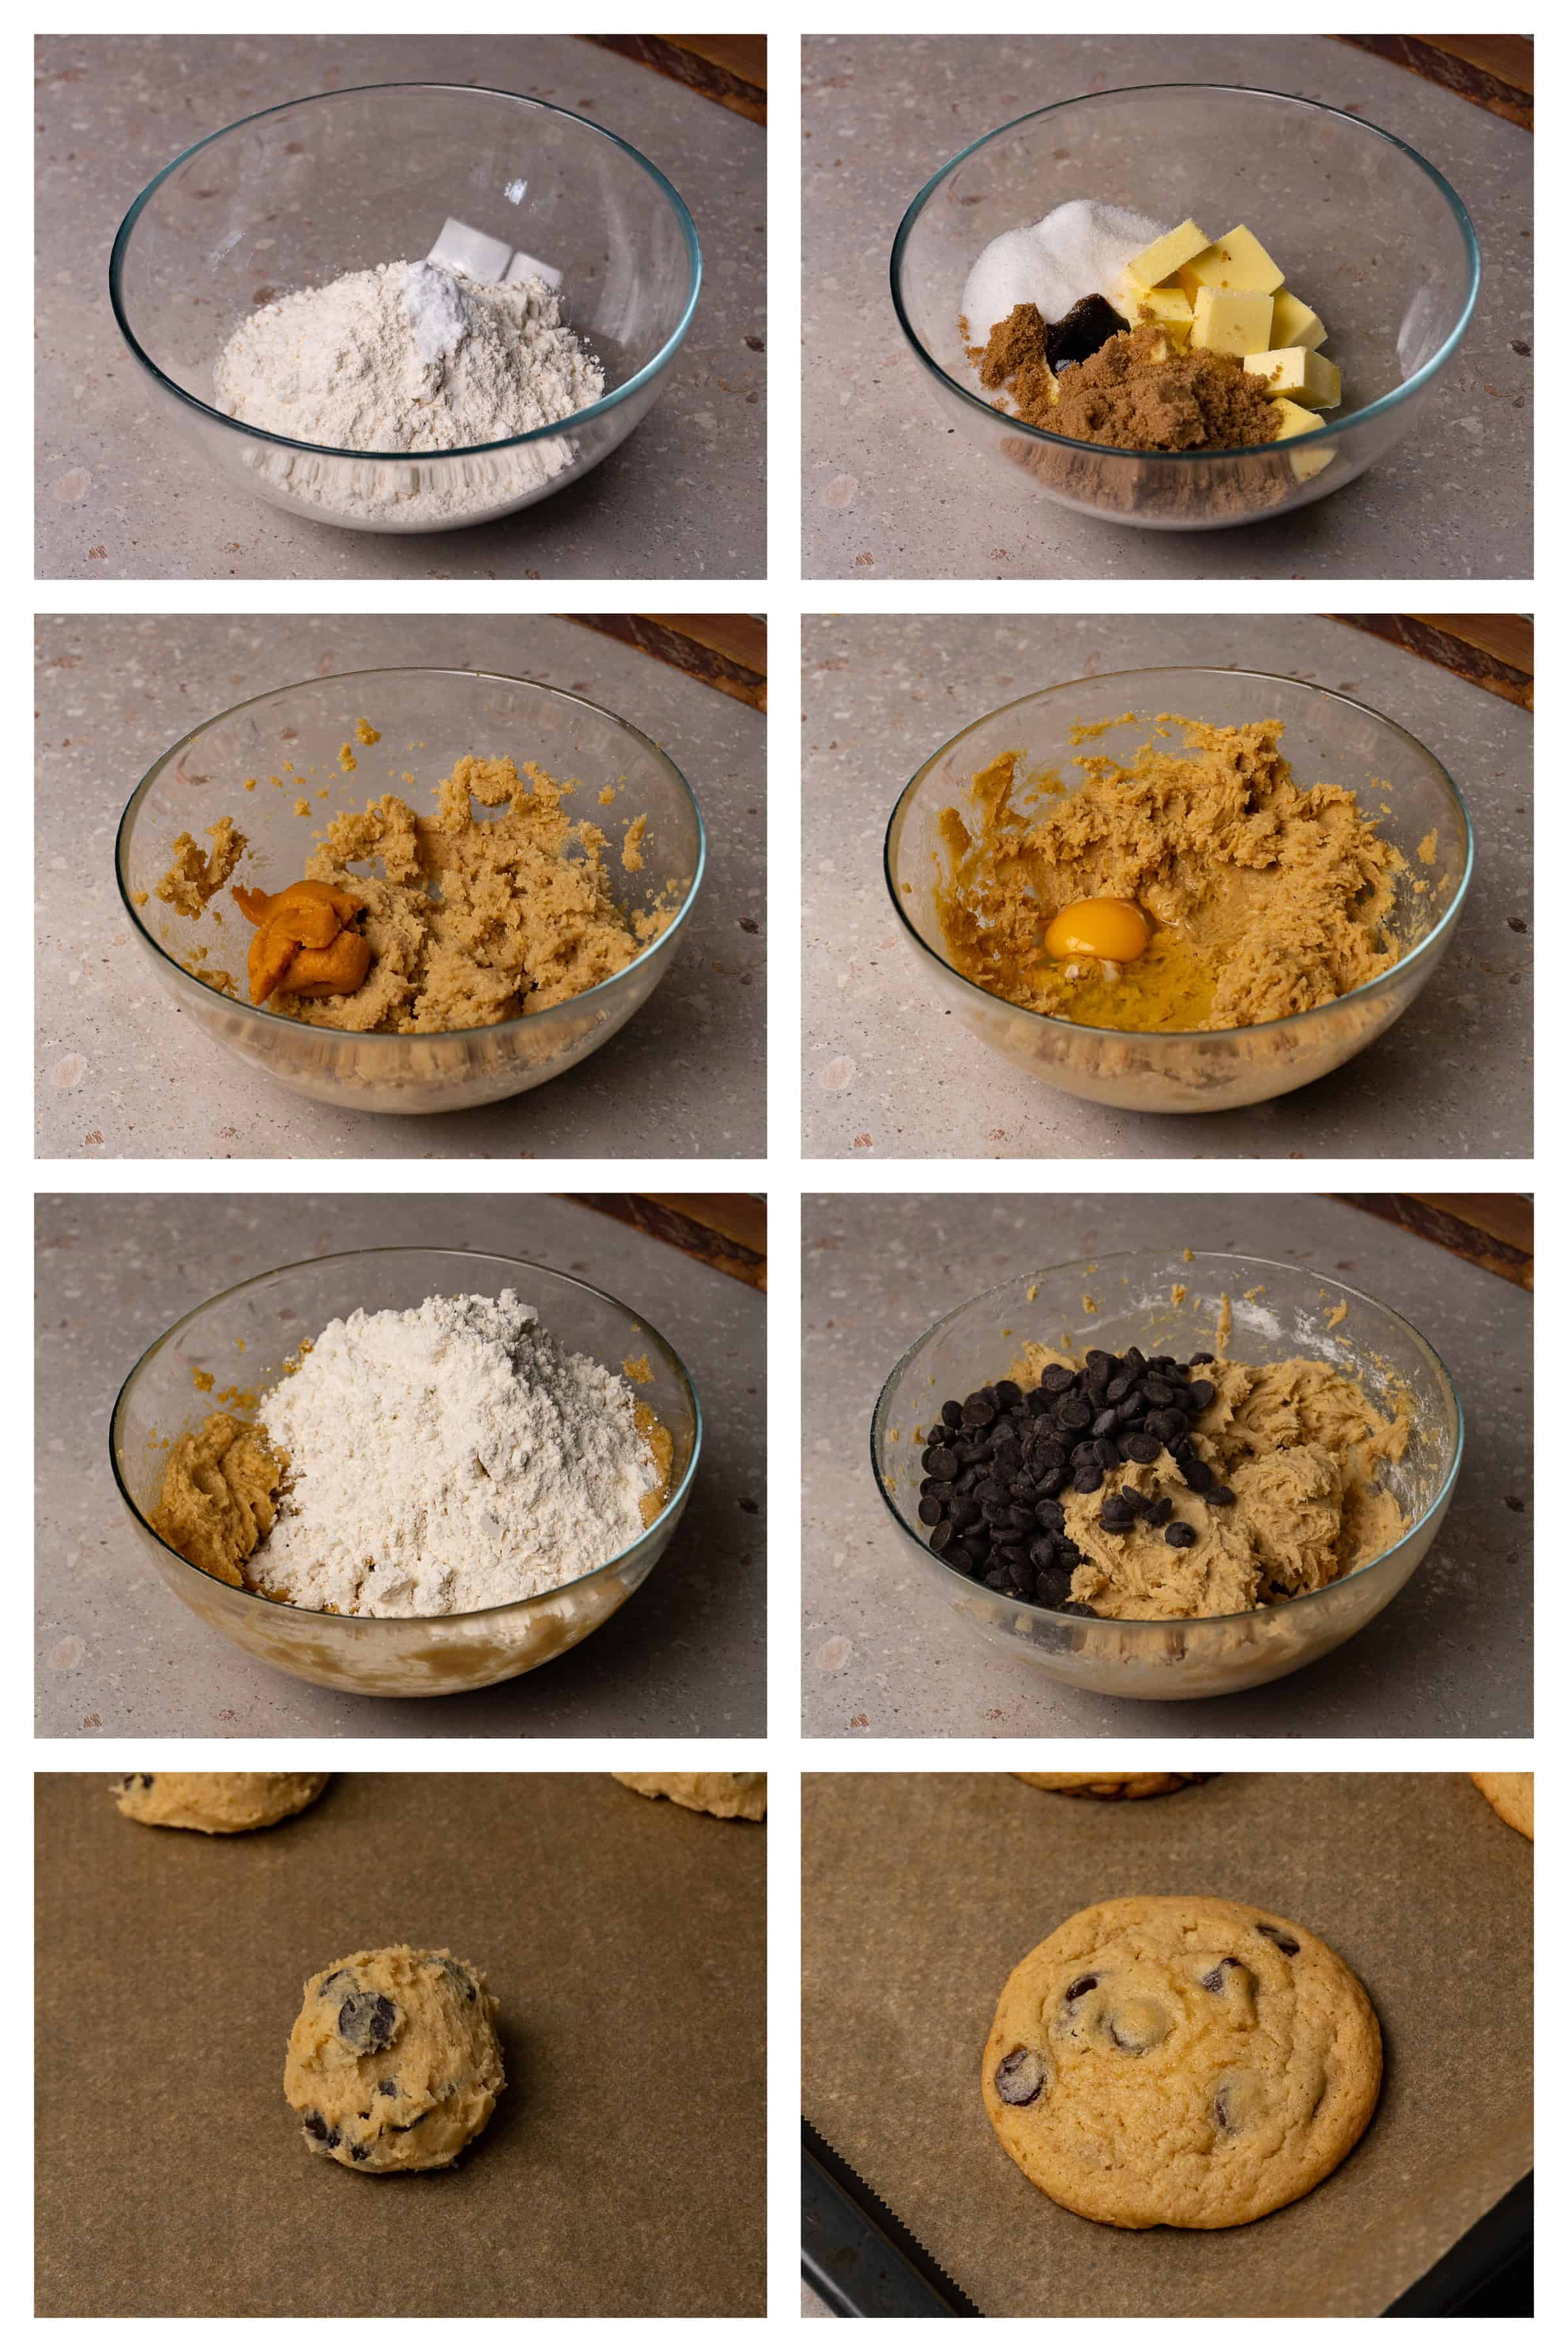
Portion: Scoop the dough into 16 balls and place on lined baking sheets with enough space for spreading.
Bake: Bake at 355F (180C) for 10-12 minutes until the edges are set and lightly golden but the centers still look slightly underdone. Cool on the baking sheet for 5 minutes before transferring to a wire rack.
Flavor Variations
Brown butter: Brown the butter like I did for my Brown butter chocolate chip cookies before beating it with the sugars for an extra layer of nutty, toasty depth that amplifies the caramel notes of the miso beautifully.
Sea salt finish: Sprinkle a small pinch of flaky sea salt on top of each cookie just before baking. The salt enhances every other flavor in the cookie and makes the chocolate taste richer and more intense.
White or milk chocolate chocolate: Swap the semi-sweet chocolate chips for white or milk chocolate chips for extra sweetness.
Storing Tips
Store the cookies in an airtight container at room temperature for up to 5 days. They actually get chewier on day two as the moisture in the dough redistributes, so they're well worth making ahead. To freeze, place the unbaked dough balls on a baking sheet, freeze until solid, then transfer to a freezer bag and freeze for up to 3 months. Bake straight from frozen, adding 2-3 minutes to the baking time.
Recipe card

Miso Cookies
Equipment
- Digital kitchen scale
- 2 Mixing bowls
- Hand mixer
- 3 tablespoon cookie scoop
- Parchment paper
Ingredients
- 200 g bread flour
- ½ teaspoon baking soda
- ½ teaspoon baking powder
- 140 g unsalted butter at room temperature
- 90 g white granulated sugar
- 90 g light brown sugar
- 1 teaspoon vanilla extract
- 45 g white miso paste
- 1 large egg at room temperature
- 150 g semi-sweet chocolate chips
Instructions
- Preheat the oven to 355F (180C) and line two baking sheets with parchment paper.
- In a bowl, whisk together the flour, baking soda, and baking powder. Set aside.
- In a large mixing bowl, beat the butter, granulated sugar, brown sugar, and vanilla extract together with a hand mixer on medium speed until a paste-like consistency.
- Add the miso paste and beat until fully incorporated. Then add the egg and beat again until well combined.
- Add the dry ingredients and mix on low until just combined.
- Fold in the chocolate chips with a rubber spatula.
- Scoop the dough into 16 balls (I use a 3 tablespoon cookie scoop for that) and place them on the prepared baking sheets, leaving enough space between each one for spreading.
- Bake for 10-12 minutes or until the edges are set and lightly golden but the centers still look slightly underdone. They will firm up as they cool.
- Remove from the oven and allow to cool on the baking sheet for 5 minutes before transferring to a wire rack.


Leave a comment