
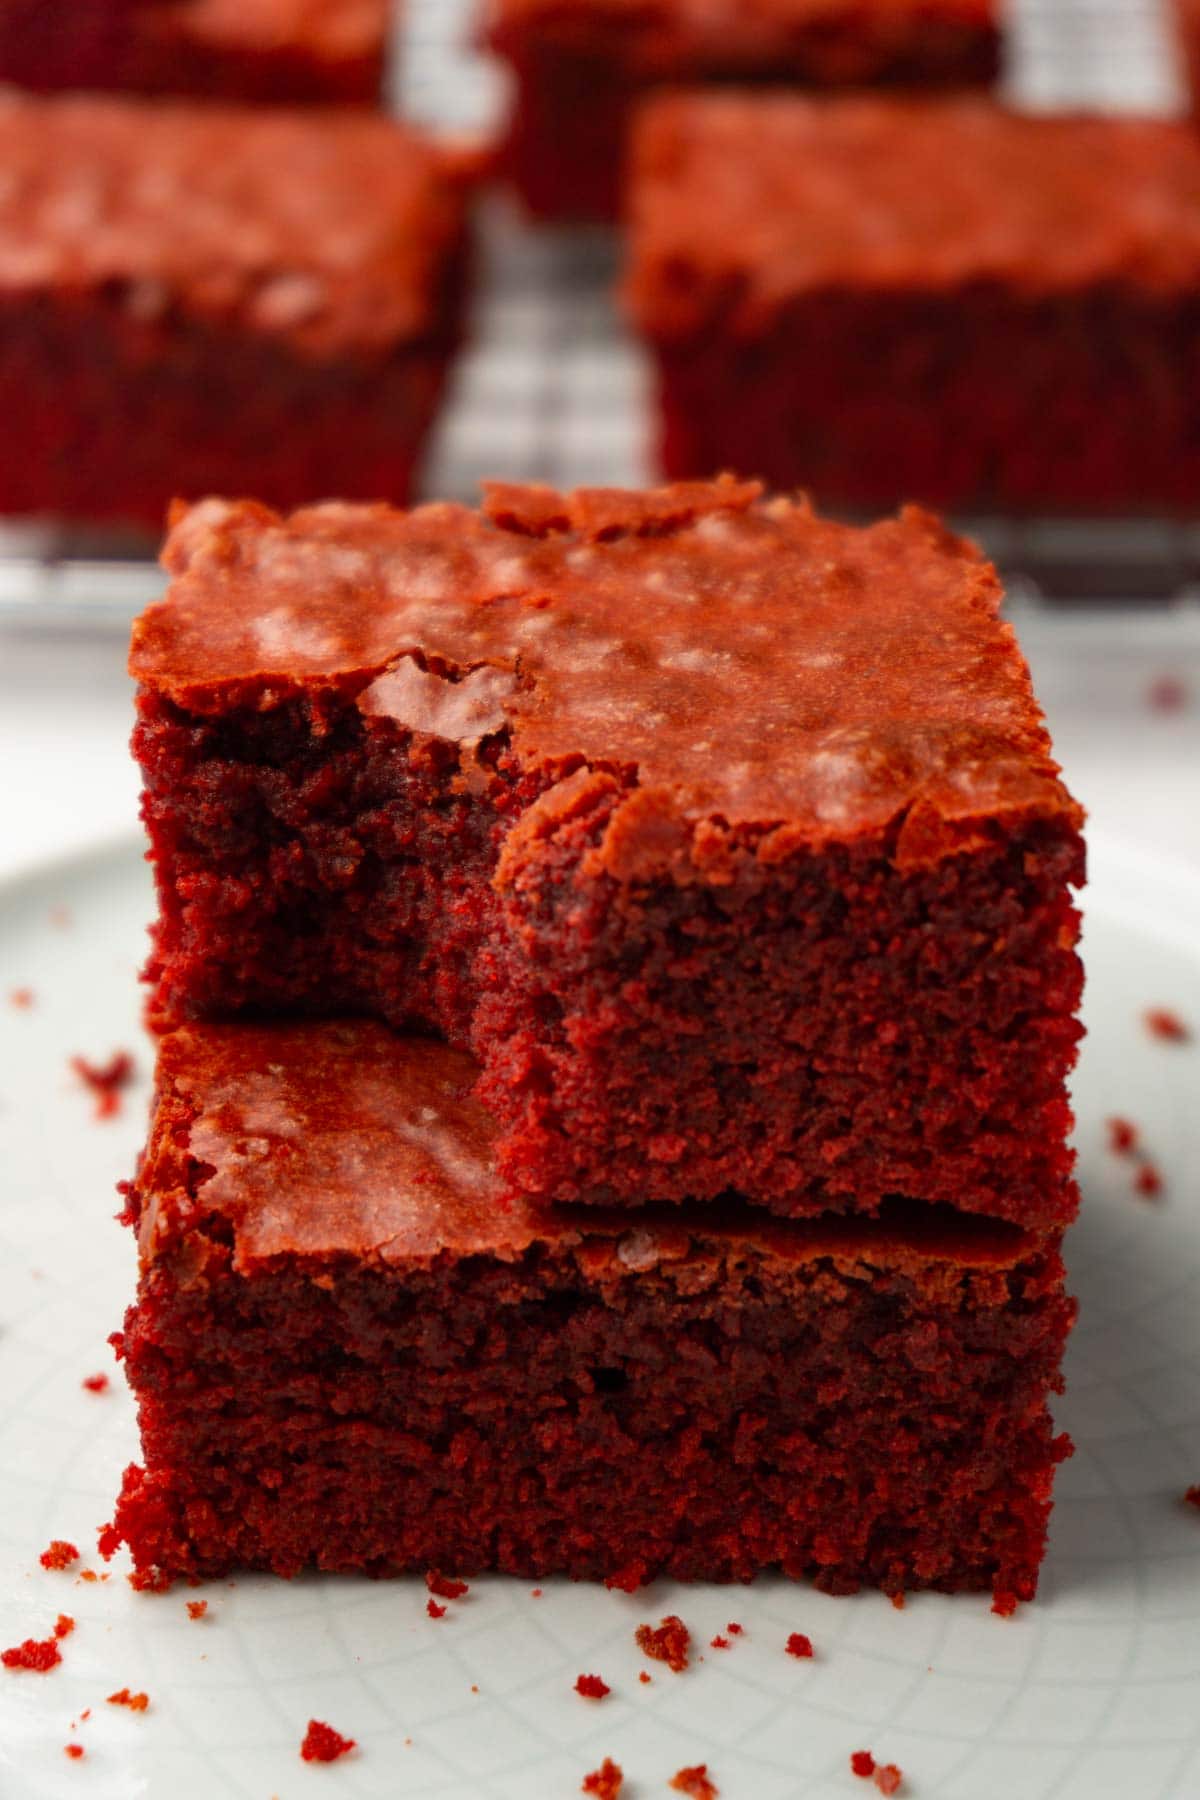
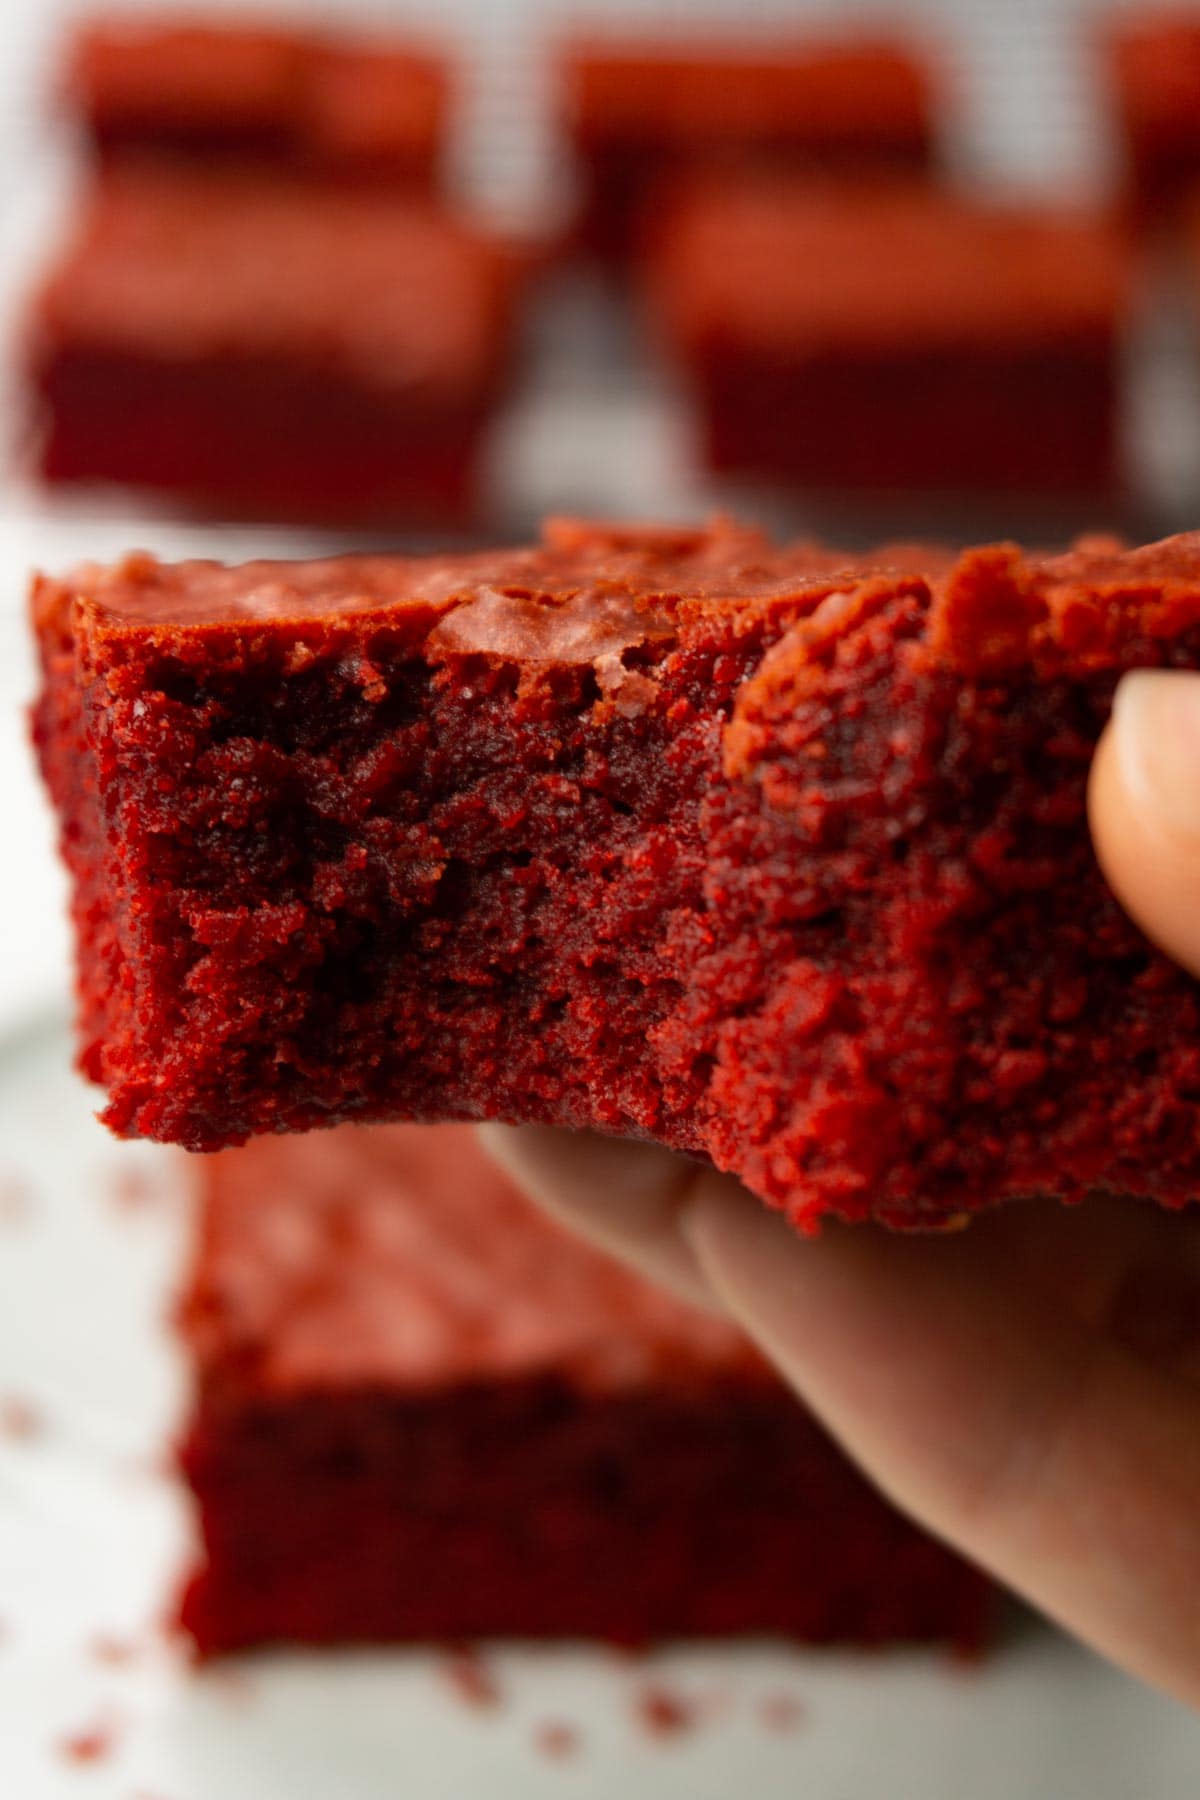
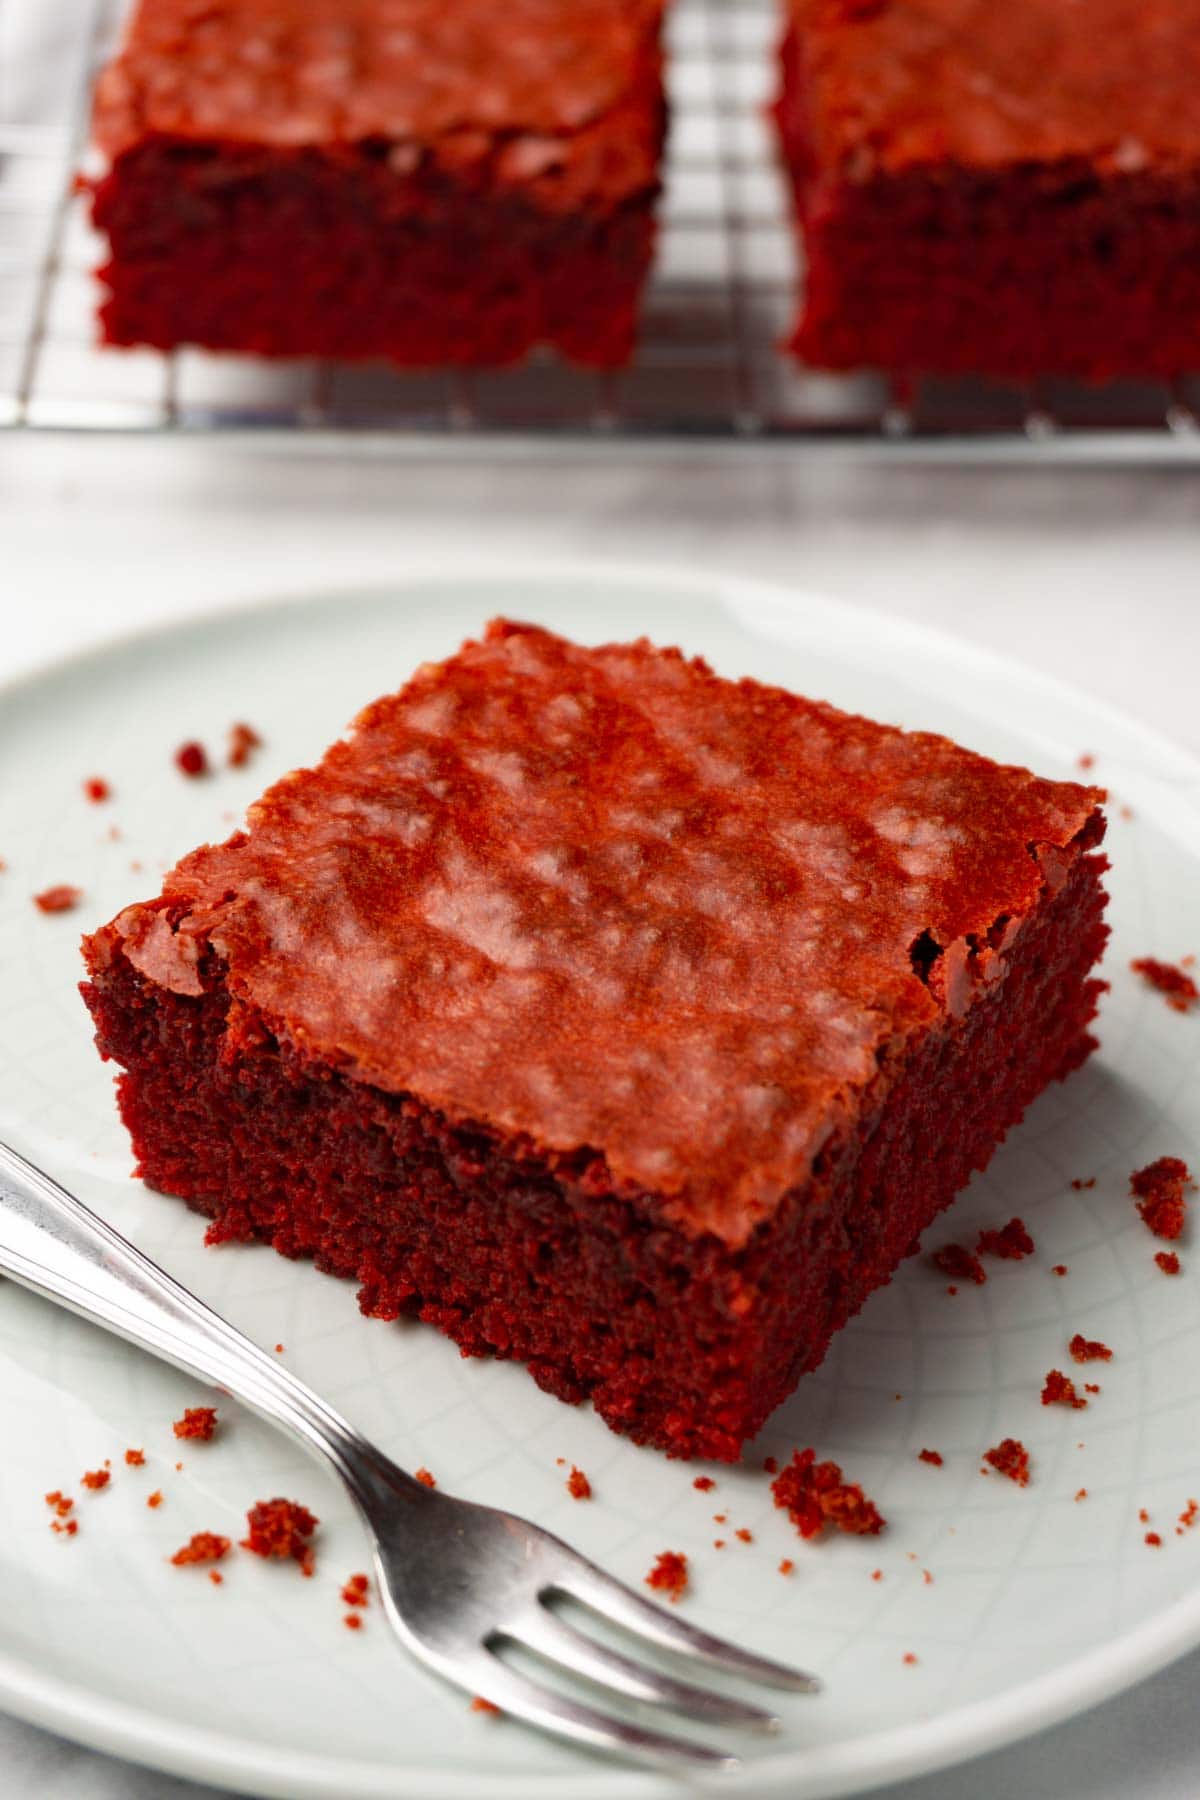
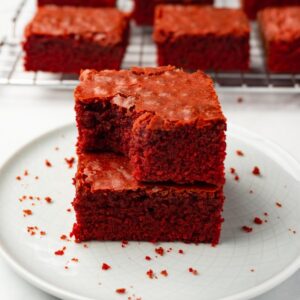
These very best red velvet brownies are soft and buttery, with light chocolate and vanilla flavor and a fantastic melt-in-your-mouth texture that's a little fudgy. This dessert looks festive and can be served on occasions such as Christmas or Valentine's Day.
Jump to:
Ingredients and substitutions
Flour - I use all-purpose flour to make my easy red velvet brownies, but you can use cake flour if you like.
Cocoa powder - You should use Dutch-processed, unsweetened cocoa powder rather than a natural one.
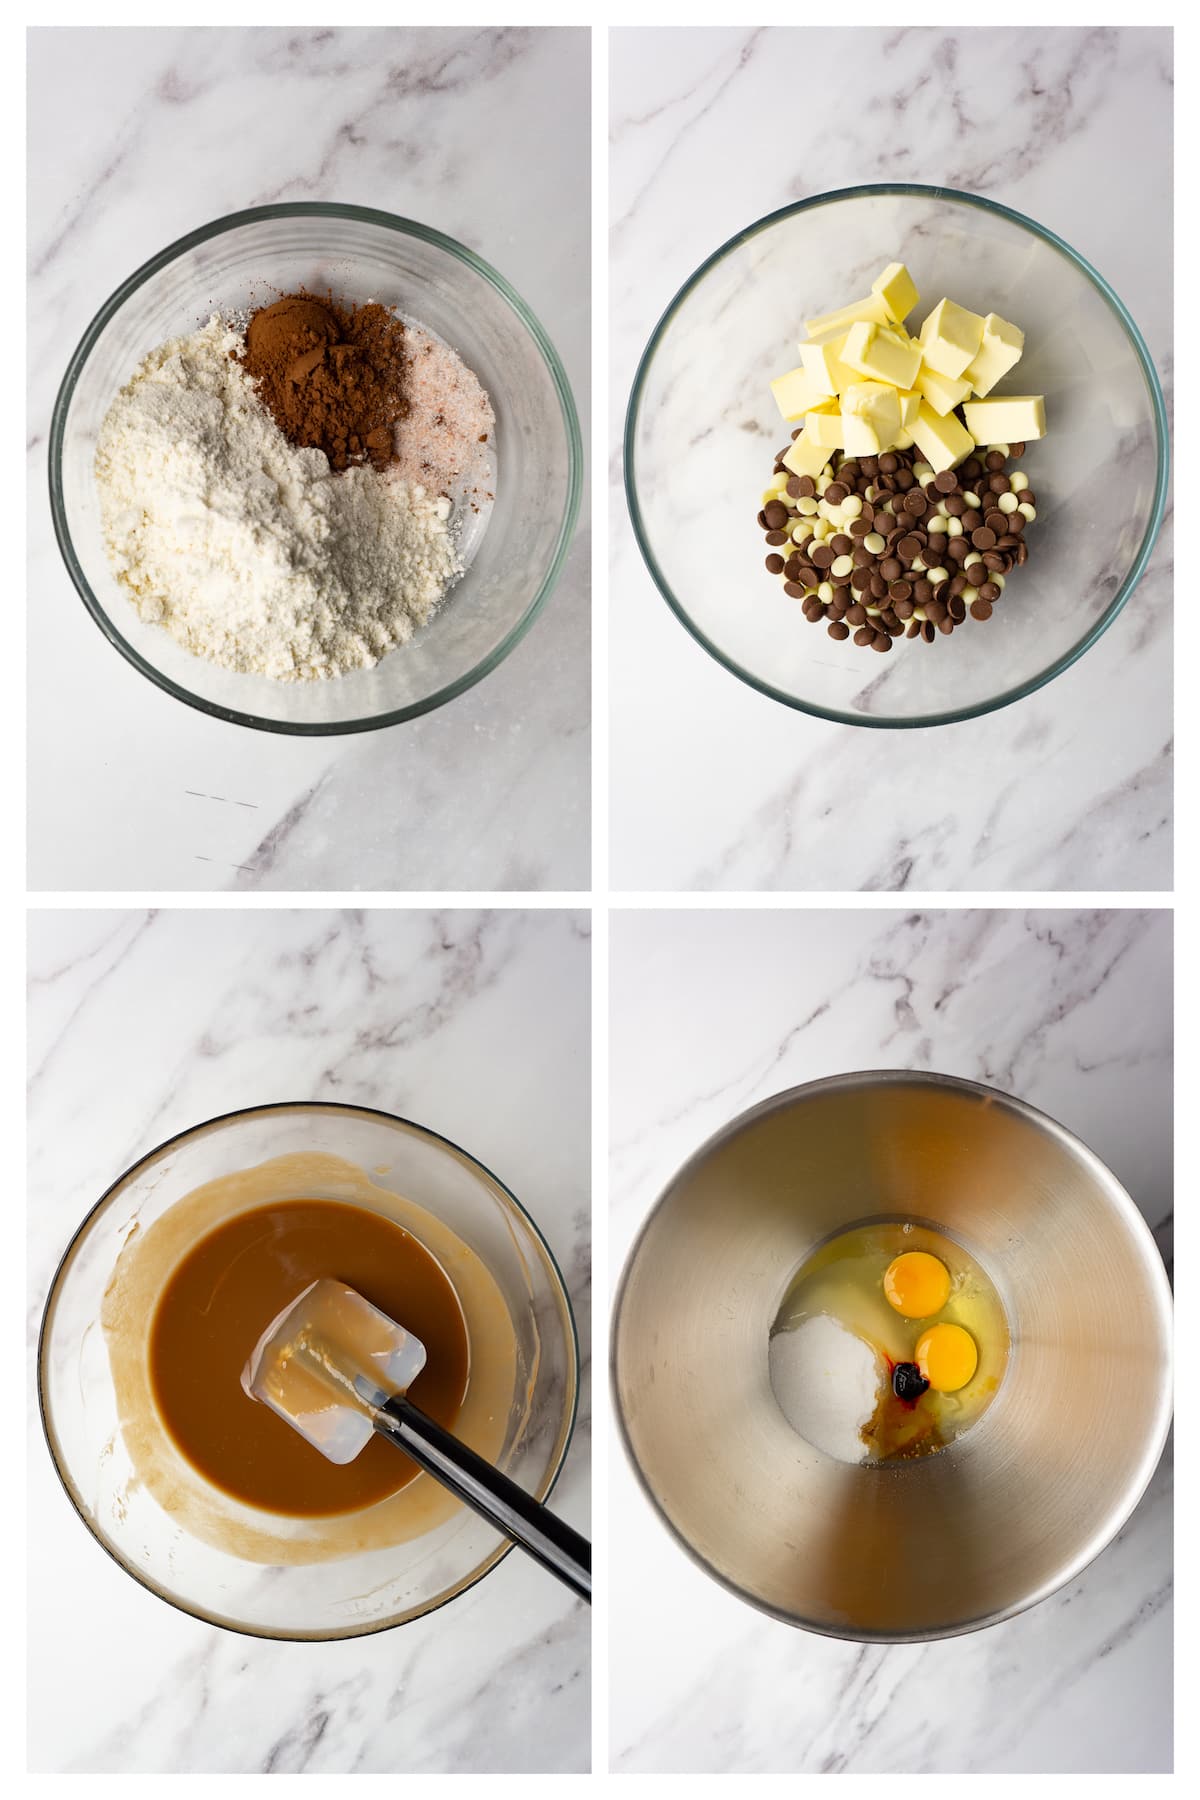
Salt and vanilla extract - You should also add some vanilla and salt if you want your brownies to taste exactly like red velvet cake.
Eggs - Use eggs at room temperature.
Sugar - You'll need white granulated sugar that you'll whip up with the eggs. You can also use caster sugar if you like.
White and milk chocolate - I wanted the red color to shine through without using too much food coloring. That's why I used chocolate that's lighter in color. You can use 120g of semi-sweet chocolate instead or replace only the milk or white chocolate with 60g of any darker chocolate of your choice.
Butter - The unsalted butter that you use can be cold, right out of the fridge. We're going to melt it together with the chocolate anyway to make these red velvet brownies recipes.
Red food coloring - I use paste concentrated red food coloring from Sugarflair colors (UK brand in the blood red shade), but you can use any water-soluble food coloring such as in gel, powder, or paste form. The amount you need to use will depend on the quality and concentration of your coloring. I use ½ teaspoon to achieve a very vibrant red color. You might need 1-2 teaspoon if you use gel food coloring, as it's less concentrated. You can also skip it altogether if you don't like anything artificial in your food. The brownies will taste divine but won't be red anymore.
Cooking tips
Melt the chocolate using gentle heat. The best way to melt the chocolate without burning it is by using a double boiler method. Make sure that the bowl with your chocolate and butter is not touching the simmering water. When you remove the bowl with the melted chocolate, wipe the droplets of water from the bottom of the bowl with a kitchen towel to avoid it getting into the chocolate mixture. Saying all that, I like to use my microwave to melt a small amount of chocolate. Always use short increments to do that and mix well in between to spread the heat and speed up the melting process.
Whip the eggs well. By whipping the eggs with sugar, we improve the texture of our fudgy red velvet brownies and help the sugars melt, which will create the crunchy glass-like top that many brownies have.
Add the coloring to the egg mixture, not to the chocolate. Since we use water-soluble food coloring we need water to dissolve it. If you add gel coloring to the chocolate mixture (which primarily consists of fat), it will appear flaky and will never dissolve. Eggs, on the other hand, consist of 75% of water, so your gel coloring will color your egg and sugar mixture quickly and efficiently.
Don't add hot chocolate to your egg mixture. We're making brownies, not an omelet, so you need your chocolate to melt and cool down so it's just warm to the touch before adding it to whipped eggs.
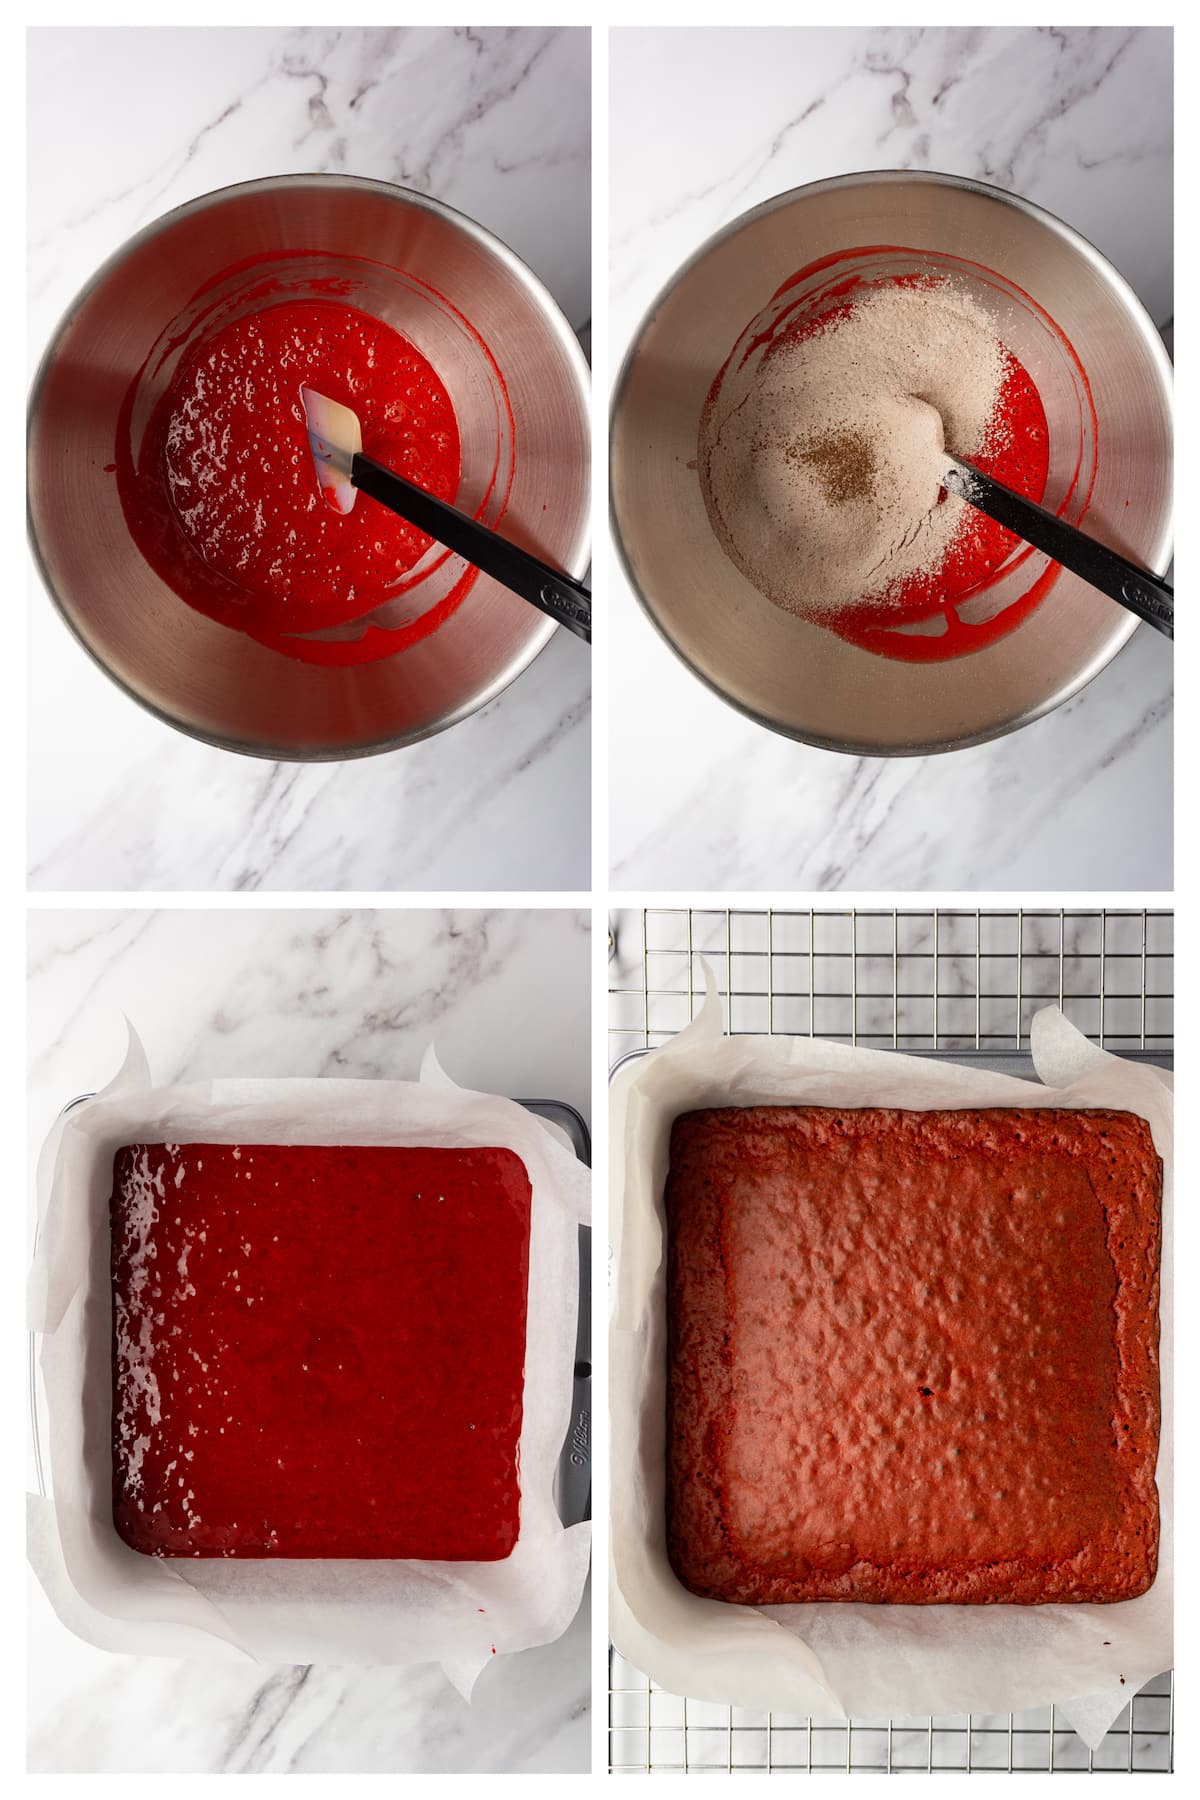
Don't overmix the batter. As with many desserts, we don't want too much gluten to be formed when folding our dry ingredients into our wet ones. More gluten means a chewy texture which isn't nice in cakes or brownies. Once you no longer see any dry ingredients in the batter, it's ready to be baked.
Don't overbake. Depending on your oven, your brownies will bake faster or slower. I suggest you check them with a toothpick at 22 minutes first. If the toothpick comes out very wet, continue baking for 3 extra minutes. Then, check again. If you see just a couple of wet crumbs on your toothpick, remove the pan from the oven and let the brownies rest for 5-10 minutes like that. Residual heat from the brownie pan will finish baking your dessert even if it's not in the oven. Overbaking will make your red velvet brownies dry and crumbly.
Step by step directions
1. Preheat the oven to 350F (175C) and line an 8" by 8" (20cm by 20cm) brownie baking pan with parchment paper so the bottom and sides are covered.
2. In a bowl, sift the flour, cocoa powder, and salt. Set aside.
3. In a microwave-safe bowl, add the butter, white, and milk chocolate. Heat in a microwave for 10-15 seconds at a time, mixing well with a rubber spatula in between. You can also melt everything in a double boiler.
4. In the bowl of a stand mixer, add the eggs, sugar, vanilla extract, and red food coloring. Whip on medium-high for 5 minutes or until fluffy, tripled in volume, and the coloring has fully incorporated.
5. Add the chocolate mixture to the egg mixture and mix with a rubber spatula until fully incorporated. Then, fold in the dry ingredients just until fully incorporated.
6. Pour the red velvet brownie batter into the prepared pan and bake for 25-27 minutes or until a toothpick inserted into the center of the brownie comes out clean.
7. Remove from the oven and let it cool down in the pan for 5 minutes. Then, lift up holding the parchment paper and place the brownie on a cooling rack to cool down.
8. Cut your slightly warm brownie into 9 even squares and serve.
Possible variations
Freeze-dried berries - You can add freeze-dried cranberries or strawberries right into the batter before baking to give a little bit of fresh and sour berry flavor to our brownies.
Chocolate chips - Any chocolate chips will work great if you add them to the batter - or even sprinkle them on top of the batter - before baking it.
Nuts - Crushed walnuts will add variety to the texture and are absolutely delicious when added to anything with chocolate flavor.
Cream cheese frosting - Red velvet brownies with cream cheese frosting are very delicious. Bake your brownies and cool them completely before applying an even layer of cream cheese (which can be made with heavy whipping cream or butter) on top. Note that you should store such brownies in the fridge for up to 4 days.
FAQ
Store brownies in an air-tight container at room temperature for up 4 days. Decorated with cream cheese frosting, brownies should be stored in the fridge for up to 4 days.
You can freeze them for up to 1 month, though freezing and thawing may affect the texture. Therefore, I would suggest avoiding freezing them.

More dessert recipes
Recipe card
Red velvet brownies
Equipment
- 8" by 8" (20cm by 20cm) brownie pan
- Stand mixer or hand mixer and a large mixing bowl
- Heat-proof bowl
Ingredients
- 90 g all-purpose flour
- 1 tablespoon Dutch-processed cocoa powder
- 1 teaspoon salt
- 100 g unsalted butter
- 60 g white chocolate
- 60 g milk chocolate
- 2 large eggs at room temperature
- 120 g white granulated sugar
- 1 teaspoon vanilla
- ½ teaspoon red food coloring more if needed
Instructions
- Preheat the oven to 350F (175C) and line an 8" by 8" (20cm by 20cm) brownie pan with parchment paper so the bottom and sides are covered.
- In a bowl, sift the flour, cocoa powder, and salt. Set aside.
- In a microwave-safe bowl, add the butter, white, and milk chocolate. Heat in a microwave for 10-15 seconds at a time, mixing well with a rubber spatula in between. You can also melt everything in a double boiler.
- In the bowl of a stand mixer (or you can use a large mixing bowl and a hand mixer), add the eggs, sugar, vanilla extract, and food coloring. Whip on medium-high for 5 minutes or until fluffy, tripled in volume, and the coloring has fully incorporated.
- Add the chocolate mixture to the egg mixture and mix with a rubber spatula until fully incorporated. Then, fold in the dry ingredients just until fully incorporated.
- Pour the batter into the prepared pan and bake for 25-27 minutes or until a toothpick inserted into the center of the brownie comes out clean.
- Remove from the oven and let it cool down in the pan for 5 minutes. Then, lift up holding the parchment paper and place the brownie on a cooling rack to cool down.
- Cut your slightly warm brownie into 9 even squares and serve.
Leave a comment