
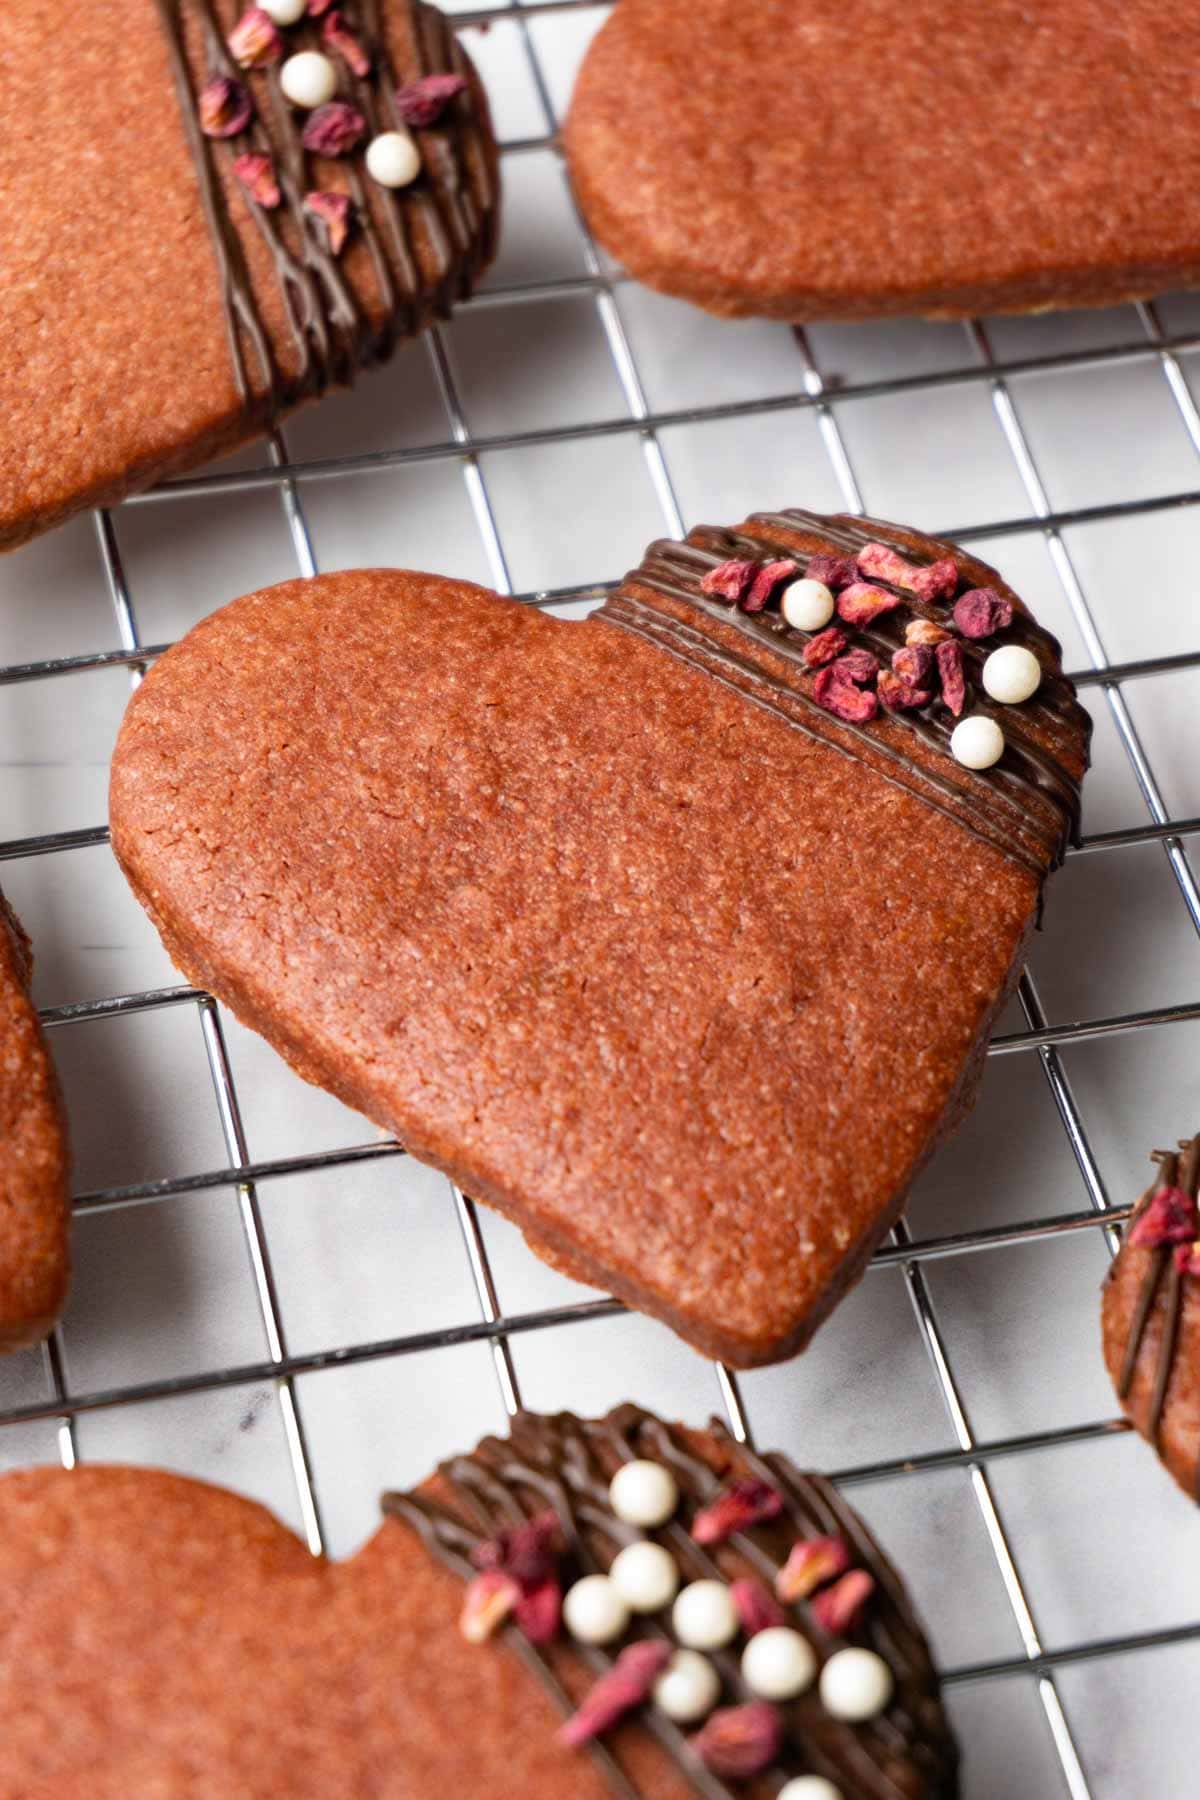
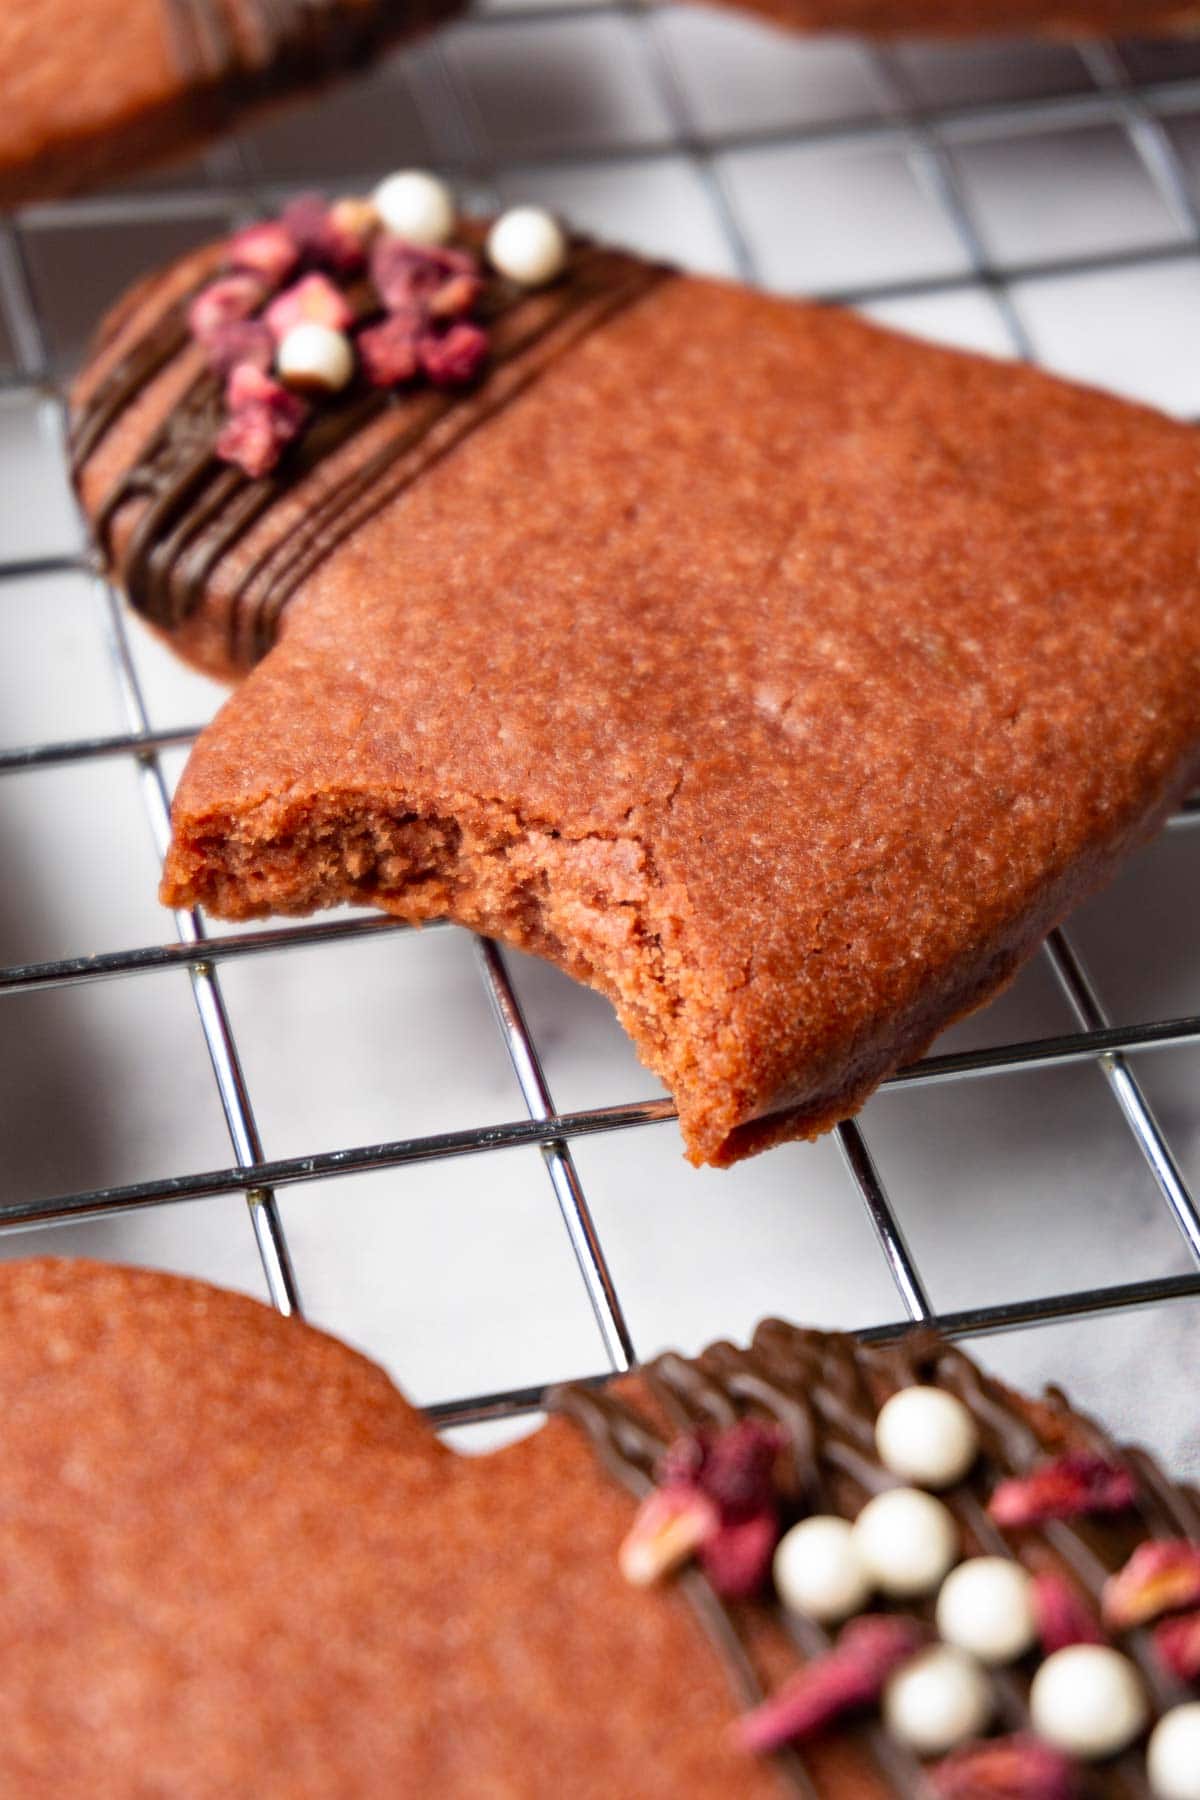
These easy Valentine cookies with a festive color are not only beautiful but have a delicious, buttery flavor with chocolate and vanilla undertones. Crunchy on the outside but a little bit soft on the inside, these are the perfect cookies to serve to your loved ones on Valentine's day - or on any other day, as it's possible to adjust the color, shape, and decoration!
Jump to:
Ingredients
Flour - I use all-purpose flour. My advice will be, sift it well with the rest of the dry ingredients to enrich it with air and remove possible lumps.
Cocoa powder and vanilla extract - I wanted to give these heart-shaped cookies a red velvet vibe, so I added a little bit of unsweetened cocoa powder. The cookies are not chocolate, but you will definitely feel this very gentle chocolate flavor shining through with a touch of vanilla.
Salt and baking powder - Salt will balance the flavor and baking powder will improve the texture. Because of the baking powder, the cookies will puff up a little bit in the oven, but then they will subside.
Butter - Use unsalted butter to have better control over the flavor. Also, it's very important to have the butter at the right temperature. It should be at room temp, so it will beat perfectly with sugar to reach a fluffy pale mixture.
Sugar - You can use regular white granulated sugar as well as caster sugar.
Egg - Your egg should be at room temperature to emulsify with the butter. If you forgot to take it out from the fridge in advance, place it in warm water for 3-5 minutes. This will do the trick!
Food coloring - Use water-soluble gel food coloring. 1 ½ teaspoon of Red soft gel paste will give you a nice red-ish color.
Decoration - I drizzled some tempered dark chocolate and sprinkled some sprinkles and freeze-dried raspberries (they are sour and go well with the sweetness of the cookies) on top.
Step by step directions
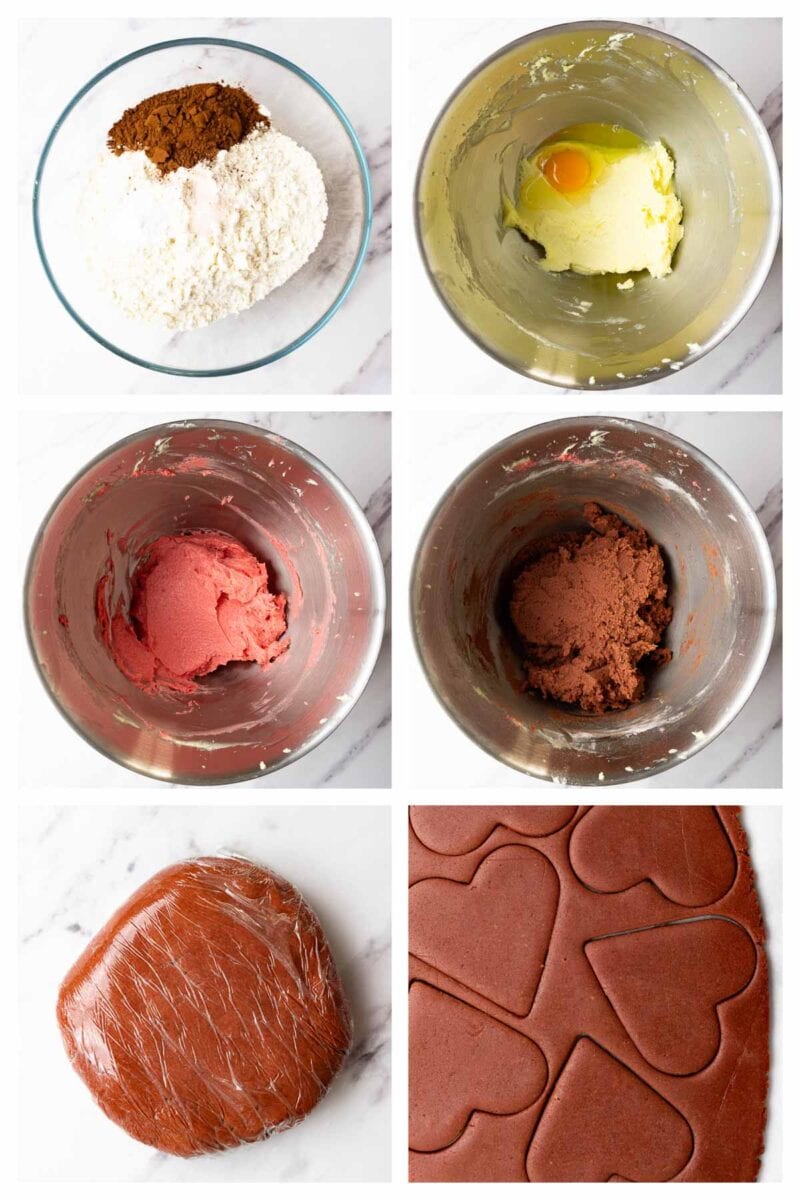
1. Sift and combine the dry ingredients.
2. Beat the butter and sugar in a Stand mixer fitted with a paddle attachment until pale and fluffy. Scrape the sides of the bowl.
3. Add the coloring (optional) and beat until the butter mixture has an even color. After, add the egg and vanilla and beat on medium-high until completely incorporated.
4. Beat the butter mixture with the dry ingredients on low until no dry ingredients are left.
5. Wrap the cookie dough in plastic wrap so it's a disk shape and place it into the fridge to rest.
6. Meanwhile, preheat the oven to 180C (355F) and line the baking sheet with parchment paper.
7. When the oven is hot, roll the dough out to ¼ inch or ½ cm thickness between two pieces of parchment paper (or use parchment paper on the bottom and plastic wrap on the top). Cut out desired shapes and transfer them onto the prepared baking sheet using an offset spatula. Repeat the process with the scraps.
8. Bake right away in the middle rack for 11-13 min depending on how crunchy you want the cookies to be.
9. When finished baking, place onto a cooling rack to cool down. Decorate your beautiful Valentine cookies with tempered chocolate sprinkles and freeze-dried raspberries and serve.
How to make no spread heart cookies
This recipe is like a mix of red velvet cookies and sugar cookies. And because the proportions are very close to sugar cookies (but not 100%), it's possible to make them no-spread.
If you don't want to chill the dough and the cookies, you can absolutely skip this step and you'll get a very decent shape. Yes, they will spread, but just a little bit.
If you want, however, to make them no-spread, you need to chill the dough. And the fastest way to do it is to freeze the cookies that were already cut out, not the whole dough mixture.
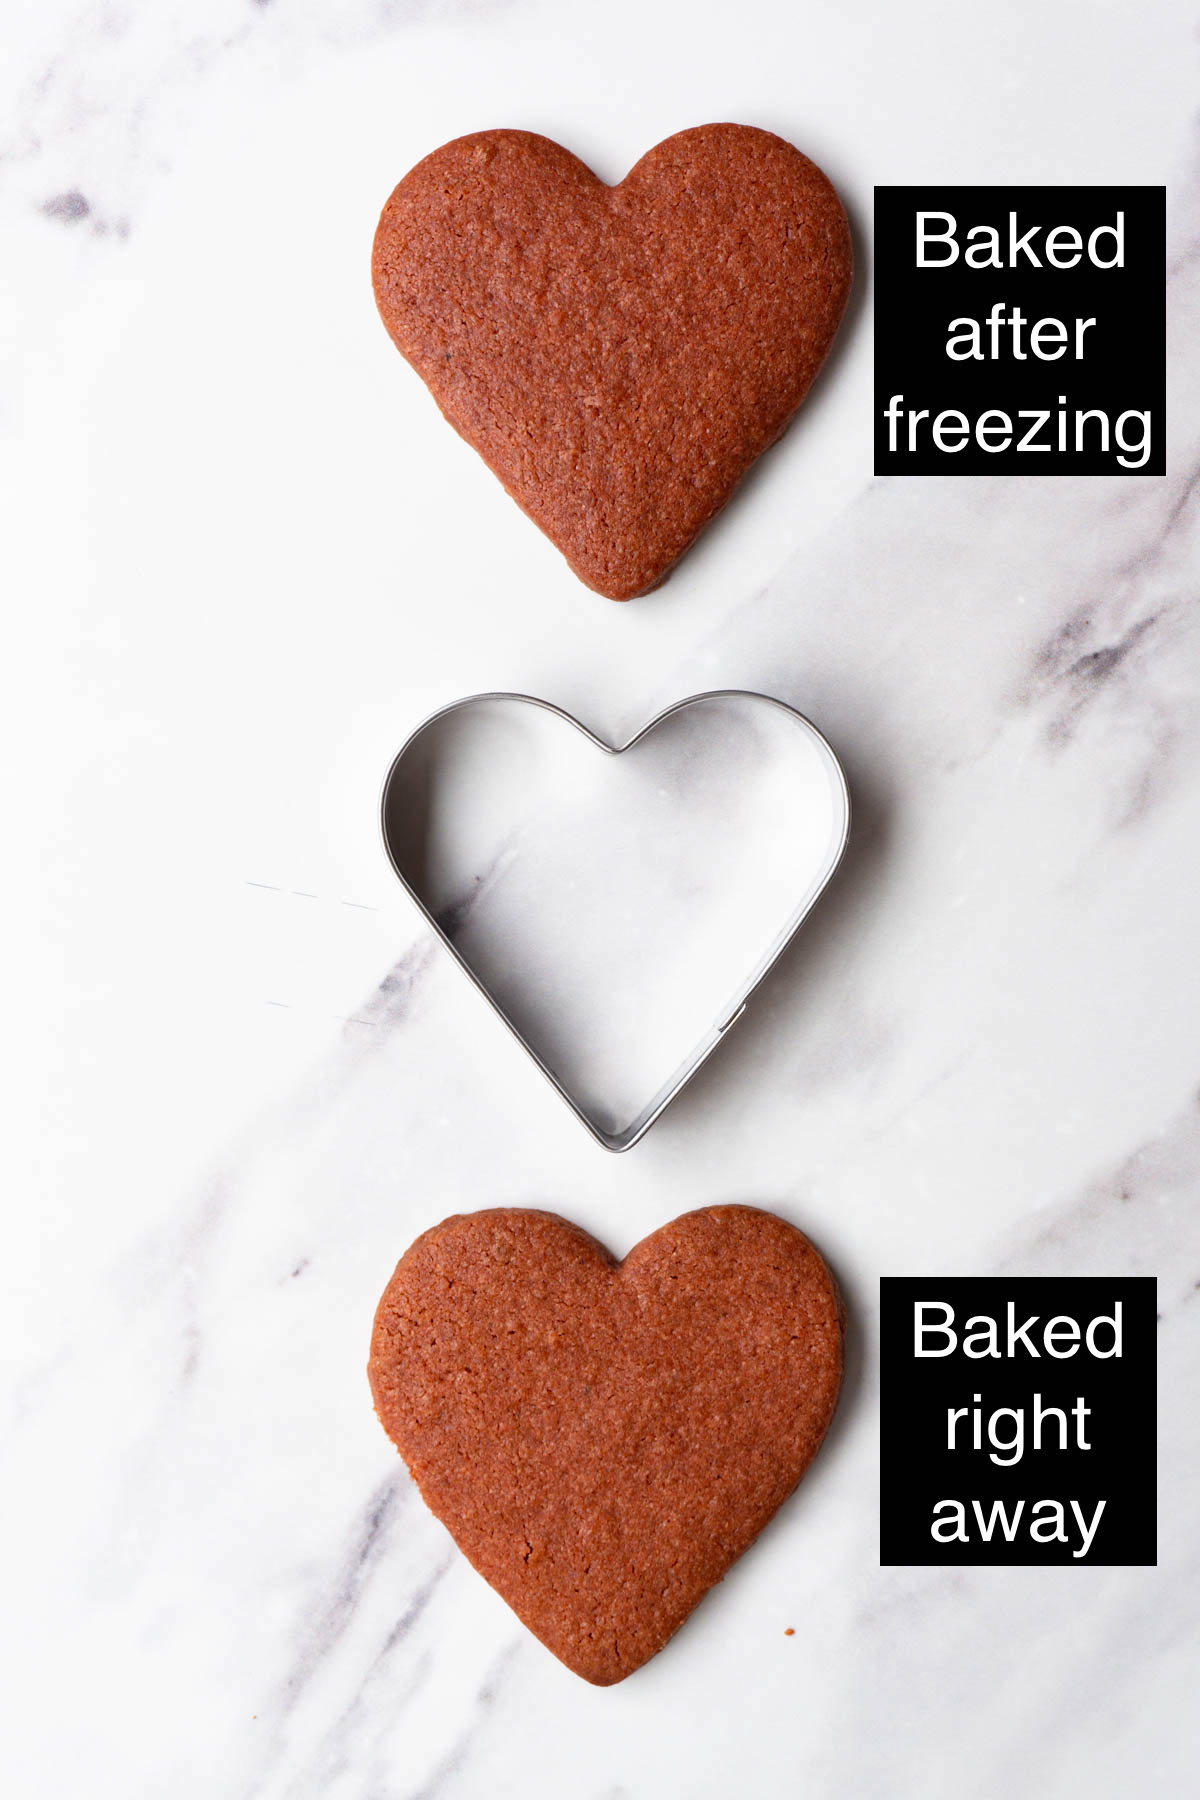
So, you let the dough rest in the fridge while the oven is preheating. Then, you roll it out and cut out the cookies. Place them on a large flat surface (I take a large cutting board that fits in my freezer) and freeze for 10-15 minutes. Meanwhile, prepare another batch of cookies from the scraps.
When the cookies are firm, place them on the baking sheet and bake for 11-13 minutes. While they're baking, another batch of cookies should be in the freezer. And just like that, you'll make around 3 dozen no-spread cookies in just 45 minutes without a fuss.
How to decorate Valentine's day cookies
Of course, you can use any royal icing recipe to create your unique design. Or, you can decorate your Valentine's day cookies with a rolled-out and dried fondant, which is super popular nowadays. Also, you can use edible glue to stick anything from chocolate chips to sprinkles to your heart cookies.
However, I like to drizzle some tempered chocolate and sprinkle my favorite sugar sprinkles and freeze-dried raspberries on top while the chocolate is still sticky. To make less mess, do it on parchment paper.
FAQ
Store completely cooled cookies in an air-tight container in a cool, dark place, but not in the fridge. Properly stored cookies will stay fresh for up to 2 weeks.
Yes, you can wrap it in plastic wrap and then in a piece of foil and freeze it for up to 3 months.
More dessert recipes
Easy homemade chocolate truffles
Recipe card

Valentine cookies
Equipment
- Digital kitchen scale
- Stand mixer
- Rubber spatula
Ingredients
- 350 g all-purpose flour
- 15 g unsweetened cocoa powder
- 1 teaspoon baking powder
- Pinch of salt
- 225 g unsalted butter at room temperature
- 200 g granulated sugar
- 1 large egg
- 1 teaspoon vanilla extract
- 1 ½ teaspoon red soft gel paste
Decoration
- 40 g dark chocolate tempered (read the recipe notes below to learn how to temper dark chocolate)
- Sprinkles
- Freeze-dried raspberries
Instructions
- Into a large bowl, sift the flour, cocoa powder, baking powder, and salt. Whisk to combine and set aside.
- Place the butter and the sugar into the bowl of a stand mixer fitted with a paddle attachment. Beat on medium-high until pale and fluffy. Scrape the sides of the bowl.
- Add the coloring (optional) and beat until the butter mixture has an even color. After, add the egg and vanilla and beat on medium-high until completely incorporated.
- Then, add the dry mixture and beat at the lowest speed possible until no dry ingredients are left, scraping the sides in between.
- Wrap the dough in plastic wrap so it's a disk shape and place it into the fridge to rest.
- Meanwhile, preheat the oven to 180C (355F) and line the baking sheet with parchment paper.
- When the oven is hot, roll the dough out to ¼ inch or ½ cm thickness between two pieces of parchment paper (or use parchment paper on the bottom and plastic wrap on the top). Cut out desired shapes and transfer them onto the prepared baking sheet using an offset spatula. Repeat the process with the scraps.
- Bake right away in the middle rack for 11-13 mins depending on how crunchy you want the cookies to be. If you bake them right away they will spread just a little bit, so make sure you place them 1 inch apart from each other. The cookies that didn't fit onto the baking sheet should be stored in the fridge while waiting their turn.
- For no spread cookies, place the tray with the cookies into the freezer for 15 minutes, then bake for 11-13 minutes. If your tray doesn't fit into the freezer, place the cookies on anything flat that fits, such as a cutting board.
- When finished baking, place onto a cooling rack to cool down. Decorate with tempered chocolate sprinkles and freeze-dried raspberries and serve.

Mia says
These cookies are the bomb, my hubby and I loved them. Thank you!